


![Apple Watch Series 10 Back On Sale for $299! [Lowest Price Ever]](https://www.iclarified.com/images/news/96657/96657/96657-640.jpg)
![Apple Slips to Fifth in China's Smartphone Market with 9% Decline [Report]](https://www.iclarified.com/images/news/97065/97065/97065-640.jpg)
![EU Postpones Apple App Store Fines Amid Tariff Negotiations [Report]](https://www.iclarified.com/images/news/97068/97068/97068-640.jpg)


![What’s new in Android’s April 2025 Google System Updates [U: 4/18]](https://i0.wp.com/9to5google.com/wp-content/uploads/sites/4/2025/01/google-play-services-3.jpg?resize=1200%2C628&quality=82&strip=all&ssl=1)


_Andreas_Prott_Alamy.jpg?width=1280&auto=webp&quality=80&disable=upscale#)


![[The AI Show Episode 144]: ChatGPT’s New Memory, Shopify CEO’s Leaked “AI First” Memo, Google Cloud Next Releases, o3 and o4-mini Coming Soon & Llama 4’s Rocky Launch](https://www.marketingaiinstitute.com/hubfs/ep%20144%20cover.png)


Designing an Azure Virtual Network (Vnet) For a Tech Company a Step-by-Step Guide
Table of Content Overview VNet Configuration Subnet Design 3.1 Subnet 1: Web Tier 3.2 Subnet 2: Application Tier 3.3 Subnet 3: Database Tier 3.4 Subnet 4: Admin Tier 4.Overview dialog box of subnets after deployment. 5.Conclusion Overview We'll create an Azure Virtual Network VNet with the following specifications: •Address Space: 197.152.50.0/24 •Subnets: 4 subnets •Subnet size: /28 VNet Configuration •VNet Name: blucontech-net •Address Space: 197.152.50.0/24 •Subnet Mask: 255.255.255.0 Subnet Design With subnet size /28: •Each subnet uses 16 IP addresses •First usable IP is the .1 of the range •Last usable IP is .14 •Broadcast IP is .15 We can fit 16 /28 subnets into a /24, but we only need 4. Let's define the 4 subnets into the following tier: •Subnet 1: Web Tier •Subnet 2: Application Tier •Subnet 3: Database Tier •Subnet 4: Admin Tier 3.1 Subnet 1: Web Tier 1.Log in to Azure Portal. 2.Select "Virtual Network”, then click on create virtual network on the portal. 3.Fill in the required details: Under Basics •Subscription: Choose your subscription. •Resource group: Create new or select existing. •Virtual network name: Enter a unique name (e.g. blucontech-net). •Region: Select the closest region. Under IP Addresses •Delete default subnet. Change the following default parameters to: •Address space value (197.152.50.0). •CIDR value: /24 •Click +Add a subnet, then change the default parameters on the dialog box that opens. Name: Web Size: /28 •Click Add to add the subnet 3.2 Subnet 2: Application Tier IP Addresses Under IP Addresses, all the parameters including Address space, CIDR etc, will configure automatically with respect to subnet web. Then, •Click +Add a subnet, then change the default parameters on the dialog box that opens. Name: Application Size: /28 •Click Add to add the subnet. 3.3 Subnet 3: Database Tier IP Addresses Under IP Addresses, all the parameters including Address space, CIDR etc, will configure automatically with respect to subnet web and Application. Then, •Click +Add a subnet, then change the default parameters on the dialog box that opens. Name: Database Size: /28 •Click Add to add the subnet. 3.4 Subnet 4: Admin Tier IP Addresses Under IP Addresses, all the parameters including Address space, CIDR etc, will configure automatically with respect to subnet web, Application and Database. Then, •Click +Add a subnet, then change the default parameters on the dialog box that opens. Name: Admin Size: /28 •Click Add to add the subnet. After adding all the subnets, then click on: •Review + Create •Create. After clicking on create and deploying the subnets, the dialog box below will pop up to confirm deployment successful. 4.Overview dialog box of subnets after deployment. 5.Conclusion After allocating these four subnets (using 197.152.50.0 to 197.152.50.63), the remaining address space (197.152.50.64 to 197.152.50.255) can be used for future expansion or additional subnets as needed. In this case with each /28 subnet, Azure provides 11 usable IPs and reserves 5 per subnet. As shown on the image above. This design provides proper isolation between tiers while efficiently utilizing the allocated address space.
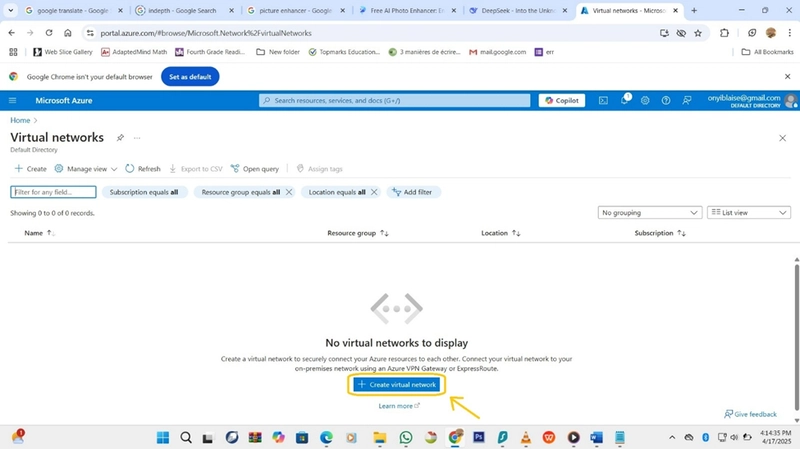
Table of Content
Overview
VNet Configuration
Subnet Design
3.1 Subnet 1: Web Tier
3.2 Subnet 2: Application Tier
3.3 Subnet 3: Database Tier
3.4 Subnet 4: Admin Tier
4.Overview dialog box of subnets after deployment.
5.Conclusion
Overview
We'll create an Azure Virtual Network VNet with the following specifications:
•Address Space: 197.152.50.0/24
•Subnets: 4 subnets
•Subnet size: /28VNet Configuration
•VNet Name: blucontech-net
•Address Space: 197.152.50.0/24
•Subnet Mask: 255.255.255.0Subnet Design
With subnet size /28:
•Each subnet uses 16 IP addresses
•First usable IP is the .1 of the range
•Last usable IP is .14
•Broadcast IP is .15
We can fit 16 /28 subnets into a /24, but we only need 4.
Let's define the 4 subnets into the following tier:
•Subnet 1: Web Tier
•Subnet 2: Application Tier
•Subnet 3: Database Tier
•Subnet 4: Admin Tier
3.1 Subnet 1: Web Tier
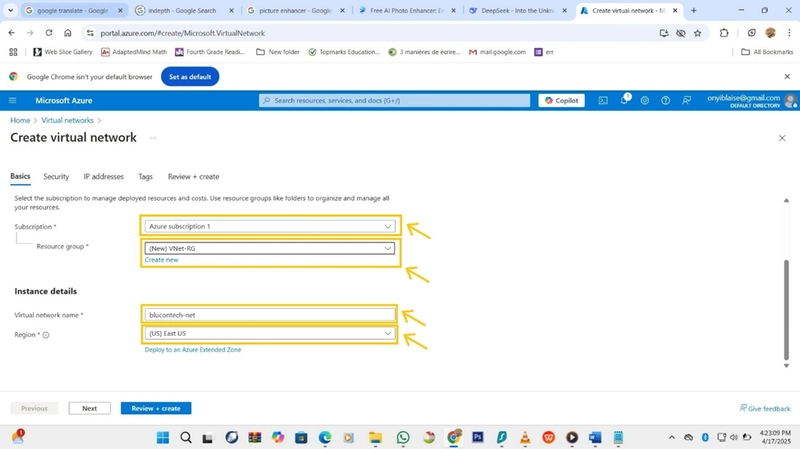
1.Log in to Azure Portal.
2.Select "Virtual Network”, then click on create virtual network on the portal.
3.Fill in the required details:
Under Basics
•Subscription: Choose your subscription.
•Resource group: Create new or select existing.
•Virtual network name: Enter a unique name (e.g. blucontech-net).
•Region: Select the closest region.
Under IP Addresses
•Delete default subnet.
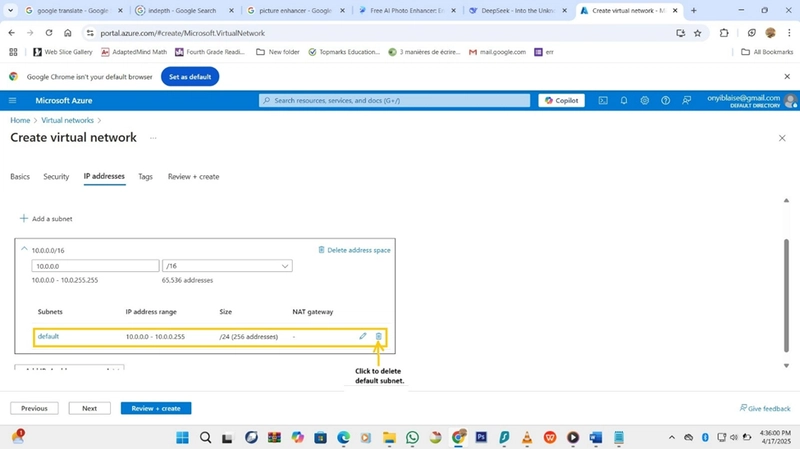
Change the following default parameters to:
•Address space value (197.152.50.0).
•CIDR value: /24
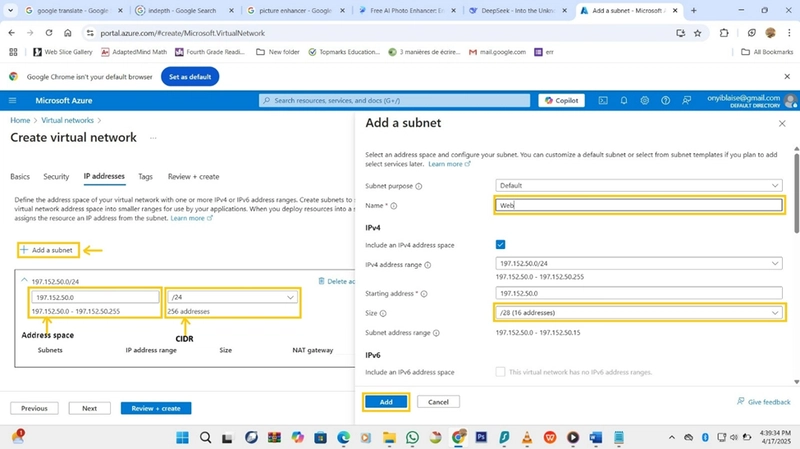
•Click +Add a subnet, then change the default parameters on the dialog box that opens.
Name: Web
Size: /28
•Click Add to add the subnet
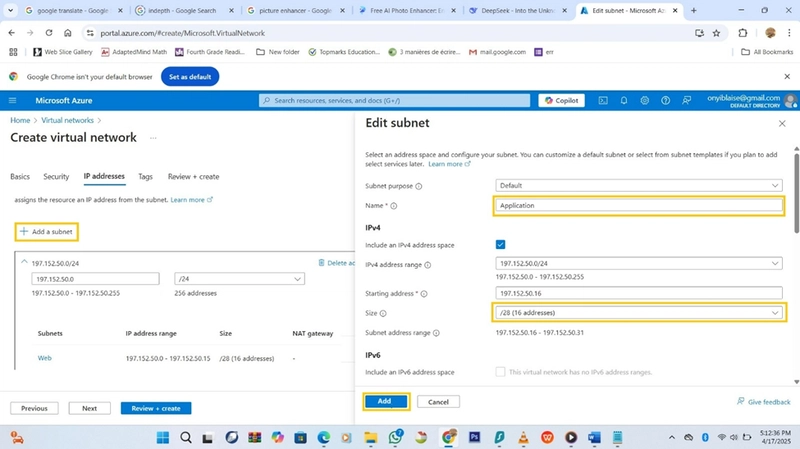
3.2 Subnet 2: Application Tier
IP Addresses
Under IP Addresses, all the parameters including Address space, CIDR etc, will configure automatically with respect to subnet web. Then,
•Click +Add a subnet, then change the default parameters on the dialog box that opens.
Name: Application
Size: /28
•Click Add to add the subnet.
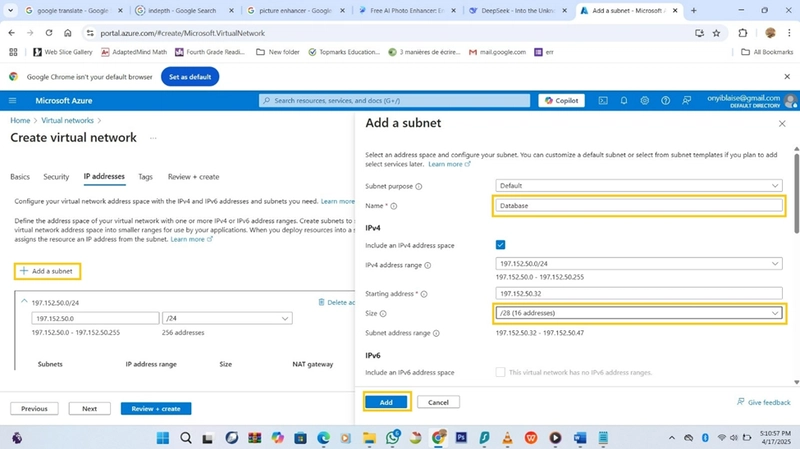
3.3 Subnet 3: Database Tier
IP Addresses
Under IP Addresses, all the parameters including Address space, CIDR etc, will configure automatically with respect to subnet web and Application. Then,
•Click +Add a subnet, then change the default parameters on the dialog box that opens.
Name: Database
Size: /28
•Click Add to add the subnet.
3.4 Subnet 4: Admin Tier
IP Addresses
Under IP Addresses, all the parameters including Address space, CIDR etc, will configure automatically with respect to subnet web, Application and Database. Then,
•Click +Add a subnet, then change the default parameters on the dialog box that opens.
Name: Admin
Size: /28
•Click Add to add the subnet.

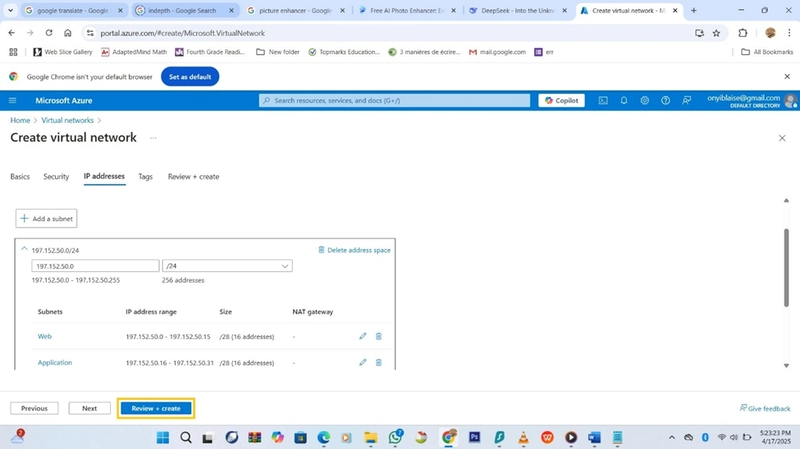
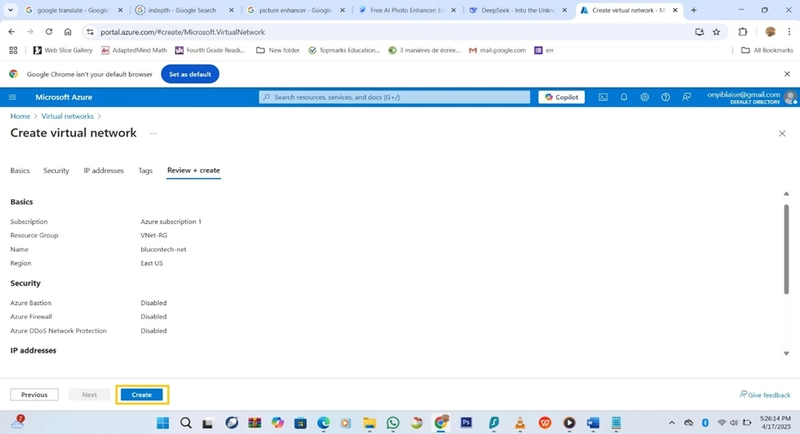
After adding all the subnets, then click on:
•Review + Create
•Create.
After clicking on create and deploying the subnets, the dialog box below will pop up to confirm deployment successful.
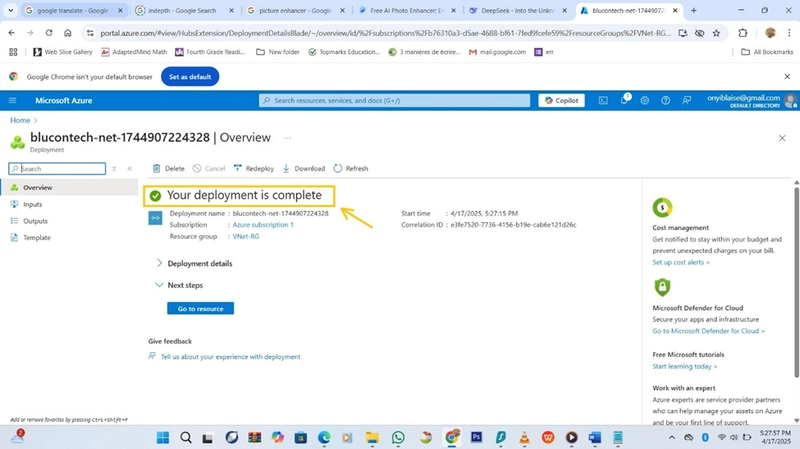
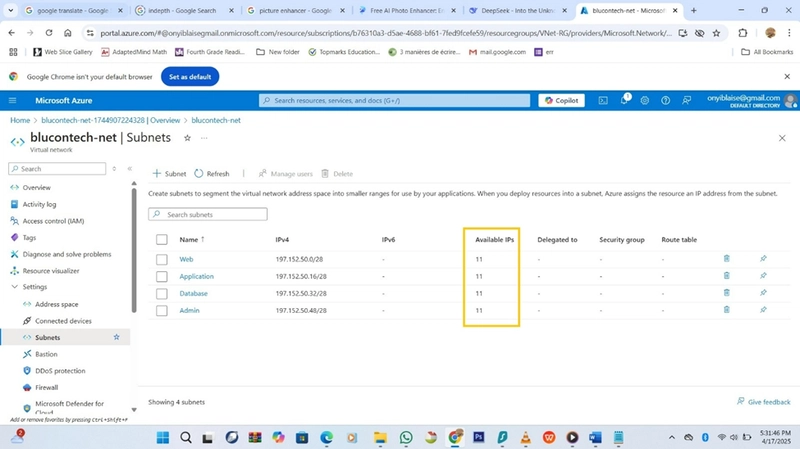
4.Overview dialog box of subnets after deployment.
5.Conclusion
After allocating these four subnets (using 197.152.50.0 to 197.152.50.63), the remaining address space (197.152.50.64 to 197.152.50.255) can be used for future expansion or additional subnets as needed. In this case with each /28 subnet, Azure provides 11 usable IPs and reserves 5 per subnet. As shown on the image above. This design provides proper isolation between tiers while efficiently utilizing the allocated address space.