


![Apple C1 vs Qualcomm Modem Performance [Speedtest]](https://www.iclarified.com/images/news/96767/96767/96767-640.jpg)
![Apple Studio Display On Sale for $1249 [Lowest Price Ever]](https://www.iclarified.com/images/news/96770/96770/96770-640.jpg)


![[Fixed] Chromecast (2nd gen) and Audio can’t Cast in ‘Untrusted’ outage](https://i0.wp.com/9to5google.com/wp-content/uploads/sites/4/2019/08/chromecast_audio_1.jpg?resize=1200%2C628&quality=82&strip=all&ssl=1)


![[The AI Show Episode 139]: The Government Knows AGI Is Coming, Superintelligence Strategy, OpenAI’s $20,000 Per Month Agents & Top 100 Gen AI Apps](https://www.marketingaiinstitute.com/hubfs/ep%20139%20cover-2.png)


![[The AI Show Episode 138]: Introducing GPT-4.5, Claude 3.7 Sonnet, Alexa+, Deep Research Now in ChatGPT Plus & How AI Is Disrupting Writing](https://www.marketingaiinstitute.com/hubfs/ep%20138%20cover.png)


![Is XMPP a good option for a messaging system in an app? [closed]](https://cdn.sstatic.net/Sites/softwareengineering/Img/apple-touch-icon@2.png?v=1ef7363febba)


Cloning, Forking, and Merging Repositories on GitHub: A Beginner’s Guide
This comprehensive guide walks you through the essential GitHub operations of cloning, forking, and merging repositories. Whether you’re new to version control or looking to solidify your understanding of GitHub workflows, this tutorial will equip you with the fundamental skills needed to collaborate effectively on coding projects. Understanding GitHub Repositories GitHub repositories serve as central […] The post Cloning, Forking, and Merging Repositories on GitHub: A Beginner’s Guide appeared first on MarkTechPost.


This comprehensive guide walks you through the essential GitHub operations of cloning, forking, and merging repositories. Whether you’re new to version control or looking to solidify your understanding of GitHub workflows, this tutorial will equip you with the fundamental skills needed to collaborate effectively on coding projects.
Understanding GitHub Repositories
GitHub repositories serve as central storage locations for projects, containing all files, folders, and the complete history of changes. Before diving into specific operations, it’s important to understand the difference between remote repositories (hosted on GitHub) and local repositories (on your computer). Working with GitHub typically involves creating a local copy of a repository through cloning or forking, making changes, and then integrating those changes through merging.
Remote vs. Local Repositories
Repositories on GitHub are remote repositories. To work with them on your computer, you need to create local copies, which you can do by cloning or forking1. The main differences are:
- Remote repositories: Hosted on GitHub’s servers and accessible to collaborators
- Local repositories: Exist on your computer, allowing you to work offline and test changes before sharing
Cloning Repositories
Cloning creates a local copy of a repository on your computer. This is the most direct way to start working with an existing project.
What is Cloning?
When you clone a repository, you download a complete copy of the repository, including all files and commit history. This creates a connection to the original repository, allowing you to push changes back if you have write permissions.
How to Clone Using HTTPS
- Find the Repository to Clone
- Navigate to the GitHub repository you want to clone
- Click the green “Code” button above the files list
- Select the HTTPS option to get the repository URL
- Navigate to the GitHub repository you want to clone
- Clone the Repository Using Git
- Open your terminal or command prompt
- Navigate to the directory where you want to store the repository
- Type the following command:
- Open your terminal or command prompt
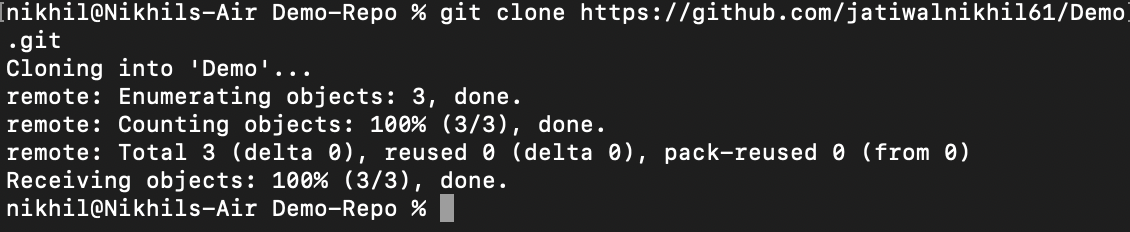
- Press Enter to begin cloning
- Authenticate if Necessary
- For private repositories, you’ll need to authenticate
- GitHub no longer accepts password authentication for HTTPS
- Use a Personal Access Token (PAT) instead, which you can generate in GitHub Settings → Developer settings → Personal access tokens
- For private repositories, you’ll need to authenticate
- Start Working with the Cloned Repository
- Navigate to the cloned repository directory using:

- Now you can view, edit, and work with the files
Cloning Using GitHub Desktop
If you prefer a graphical interface:
- In GitHub Desktop, click “File” → “Clone Repository”
- Select the repository source:
- Choose from your GitHub repositories
- Enter a URL for any repository
- Browse for a local repository
- Choose from your GitHub repositories
- Choose the local path where you want to store the repository
- Click “Clone” to finalize the process
Forking Repositories
Forking is creating a personal copy of someone else’s repository in your GitHub account, which allows you to freely experiment with changes without affecting the original project.
When to Fork Instead of Clone
You should fork a repository when:
- You don’t have write access to the original repository
- You want to contribute to an open-source project
- You want to use someone’s project as a starting point for your own work
The Complete Forking Workflow
- Fork the Repository
- Navigate to the repository you want to fork
- Click the “Fork” button in the top-right corner
- Wait a few seconds for GitHub to create the fork in your account
- Navigate to the repository you want to fork
- Clone Your Forked Repository
- After forking, clone the repository to your local machine using the methods described earlier
- This creates a local copy of your fork, not the original repository
- After forking, clone the repository to your local machine using the methods described earlier
- Make Changes and Push to Your Fork
- Make the desired changes to the local copy
- Commit your changes
- Push the changes to your forked repository
- Make the desired changes to the local copy
- Create a Pull Request (Optional)
- If you want to contribute back to the original project, create a pull request
- This proposes your changes to the original repository’s owner
- If you want to contribute back to the original project, create a pull request
Understanding the Relationship
When you fork a repository:
- The original repository is called the “upstream repository”
- Your copy is the “forked repository”
- These repositories are separate, allowing independent development
- You can sync changes from the upstream repository when needed
Working with Your Repositories
After cloning or forking a repository, you’ll need to make changes, commit them, and push them back to GitHub.
Basic Git Commands for Daily Work
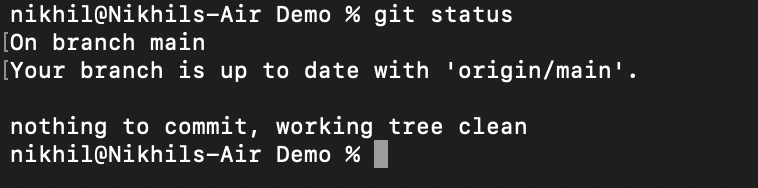
- Check Repository Status
- Create a New Branch for Your Changes
- Add Your Changed Files
- Or add all changes:
- Commit Your Changes
- Push Your Changes to GitHub

Merging Repositories and Branches
Merging is Git’s way of integrating changes from one branch or repository into another.
Understanding Git Merge
Git merge combines multiple sequences of commits into one unified history. In typical scenarios, merging is used to combine two branches. When merging:
- Git finds a common base commit between the branches
- It creates a new “merge commit” that combines the changes
- This merge commit has two parent commits (unlike regular commits)
How to Merge Branches
- Checkout the Target Branch
- Ensure Your Branch is Up-to-Date
- Merge the Source Branch
- Handle Any Merge Conflicts
- If Git encounters conflicting changes, it will mark them in the affected files
- Edit these files to resolve the conflicts
- After resolving, add the files and commit the merge
- If Git encounters conflicting changes, it will mark them in the affected files
Creating and Managing Pull Requests
Pull requests are the primary way to contribute changes from a fork back to the original repository.
Creating a Pull Request
- Push Your Changes to Your Fork
- Navigate to the Original Repository on GitHub
- Click “Pull Requests” and then “New Pull Request”
- Select the Base Repository/Branch and Your Fork/Branch
- Review Your Changes and Create the Pull Request
- Add a title and description
- Explain what changes you’ve made and why
- Add a title and description
Merging a Pull Request
If you own the repository or have write access:
- Review the Pull Request
- Check the code changes
- Run tests if applicable
- Consider feedback from other collaborators
- Check the code changes
- Merge the Pull Request
- On GitHub, navigate to the pull request
- Click “Merge pull request” if everything looks good
- For repositories with merge queues, you can click “Merge when ready”
- On GitHub, navigate to the pull request
Best Practices and Tips
Workflow Recommendations
- Always Create Branches for New Features
- Keep the main branch clean and stable
- Create feature branches for new development
- Keep the main branch clean and stable
- Pull Before You Push
- Always pull the latest changes before pushing your own
- This reduces merge conflicts
- Always pull the latest changes before pushing your own
- Write Clear Commit Messages
- Use descriptive messages that explain why changes were made
- Follow the convention of a short title and longer description if needed
- Use descriptive messages that explain why changes were made
Common Pitfalls to Avoid
- Working Directly on the Main Branch
- This can cause conflicts and confusion
- Always create feature branches for new work
- This can cause conflicts and confusion
- Not Updating Your Fork Regularly
- Your fork can become outdated if the original repository changes
- Learn how to sync your fork with the upstream repository
- Your fork can become outdated if the original repository changes
- Pushing Large Binary Files to Git
- Git is not optimized for binary files
- Consider Git LFS (Large File Storage) for large binary files
- Git is not optimized for binary files
Conclusion
In this guide, we covered cloning, forking, and merging repositories on GitHub, essential for collaboration and version control. Cloning creates a local copy, forking allows independent development, and merging integrates changes efficiently. Pull requests facilitate structured contributions. Best practices include using feature branches, keeping repositories updated, and writing clear commit messages. By following these workflows, developers can collaborate effectively, reduce conflicts, and manage code efficiently, ensuring smooth project development and contribution to open-source or team-based projects.
The post Cloning, Forking, and Merging Repositories on GitHub: A Beginner’s Guide appeared first on MarkTechPost.


