


![Mike Rockwell is Overhauling Siri's Leadership Team [Report]](https://www.iclarified.com/images/news/97096/97096/97096-640.jpg)
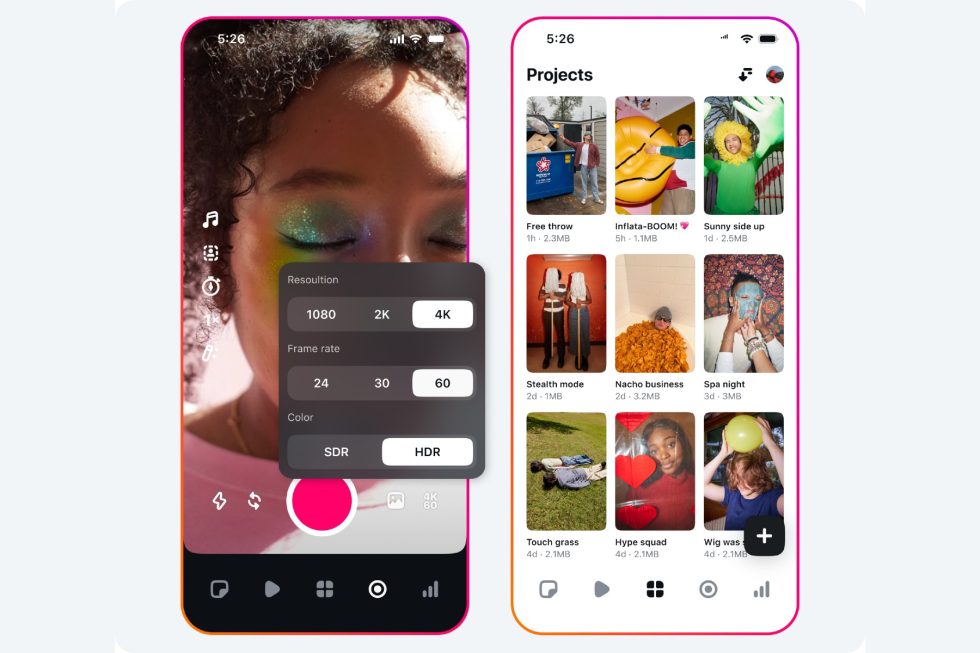
![Instagram Releases 'Edits' Video Creation App [Download]](https://www.iclarified.com/images/news/97097/97097/97097-640.jpg)
![Hands-On With 'iPhone 17 Air' Dummy Reveals 'Scary Thin' Design [Video]](https://www.iclarified.com/images/news/97100/97100/97100-640.jpg)
![Inside Netflix's Rebuild of the Amsterdam Apple Store for 'iHostage' [Video]](https://www.iclarified.com/images/news/97095/97095/97095-640.jpg)


![What iPhone 17 model are you most excited to see? [Poll]](https://9to5mac.com/wp-content/uploads/sites/6/2025/04/iphone-17-pro-sky-blue.jpg?quality=82&strip=all&w=290&h=145&crop=1)


![[The AI Show Episode 144]: ChatGPT’s New Memory, Shopify CEO’s Leaked “AI First” Memo, Google Cloud Next Releases, o3 and o4-mini Coming Soon & Llama 4’s Rocky Launch](https://www.marketingaiinstitute.com/hubfs/ep%20144%20cover.png)


![BPMN-procesmodellering [closed]](https://i.sstatic.net/l7l8q49F.png)


-All-will-be-revealed-00-35-05.png?width=1920&height=1920&fit=bounds&quality=70&format=jpg&auto=webp#)


Deploying a Sentiment Analysis API with Nitric and Python
Deploying a Sentiment Analysis API with Nitric and Python In this guide, you’ll build a serverless API using Nitric and Python that performs sentiment analysis on text input using a pre-trained machine learning model. You'll use the transformers library from Hugging Face and keep your project lightweight by installing dependencies directly with uv. What You'll Build A POST /analyze HTTP endpoint A Python function that loads and uses an ML model A serverless app you can run locally and deploy to the cloud Prerequisites Python 3.10+ Nitric CLI Install using official instructions uv Install from https://github.com/astral-sh/uv - (optional) Your choice of an AWS, GCP or Azure account Create a New Project Create a new Nitric Python project: nitric new ml-api py-starter cd ml-api Install Dependencies Use uv to install your required libraries: uv add torch transformers==4.39.3 Write the Sentiment API Open or create the file functions/api.py and add the following: from nitric.resources import api from nitric.application import Nitric from transformers import pipeline # Load the model once globally analyzer = pipeline("sentiment-analysis", model="ProsusAI/finbert") # Define an API ml_api = api("ml-api") @ml_api.post("/analyze") async def analyze(ctx): body = ctx.req.json text = body.get("text") if not text: ctx.res.status = 400 ctx.res.body = {"error": "Missing 'text' field"} return result = analyzer(text)[0] ctx.res.body = { "sentiment": result["label"], "confidence": round(result["score"], 3) } # Create the Nitric app and run it Nitric.run() This defines an API route that accepts a POST /analyze request and returns the sentiment and confidence score based on the input text. Run Locally Start your app locally using the Nitric CLI: nitric start Once running, test it using the dashboard - http://localhost:49152/ Or you can use cURL: curl -X POST http://localhost:4001/analyze \ -H "Content-Type: application/json" \ -d '{"text": "The market is showing strong signs of recovery."}' Example response: { "sentiment": "positive", "confidence": 0.996 } ⚠️ The first request may take a few seconds as the model is downloaded. Deploy to the Cloud Step 1: Create a Stack nitric stack new dev aws Edit nitric.dev.yaml: provider: nitric/aws@latest region: us-east-1 You can also use gcp or azure depending on your cloud preference. Step 2: Deploy nitric up Nitric will: Package your function (including installed ML libraries) Provision the API Gateway and runtime Deploy to your cloud account The CLI will print the public URL when deployment is complete. Test the Deployed API Replace with the deployed API base URL: curl -X POST https:///analyze \ -H "Content-Type: application/json" \ -d '{"text": "Interest rates are expected to rise."}' Clean Up To destroy the cloud stack and avoid charges: nitric down Summary You built a serverless ML inference API Ran it locally with Nitric Deployed it to the cloud with one command You can now adapt this pattern for other use cases like classification, moderation, or lightweight recommendations.
Deploying a Sentiment Analysis API with Nitric and Python
In this guide, you’ll build a serverless API using Nitric and Python that performs sentiment analysis on text input using a pre-trained machine learning model. You'll use the transformers library from Hugging Face and keep your project lightweight by installing dependencies directly with uv.
What You'll Build
- A
POST /analyzeHTTP endpoint - A Python function that loads and uses an ML model
- A serverless app you can run locally and deploy to the cloud
Prerequisites
- Python 3.10+
- Nitric CLI Install using official instructions
- uv Install from https://github.com/astral-sh/uv
- - (optional) Your choice of an AWS, GCP or Azure account
Create a New Project
Create a new Nitric Python project:
nitric new ml-api py-starter
cd ml-api
Install Dependencies
Use uv to install your required libraries:
uv add torch transformers==4.39.3
Write the Sentiment API
Open or create the file functions/api.py and add the following:
from nitric.resources import api
from nitric.application import Nitric
from transformers import pipeline

# Load the model once globally
analyzer = pipeline("sentiment-analysis", model="ProsusAI/finbert")

# Define an API
ml_api = api("ml-api")

@ml_api.post("/analyze")
async def analyze(ctx):
    body = ctx.req.json
    text = body.get("text")

    if not text:
        ctx.res.status = 400
        ctx.res.body = {"error": "Missing 'text' field"}
        return

    result = analyzer(text)[0]

    ctx.res.body = {
        "sentiment": result["label"],
        "confidence": round(result["score"], 3)
    }

# Create the Nitric app and run it
Nitric.run()
This defines an API route that accepts a POST /analyze request and returns the sentiment and confidence score based on the input text.
Run Locally
Start your app locally using the Nitric CLI:
nitric start
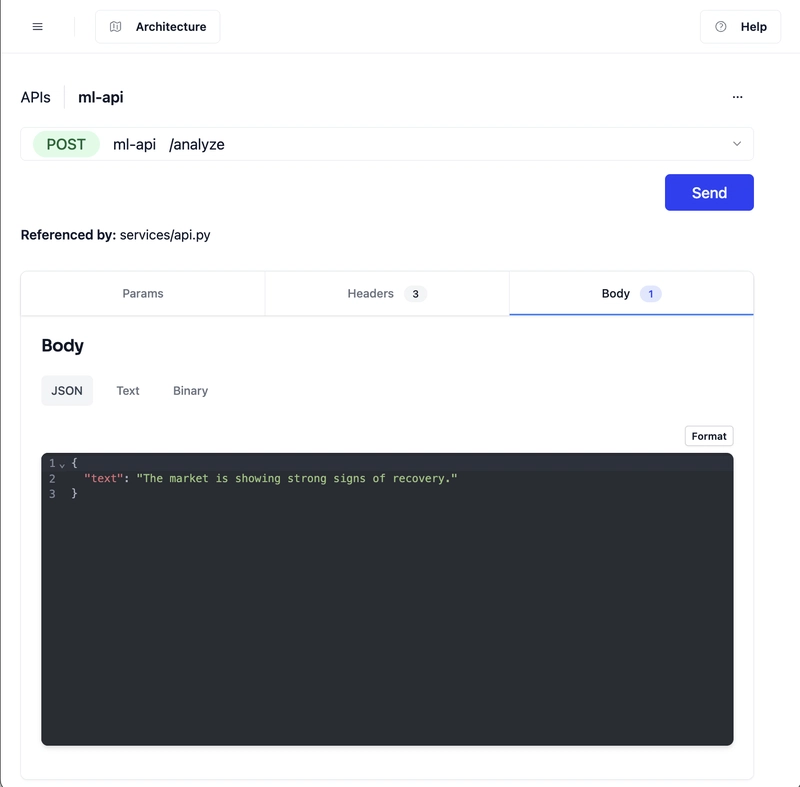
Once running, test it using the dashboard - http://localhost:49152/
Or you can use cURL:
curl -X POST http://localhost:4001/analyze \
  -H "Content-Type: application/json" \
  -d '{"text": "The market is showing strong signs of recovery."}'
Example response:
{
  "sentiment": "positive",
  "confidence": 0.996
}
⚠️ The first request may take a few seconds as the model is downloaded.
Deploy to the Cloud
Step 1: Create a Stack
nitric stack new dev aws
Edit nitric.dev.yaml:
provider: nitric/aws@latest
region: us-east-1
You can also use
gcporazuredepending on your cloud preference.
Step 2: Deploy
nitric up
Nitric will:
- Package your function (including installed ML libraries)
- Provision the API Gateway and runtime
- Deploy to your cloud account
The CLI will print the public URL when deployment is complete.
Test the Deployed API
Replace
curl -X POST https:///analyze \
  -H "Content-Type: application/json" \
  -d '{"text": "Interest rates are expected to rise."}'
Clean Up
To destroy the cloud stack and avoid charges:
nitric down
Summary
- You built a serverless ML inference API
- Ran it locally with Nitric
- Deployed it to the cloud with one command
You can now adapt this pattern for other use cases like classification, moderation, or lightweight recommendations.