Node.js Image Upload System: File Handling, Storage, and Database Integration
In our previous article, we implemented a client-side image upload functionality using React. Now, it's time to build out the server-side infrastructure to handle these uploads effectively. In this tutorial, we'll create a backend system that not only receives and stores images but also manages their metadata and serves them back to our application. We'll cover setting up file storage, integrating with a database to track image information, and creating endpoints that return essential image data like storage locations. Let's dive into building a complete image management system with Node.js. 1. Configuring New Route, Controller, and Multer for handling multipart/form-data So, what is the idea? Ok, we will create a separate route that will accept the image, send the file to the storage, and then return some data about that file to the frontend. On the frontend, we will get that data, and add it to the post payload before sending the "create new post" request. Now we will start with configuring a new route in our Node.js server. inside our "posts.router.js" file we need to add one more route; postsRouter.post('/post-image', protect, postsController.uploadPostImage); use the "npm i multer" command to install the "multer" module to our server; import "fs" (is a built-in Node.js module that provides an API for interacting with the file system, allowing us to read, write, delete, and manage files and directories), path (is a built-in Node.js module that provides utilities for working with file and directory paths, allowing us to resolve, join, normalize, and manipulate paths in a cross-platform way), multer (is a Node.js middleware for handling multipart/form-data, primarily used for uploading files in Express applications); const multer = require('multer'); const fs = require('fs'); const path = require('path'); define the "uploadPostImage" controller. First, create a "directory" structure where we will store our images, with the help of the "path" module. Second, check if the directory exists, if not create one with the help of the "fs" module. Third, create a storage variable that will store all necessary data for our file success upload (like name, directory, etc...). Finally, build an "upload" function that will use all "storage" and "file" data to upload the file and return the resulting code; function uploadPostImage(req, res) { let uploadDir = path.join(__dirname, '../../../../public/uploads/post-images'); if (!fs.existsSync(uploadDir)) { fs.mkdirSync(uploadDir, { recursive: true }); } const storage = multer.diskStorage({ destination: (req, file, cb) => { cb(null, uploadDir); }, filename: (req, file, cb) => { cb(null, file.originalname); } }); const upload = multer({ storage }).single('file'); upload(req, res, (err) => { if (err) { console.error('Error uploading file:', err); return res.status(500).json({ error: 'File upload failed' }); } res.status(200).json({ status: 200, message: 'Post image uploaded successfully', imageUrl: req.file.path }); }); } Nice, now, we have a file uploading feature ready to use in our "server" app, and let's move on. 2. DELETE Endpoint for Image Removal Functionality We will start from "posts.router.js" file: create a new "remove-image" route inside our post router list; postsRouter.post('/remove-image', protect, postsController.deletePostImage); define the "deletePostImage" controller, which will: receive the image name, create a file path to the folder with our images, and "fs.unlink" (fs.unlink is a Node.js method used to asynchronously delete a file from the filesystem) image we need; function deletePostImage(req, res) { const { imageName } = req.body; let uploadDir = path.join(__dirname, '../../../../public/uploads/post-images'); const filePath = path.join(uploadDir, imageName); fs.unlink(filePath, (err) => { if (err) { console.error('Error deleting file:', err); return res.status(500).json({ error: 'File deletion failed' }); } res.status(200).json({ status: 200, message: 'Post image deleted successfully' }); }); } Great. But we have functionality that allows us to save posts to our database, to fix this we need to modify our frontend part, it should send images into our new routes before saving the post. 3. Sending Images from Frontend Part We need to open our "posts.services.js" file from the "admin" folder once again and add two more endpoints. export const uploadPostImage = (data) => HTTP.post('/posts/post-image', data).then(({data}) => data ); export const removePostImage = (data) => HTTP.post('/posts/remove-image', data).then(({data}) => data ); Then, inside the "PostForm.
In our previous article, we implemented a client-side image upload functionality using React. Now, it's time to build out the server-side infrastructure to handle these uploads effectively. In this tutorial, we'll create a backend system that not only receives and stores images but also manages their metadata and serves them back to our application. We'll cover setting up file storage, integrating with a database to track image information, and creating endpoints that return essential image data like storage locations. Let's dive into building a complete image management system with Node.js.
1. Configuring New Route, Controller, and Multer for handling multipart/form-data
So, what is the idea? Ok, we will create a separate route that will accept the image, send the file to the storage, and then return some data about that file to the frontend. On the frontend, we will get that data, and add it to the post payload before sending the "create new post" request. Now we will start with configuring a new route in our Node.js server.
- inside our "posts.router.js" file we need to add one more route;
postsRouter.post('/post-image', protect, postsController.uploadPostImage);
use the "npm i multer" command to install the "multer" module to our server;
import "fs" (is a built-in Node.js module that provides an API for interacting with the file system, allowing us to read, write, delete, and manage files and directories), path (is a built-in Node.js module that provides utilities for working with file and directory paths, allowing us to resolve, join, normalize, and manipulate paths in a cross-platform way), multer (is a Node.js middleware for handling multipart/form-data, primarily used for uploading files in Express applications);
const multer = require('multer');
const fs = require('fs');
const path = require('path');
- define the "uploadPostImage" controller. First, create a "directory" structure where we will store our images, with the help of the "path" module. Second, check if the directory exists, if not create one with the help of the "fs" module. Third, create a storage variable that will store all necessary data for our file success upload (like name, directory, etc...). Finally, build an "upload" function that will use all "storage" and "file" data to upload the file and return the resulting code;
function uploadPostImage(req, res) {
    let uploadDir = path.join(__dirname, '../../../../public/uploads/post-images');
    if (!fs.existsSync(uploadDir)) {
        fs.mkdirSync(uploadDir, { recursive: true });
    }
    const storage = multer.diskStorage({
        destination: (req, file, cb) => {
            cb(null, uploadDir);
        },
        filename: (req, file, cb) => {
            cb(null, file.originalname);
        }
    });
    const upload = multer({ storage }).single('file');
    upload(req, res, (err) => {
        if (err) {
            console.error('Error uploading file:', err);
            return res.status(500).json({ error: 'File upload failed' });
        }
        res.status(200).json({
            status: 200,
            message: 'Post image uploaded successfully',
            imageUrl: req.file.path
        });
    });
}
Nice, now, we have a file uploading feature ready to use in our "server" app, and let's move on.
2. DELETE Endpoint for Image Removal Functionality
We will start from "posts.router.js" file:
- create a new "remove-image" route inside our post router list;
postsRouter.post('/remove-image', protect, postsController.deletePostImage);
- define the "deletePostImage" controller, which will: receive the image name, create a file path to the folder with our images, and "fs.unlink" (fs.unlink is a Node.js method used to asynchronously delete a file from the filesystem) image we need;
function deletePostImage(req, res) {
    const { imageName } = req.body;
    let uploadDir = path.join(__dirname, '../../../../public/uploads/post-images');
    const filePath = path.join(uploadDir, imageName);
    fs.unlink(filePath, (err) => {
        if (err) {
            console.error('Error deleting file:', err);
            return res.status(500).json({ error: 'File deletion failed' });
        }
        res.status(200).json({
            status: 200,
            message: 'Post image deleted successfully'
        });
    });
}
Great. But we have functionality that allows us to save posts to our database, to fix this we need to modify our frontend part, it should send images into our new routes before saving the post.
3. Sending Images from Frontend Part
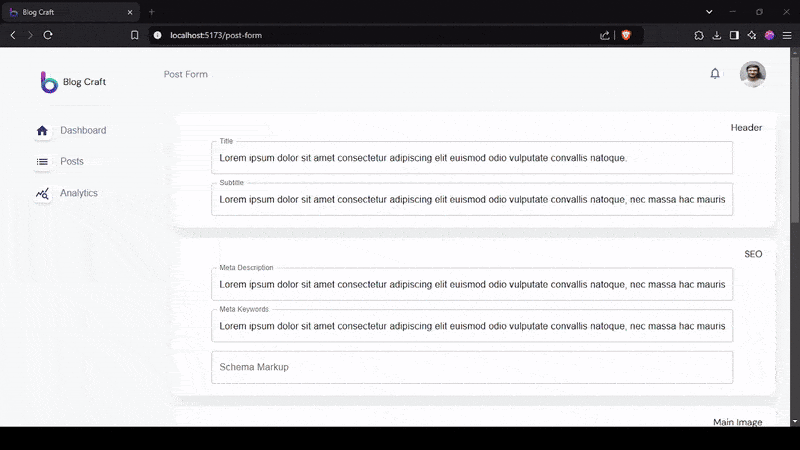
We need to open our "posts.services.js" file from the "admin" folder once again and add two more endpoints.
export const uploadPostImage = (data) =>
    HTTP.post('/posts/post-image', data).then(({data}) => data );
export const removePostImage = (data) =>
    HTTP.post('/posts/remove-image', data).then(({data}) => data );
Then, inside the "PostForm.jsx" file we need to import these functions.
import {
    createNewPost,
    uploadPostImage,
    removePostImage
} from "../../http/services/posts.services";
And we need to modify the "handleSubmit" function, we will make "main image" as required so that our post will always have at least one image, and we need to add functionality to save additional images into the post body.
Okay, let's figure out how it should work from the start: we will check if "main image" was added, and if not we will return an error message, then we will create a "newFile" (formData type) variable which will store our image, then we will send this formData into "upload-image" endpoint, then we will modify our "postForm" state and add "main image" data and additional "created" date and time. Additionally, we need to parse "post body" to check if there were additional images and send them to the server in the same way.
const handleSubmit = async (e) => {
    e.preventDefault();
    setLoading(true);
    if (!postForm.mainImage.fileData) {
        console.log("Please upload a main image");
        dispatch(aPushNewNotification({type: 'error', text: 'Please upload a main image'}));
        setLoading(false);
        return;
    }
    const fileNameParts = postForm.mainImage.fileData.name.split('.');
    const extension = fileNameParts.pop();
    const newImageName = `${fileNameParts.join('.')}_${uuid()}.${extension}`;
    postForm.mainImage.file.name = newImageName;
    const newFile = new File([postForm.mainImage.fileData], newImageName, {
        type: postForm.mainImage.fileData.type,
    });
    const formData = new FormData();
    formData.append('file', newFile);
    const response = await uploadPostImage(formData);
    postForm.mainImage.file.url = response.imageUrl;
    delete postForm.mainImage.fileData;
    for (let i = 0; i < postForm.body.length; i++) {
        if (postForm.body[i].type === 'image') {
            const fileNameParts = postForm.body[i].file.name.split('.');
            const extension = fileNameParts.pop();
            const newImageName = `${fileNameParts.join('.')}_${uuid()}.${extension}`;
            const newFile = new File([postForm.body[i].file], newImageName, {
                type: postForm.body[i].file.type,
            });
            const formData = new FormData();
            formData.append('file', newFile);
            const response = await uploadPostImage(formData);
            delete postForm.body[i].file;
            postForm.body[i].name = newImageName;
            postForm.body[i].file = {};
            postForm.body[i].file.url = response.imageUrl;
            postForm.body[i].file.name = newImageName;
        }
    }
    postForm.created = {
        date: {
            day: String(new Date().getDate()).padStart(2, '0'),
            month: String(new Date().getMonth() + 1).padStart(2, '0'),
            year: String(new Date().getFullYear()),
            time: new Date().toTimeString().split(' ')[0],
        }
    };
    try {
        const response = await createNewPost({ post: postForm });
        if (response.status === 200) {
            dispatch(aPushNewNotification({
                type: 'success',
                text: response.message,
            }));
            setpostForm({
                title: '',
                subTitle: '',
                slug: '',
                status: 'offline',
                archived: false,
                meta: {
                    description: '',
                    keywords: '',
                    schema: '',
                },
                mainImage: {
                    description: '',
                    alt: '',
                    name: '',
                    file: null,
                    fileData: null
                },
                body: [],
                aboutThePost: {
                    preparation: '',
                    cookTime: '',
                    portions: '',
                    difficulty: '',
                }
            });
            setLoading(false);
            navigate('/posts');
        }
    } catch (error) {
        dispatch(aPushNewNotification({
            type: 'error',
            text: response.message,
        }));
        setLoading(false);
        console.log("Error:", error);
    }
};
Yeaks... Yes, I understand that it could be complicated a little bit, but it's ok. Also, that would be a nice fit to you, to separate some "image uploading" functionality into another function to make our "handleSubmit" function more readable. And do not forget to update our "Post" schema in the "posts.mongo.js" file.
Let's reload our app and check the results.
The system we've built provides a solid foundation for handling images in your CMS. You can extend this further by adding features like image optimization, different storage providers like AWS S3, or image transformation capabilities.
Remember to properly handle errors and implement security measures in a production environment. Also, consider implementing file size limits and file type validation to make your system more robust.
The complete code for this tutorial is available in the repository. If you have any questions or run into issues, feel free to leave them in the comments section below.
Found this post useful? ☕ A coffee-sized contribution goes a long way in keeping me inspired! Thank you)

Next step: "React and Node.js CMS Series: Implementing Advanced Post Editing Functionality"














![iOS 18 Adoption Reaches 82% [Chart]](https://www.iclarified.com/images/news/97512/97512/97512-640.jpg)
![Apple Shares Official Trailer for 'The Wild Ones' [Video]](https://www.iclarified.com/images/news/97515/97515/97515-1280.jpg)














































![[The AI Show Episode 151]: Anthropic CEO: AI Will Destroy 50% of Entry-Level Jobs, Veo 3’s Scary Lifelike Videos, Meta Aims to Fully Automate Ads & Perplexity’s Burning Cash](https://www.marketingaiinstitute.com/hubfs/ep%20151%20cover.png)

























![[DEALS] FileJump 2TB Cloud Storage: Lifetime Subscription (85% off) & Other Deals Up To 98% Off – Offers End Soon!](https://www.javacodegeeks.com/wp-content/uploads/2012/12/jcg-logo.jpg)








-0-8-screenshot.png?width=1920&height=1920&fit=bounds&quality=70&format=jpg&auto=webp#)
.jpg?width=1920&height=1920&fit=bounds&quality=70&format=jpg&auto=webp#)


