Building a Kubernetes Cluster from Scratch With K3s And MetalLB
Building a Kubernetes cluster from scratch with K3s and MetalLB provides a powerful and flexible environment for running containerized applications. By following the steps outlined in this guide, you've set up a multi-node cluster and configured load balancing with MetalLB. Table of Contents Building a Kubernetes Cluster from Scratch With K3s And MetalLB Setting Up Your Environment Creating Virtual Machines with Hyper-V Configuring Network with dnsmasq Installing K3s on the Master Node Adding Worker Nodes to the Cluster Installing K3s on Worker Nodes Configuring MetalLB for Load Balancing Deploying Applications with Load Balancers Managing Your Cluster with Rancher Installing Rancher with Helm Exploring Rancher's Features Integrating Rancher with MetalLB Conclusion Meta Description Options Setting Up Your Environment Creating Virtual Machines with Hyper-V To start building a Kubernetes cluster from scratch using K3s, the first step is to set up your environment. This involves creating virtual machines using Hyper-V on a Windows desktop. Hyper-V is a virtualization tool that allows you to create and manage multiple virtual machines on a single physical host. Begin by opening the Hyper-V Manager on your Windows machine. Here, you can create new virtual machines that will act as nodes in your Kubernetes cluster. For our setup, we will create four virtual machines: one master node and three worker nodes. When creating each virtual machine, ensure that they are connected to the same virtual switch to enable network communication between them. Assign each VM a static IP address within your /24 network range to avoid conflicts. Here's a simple script to create a new virtual machine with PowerShell: New-VM -Name "K3sMaster" -MemoryStartupBytes 2GB -NewVHDPath "C:\VMs\K3sMaster.vhdx" -NewVHDSizeBytes 20GB -SwitchName "ExternalSwitch" This command creates a new VM named "K3sMaster" with 2GB of RAM and a 20GB virtual hard disk. Make sure to repeat this process for each of your worker nodes, adjusting the VM name and other parameters as needed. After creating the virtual machines, install a lightweight Linux distribution such as Ubuntu Server on each VM. This will serve as the operating system for your Kubernetes nodes. Make sure to configure SSH access on each virtual machine to facilitate remote management. This can be done by installing and enabling the OpenSSH server package on each VM. Finally, verify that each VM has a unique hostname and IP address. This is crucial for the proper functioning of your Kubernetes cluster. Use the hostnamectl command to set the hostname on each VM. With your virtual machines set up, you're now ready to move on to installing K3s on your master node. This forms the foundation of your Kubernetes cluster. Configuring Network with dnsmasq Once your virtual machines are ready, the next step is to configure the network settings using dnsmasq. Dnsmasq is a lightweight DNS forwarder and DHCP server that simplifies network configuration. Dnsmasq can be installed on one of your virtual machines or a separate server that acts as your network's DHCP and DNS server. This setup ensures that each VM receives a consistent IP address and can resolve domain names. To install dnsmasq on Ubuntu, use the following command: sudo apt-get install dnsmasq After installation, configure dnsmasq to assign static IP addresses to your virtual machines based on their MAC addresses. This is done by editing the /etc/dnsmasq.conf file. In the dnsmasq configuration file, specify the DHCP range and static IP assignments. For example: dhcp-range=192.168.1.50,192.168.1.150,12h dhcp-host=00:15:5D:01:02:03,192.168.1.100 This configuration assigns the IP range 192.168.1.50 to 192.168.1.150 for DHCP clients, and a static IP of 192.168.1.100 to a VM with the specified MAC address. Restart the dnsmasq service to apply the changes: sudo systemctl restart dnsmasq Verify that your virtual machines are receiving the correct IP addresses by checking their network configurations. You can use the ip a command to view the IP address assigned to each VM. Dnsmasq also acts as a DNS forwarder, allowing your VMs to resolve domain names. Ensure that each VM is configured to use the dnsmasq server as its DNS server. This setup provides a stable network environment for your Kubernetes cluster, ensuring reliable communication between nodes. With your network configured, you're ready to install K3s on your master node, which we'll cover in the next section. Installing K3s on the Master Node With your environment and network configured, it's time to install K3s on the master node. K3s is a lightweight Kubernetes distribution designed for resource-constrained environments. Begin by connecting to your designated master node via SSH. Once connected, you'll use a simple script to ins
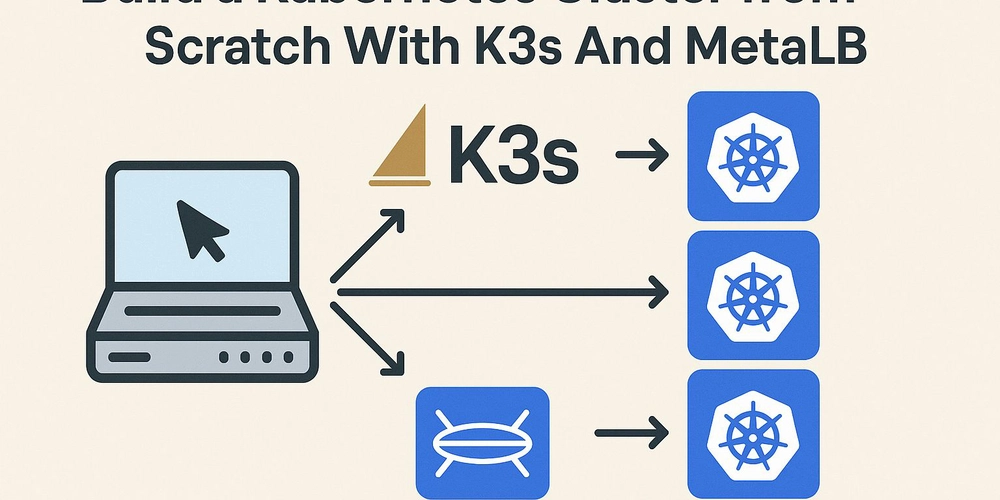
Building a Kubernetes cluster from scratch with K3s and MetalLB provides a powerful and flexible environment for running containerized applications. By following the steps outlined in this guide, you've set up a multi-node cluster and configured load balancing with MetalLB.
Table of Contents
- Building a Kubernetes Cluster from Scratch With K3s And MetalLB
-
Setting Up Your Environment
- Creating Virtual Machines with Hyper-V
- Configuring Network with dnsmasq
- Installing K3s on the Master Node
-
Adding Worker Nodes to the Cluster
- Installing K3s on Worker Nodes
- Configuring MetalLB for Load Balancing
- Deploying Applications with Load Balancers
-
Managing Your Cluster with Rancher
- Installing Rancher with Helm
- Exploring Rancher's Features
- Integrating Rancher with MetalLB
- Conclusion
- Meta Description Options
Setting Up Your Environment
Creating Virtual Machines with Hyper-V
To start building a Kubernetes cluster from scratch using K3s, the first step is to set up your environment. This involves creating virtual machines using Hyper-V on a Windows desktop. Hyper-V is a virtualization tool that allows you to create and manage multiple virtual machines on a single physical host.
Begin by opening the Hyper-V Manager on your Windows machine. Here, you can create new virtual machines that will act as nodes in your Kubernetes cluster. For our setup, we will create four virtual machines: one master node and three worker nodes.
When creating each virtual machine, ensure that they are connected to the same virtual switch to enable network communication between them. Assign each VM a static IP address within your /24 network range to avoid conflicts.
Here's a simple script to create a new virtual machine with PowerShell:
New-VM -Name "K3sMaster" -MemoryStartupBytes 2GB -NewVHDPath "C:\VMs\K3sMaster.vhdx" -NewVHDSizeBytes 20GB -SwitchName "ExternalSwitch"
This command creates a new VM named "K3sMaster" with 2GB of RAM and a 20GB virtual hard disk. Make sure to repeat this process for each of your worker nodes, adjusting the VM name and other parameters as needed.
After creating the virtual machines, install a lightweight Linux distribution such as Ubuntu Server on each VM. This will serve as the operating system for your Kubernetes nodes.
Make sure to configure SSH access on each virtual machine to facilitate remote management. This can be done by installing and enabling the OpenSSH server package on each VM.
Finally, verify that each VM has a unique hostname and IP address. This is crucial for the proper functioning of your Kubernetes cluster. Use the hostnamectl command to set the hostname on each VM.
With your virtual machines set up, you're now ready to move on to installing K3s on your master node. This forms the foundation of your Kubernetes cluster.
Configuring Network with dnsmasq
Once your virtual machines are ready, the next step is to configure the network settings using dnsmasq. Dnsmasq is a lightweight DNS forwarder and DHCP server that simplifies network configuration.
Dnsmasq can be installed on one of your virtual machines or a separate server that acts as your network's DHCP and DNS server. This setup ensures that each VM receives a consistent IP address and can resolve domain names.
To install dnsmasq on Ubuntu, use the following command:
sudo apt-get install dnsmasq
After installation, configure dnsmasq to assign static IP addresses to your virtual machines based on their MAC addresses. This is done by editing the /etc/dnsmasq.conf file.
In the dnsmasq configuration file, specify the DHCP range and static IP assignments. For example:
dhcp-range=192.168.1.50,192.168.1.150,12h
dhcp-host=00:15:5D:01:02:03,192.168.1.100
This configuration assigns the IP range 192.168.1.50 to 192.168.1.150 for DHCP clients, and a static IP of 192.168.1.100 to a VM with the specified MAC address.
Restart the dnsmasq service to apply the changes:
sudo systemctl restart dnsmasq
Verify that your virtual machines are receiving the correct IP addresses by checking their network configurations. You can use the ip a command to view the IP address assigned to each VM.
Dnsmasq also acts as a DNS forwarder, allowing your VMs to resolve domain names. Ensure that each VM is configured to use the dnsmasq server as its DNS server.
This setup provides a stable network environment for your Kubernetes cluster, ensuring reliable communication between nodes.
With your network configured, you're ready to install K3s on your master node, which we'll cover in the next section.
Installing K3s on the Master Node
With your environment and network configured, it's time to install K3s on the master node. K3s is a lightweight Kubernetes distribution designed for resource-constrained environments.
Begin by connecting to your designated master node via SSH. Once connected, you'll use a simple script to install K3s. This script automates the installation process, making it quick and easy.
To install K3s, run the following command on your master node:
curl -sfL https://get.k3s.io | sh -s - server --disable servicelb
This command downloads and executes the K3s installation script, setting up a Kubernetes server on your master node. The --disable servicelb flag disables the default load balancer, klipper-lb, to avoid conflicts with MetalLB.
After installation, K3s automatically starts and deploys a Kubernetes control plane on your master node. You can verify the installation by checking the status of the K3s service:
sudo systemctl status k3s
Ensure that the service is active and running without any errors.
To interact with your Kubernetes cluster, you'll need to set the KUBECONFIG environment variable. This variable points to the configuration file used by kubectl to manage the cluster.
Export the KUBECONFIG variable using the following command:
export KUBECONFIG=/etc/rancher/k3s/k3s.yaml
This command sets the configuration file path, allowing you to use kubectl to manage your cluster.
Verify the cluster setup by listing the nodes in your cluster:
kubectl get nodes
This command should display your master node, confirming that K3s is installed and running.
With K3s installed on your master node, the foundation of your Kubernetes cluster is now in place. Next, we'll explore how to add worker nodes to the cluster.
Adding Worker Nodes to the Cluster
Installing K3s on Worker Nodes
After setting up your master node, the next step is to add worker nodes to your Kubernetes cluster. This involves installing K3s on each worker node and joining them to the cluster.
Connect to each worker node via SSH and run the K3s installation script. However, unlike the master node, you'll use a different command to join the worker nodes to the cluster.
Run the following command on each worker node, replacing
curl -sfL https://get.k3s.io | K3S_URL=https://:6443 K3S_TOKEN= sh -
This command installs K3s on the worker node and configures it to join the existing cluster managed by the master node.
The K3S_URL environment variable specifies the address of the master node's API server, while K3S_TOKEN authenticates the worker node with the master node.
After the installation completes, verify that the worker node has successfully joined the cluster by running the following command on the master node:
kubectl get nodes
This command should list all nodes in the cluster, including the newly added worker nodes.
If a worker node does not appear in the list, check the K3s logs on the worker node for any errors. Use the journalctl -u k3s-agent command to view the logs.
Adding multiple worker nodes increases the cluster's capacity, allowing it to handle more workloads and providing redundancy.
With the worker nodes added, your Kubernetes cluster is now fully operational and ready for application deployment.
Configuring MetalLB for Load Balancing
To enable external access to services running on your Kubernetes cluster, you'll need to configure a load balancer. MetalLB is a popular choice for providing load balancing in bare-metal and virtualized environments.
MetalLB can be installed using Kubernetes manifests or Helm charts. In this guide, we'll use Helm to simplify the installation process.
First, add the MetalLB Helm repository to your Helm client:
helm repo add metallb https://metallb.github.io/metallb
This command adds the MetalLB repository, allowing you to install MetalLB using Helm charts.
Next, install MetalLB in your cluster using the following command:
helm install metallb metallb/metallb -f values.yaml
This command deploys MetalLB using the configuration specified in the values.yaml file. Customize this file to define the IP address pool used by MetalLB for load balancing.
Here's an example configuration for values.yaml:
configInline:
  address-pools:
  - name: default
    protocol: layer2
    addresses:
    - 192.168.1.240-192.168.1.250
This configuration defines a Layer 2 address pool with IP addresses from 192.168.1.240 to 192.168.1.250. MetalLB assigns these IPs to services of type LoadBalancer.
After installing MetalLB, verify that the MetalLB pods are running and ready by using the kubectl get pods -n metallb-system command.
With MetalLB configured, you can now expose services to external clients by creating services of type LoadBalancer. MetalLB will automatically assign an IP address from the configured pool.
This setup allows external clients to access your applications, providing a seamless experience for users.
Deploying Applications with Load Balancers
With MetalLB configured, you can now deploy applications on your Kubernetes cluster and expose them using load balancers. This section guides you through the deployment process and demonstrates how to create a service with a load balancer.
Begin by creating a simple application deployment using a Kubernetes manifest file. For example, you can deploy an Nginx web server using the following manifest:
apiVersion: apps/v1
kind: Deployment
metadata:
  name: nginx-deployment
spec:
  replicas: 3
  selector:
    matchLabels:
      app: nginx
  template:
    metadata:
      labels:
        app: nginx
    spec:
      containers:
      - name: nginx
        image: nginx:latest
        ports:
        - containerPort: 80
This manifest defines a deployment with three replicas of an Nginx container.
Apply the manifest using the kubectl apply -f nginx-deployment.yaml command to create the deployment in your cluster.
Next, create a service of type LoadBalancer to expose the Nginx deployment. Use the following manifest:
apiVersion: v1
kind: Service
metadata:
  name: nginx-service
spec:
  type: LoadBalancer
  selector:
    app: nginx
  ports:
  - protocol: TCP
    port: 80
    targetPort: 80
This manifest creates a service that listens on port 80 and forwards traffic to the Nginx pods.
Apply the service manifest using the kubectl apply -f nginx-service.yaml command. MetalLB will assign an external IP address to the service, making it accessible from outside the cluster.
Verify that the service has been assigned an external IP by running the kubectl get svc command. The output should display the external IP address assigned to the service.
You can now access the Nginx web server by navigating to the external IP address in a web browser. This demonstrates how MetalLB enables external access to services running on your Kubernetes cluster.
By leveraging MetalLB, you can easily expose applications to external clients, providing a robust and scalable solution for your Kubernetes workloads.
Managing Your Cluster with Rancher
Installing Rancher with Helm
Rancher is a powerful Kubernetes management platform that simplifies the deployment and management of Kubernetes clusters. In this section, we'll install Rancher on your Kubernetes cluster using Helm.
First, add the Rancher Helm repository to your Helm client:
helm repo add rancher-latest https://releases.rancher.com/server-charts/latest
This command adds the Rancher repository, allowing you to install Rancher using Helm charts.
Next, create a namespace for Rancher using the following command:
kubectl create namespace cattle-system
This command creates a dedicated namespace for Rancher, ensuring that its resources are isolated from other components in the cluster.
Install Rancher using the Helm chart and the following command:
helm install rancher rancher-latest/rancher --namespace cattle-system --set hostname=rancher.my-domain.com
Replace rancher.my-domain.com with the desired hostname for your Rancher installation. This command deploys Rancher in the cattle-system namespace.
After installation, verify that the Rancher pods are running by using the kubectl get pods -n cattle-system command. Ensure that all pods are in the Running state.
Access Rancher by navigating to the specified hostname in a web browser. You'll be prompted to set up an administrator account and configure Rancher for the first time.
Rancher provides a user-friendly interface for managing Kubernetes clusters, enabling you to deploy applications, monitor cluster health, and configure security policies.
With Rancher installed, you can easily manage your Kubernetes cluster and explore its features to streamline your operations.
Exploring Rancher's Features
Rancher offers a wide range of features that enhance the management and operation of Kubernetes clusters. In this section, we'll explore some of these features and how they can benefit your cluster management.
One of the key features of Rancher is its multi-cluster management capability. Rancher allows you to manage multiple Kubernetes clusters from a single interface, providing a centralized view of all your clusters.
Rancher also simplifies application deployment with its catalog of pre-configured applications. You can browse the catalog and deploy applications with a few clicks, streamlining the deployment process.
Rancher integrates with popular CI/CD tools, enabling you to automate application deployment and updates. This integration supports continuous delivery practices, improving the agility of your development process.
Security is a top priority in Rancher, with features such as role-based access control (RBAC) and security policies. These features help you enforce security best practices and protect your cluster from unauthorized access.
Rancher provides comprehensive monitoring and alerting capabilities, allowing you to monitor the health and performance of your clusters. You can set up alerts to notify you of any issues, enabling proactive management.
Rancher's user-friendly interface makes it easy to configure and manage Kubernetes resources, reducing the complexity of cluster management. This accessibility is particularly beneficial for teams with limited Kubernetes expertise.
By leveraging Rancher's features, you can optimize your Kubernetes cluster management, improve operational efficiency, and enhance the reliability of your applications.
Integrating Rancher with MetalLB
Integrating Rancher with MetalLB enhances your Kubernetes cluster by providing seamless load balancing capabilities. In this section, we'll explore how Rancher and MetalLB work together to improve your cluster's performance.
MetalLB provides load balancing for services of type LoadBalancer, allowing external clients to access applications running on your cluster. Rancher simplifies the deployment and management of these services.
To integrate Rancher with MetalLB, ensure that MetalLB is installed and configured in your cluster as described in previous sections. This setup provides the foundation for load balancing services.
In Rancher, you can create and manage services with load balancers using the Rancher interface. This process involves defining the service, selecting the appropriate load balancer type, and configuring the necessary parameters.
Rancher provides a visual representation of your cluster's resources, making it easy to monitor the status of your load balancers and services. This visibility helps you identify and resolve issues quickly.
Rancher's integration with MetalLB supports advanced load balancing configurations, such as Layer 2 and BGP modes. These configurations provide flexibility in how traffic is distributed across your cluster.
By using Rancher and MetalLB together, you can achieve high availability and scalability for your applications, ensuring a reliable user experience.
This integration demonstrates the power of combining Rancher's management capabilities with MetalLB's load balancing features, creating a robust and efficient Kubernetes environment.
Conclusion
Building a Kubernetes cluster from scratch with K3s and MetalLB provides a powerful and flexible environment for running containerized applications. By following the steps outlined in this guide, you've set up a multi-node cluster and configured load balancing with MetalLB. Rancher further enhances your cluster management capabilities, offering a user-friendly interface and advanced features. Now that your cluster is operational, you can experiment with deploying applications, scaling workloads, and exploring the vast ecosystem of Kubernetes tools. Start your Kubernetes journey today and unlock the full potential of container orchestration.
Meta Description Options
- Learn how to build a Kubernetes cluster from scratch with K3s and MetalLB. Step-by-step guide for setting up a 4-node cluster.
- Discover how to set up a K3s Kubernetes cluster with MetalLB for load balancing. Perfect for home labs and testing.
- Create a Kubernetes cluster using K3s and MetalLB. Follow our comprehensive guide for a seamless setup.
- Build your own Kubernetes cluster with K3s and MetalLB. Detailed instructions for a 4-node configuration.
- Step-by-step guide to setting up a Kubernetes cluster with K3s and MetalLB. Perfect for beginners and home labs.
[1] https://www.fullstaq.com/knowledge-hub/blogs/setting-up-your-own-k3s-home-cluster "Setting up your own K3S home cluster"
[2] https://www.reddit.com/r/kubernetes/comments/1bgcvyl/how_to_design_a_kubernetes_cluster_on_hetzner/ "The heart of the internet"
[3] https://canthonyscott.com/setting-up-a-k3s-kubernetes-cluster-within-proxmox/ "Setting up a k3s Kubernetes cluster on Proxmox virtual machines with MetalLB"
[4] https://www.reddit.com/r/kubernetes/comments/101oisz/how_do_you_set_up_a_local_k8s_cluster_on_mac_os/ "The heart of the internet"
[5] https://vuyisile.com/building-a-kubernetes-cluster-from-scratch-with-k3s-and-metallb/ "Building a Kubernetes Cluster from Scratch With K3s And MetalLB"
[6] https://medium.com/geekculture/bare-metal-kubernetes-with-metallb-haproxy-longhorn-and-prometheus-370ccfffeba9 "Bare Metal Kubernetes with MetalLB, HAProxy, Longhorn, and Prometheus"
[7] https://kevingoos.medium.com/k3s-setup-metallb-using-bgp-on-pfsense-f5ff1165f6d4 "K3S: Setup MetalLB using BGP on Pfsense - Kevin Goos - Medium"
[8] https://www.malachid.com/blog/2024-05-27-turingpi2/ "Building a k3s cluster on Turing Pi 2"
[9] https://dinofizzotti.com/blog/2020-05-09-raspberry-pi-cluster-part-2-todo-api-running-on-kubernetes-with-k3s/ "Raspberry Pi Cluster Part 2: ToDo API running on Kubernetes with k3s"
[10] https://www.rootisgod.com/2024/Running-an-HA-3-Node-K3S-Cluster/ "Running an HA 3 Node K3S Cluster"




![Apple Seeds watchOS 11.5 Beta 4 to Developers [Download]](https://www.iclarified.com/images/news/97147/97147/97147-640.jpg)
![Apple Seeds visionOS 2.5 Beta 4 to Developers [Download]](https://www.iclarified.com/images/news/97150/97150/97150-640.jpg)
![Apple Seeds tvOS 18.5 Beta 4 to Developers [Download]](https://www.iclarified.com/images/news/97153/97153/97153-640.jpg)
![Apple Releases macOS Sequoia 15.5 Beta 4 to Developers [Download]](https://www.iclarified.com/images/news/97155/97155/97155-640.jpg)
















_NicoElNino_Alamy.jpg?width=1280&auto=webp&quality=80&disable=upscale#)
_Muhammad_R._Fakhrurrozi_Alamy.jpg?width=1280&auto=webp&quality=80&disable=upscale#)









![[The AI Show Episode 144]: ChatGPT’s New Memory, Shopify CEO’s Leaked “AI First” Memo, Google Cloud Next Releases, o3 and o4-mini Coming Soon & Llama 4’s Rocky Launch](https://www.marketingaiinstitute.com/hubfs/ep%20144%20cover.png)


