


![Apple Seeds watchOS 11.5 Beta 4 to Developers [Download]](https://www.iclarified.com/images/news/97147/97147/97147-640.jpg)
![Apple Seeds visionOS 2.5 Beta 4 to Developers [Download]](https://www.iclarified.com/images/news/97150/97150/97150-640.jpg)
![Apple Seeds tvOS 18.5 Beta 4 to Developers [Download]](https://www.iclarified.com/images/news/97153/97153/97153-640.jpg)
![Apple Releases macOS Sequoia 15.5 Beta 4 to Developers [Download]](https://www.iclarified.com/images/news/97155/97155/97155-640.jpg)


_NicoElNino_Alamy.jpg?width=1280&auto=webp&quality=80&disable=upscale#)
_Muhammad_R._Fakhrurrozi_Alamy.jpg?width=1280&auto=webp&quality=80&disable=upscale#)


![[The AI Show Episode 144]: ChatGPT’s New Memory, Shopify CEO’s Leaked “AI First” Memo, Google Cloud Next Releases, o3 and o4-mini Coming Soon & Llama 4’s Rocky Launch](https://www.marketingaiinstitute.com/hubfs/ep%20144%20cover.png)


Internationalization in React: A Beginner's Guide to i18n
Introduction Internationalization (i18n) and localization (l10n) are essential for building web applications that cater to users across different languages and regions across the world. Internationalization is the process of enabling an application to be easily adaptable in various languages and locales, while localization involves translating and formatting content for a specific language or region. As the internet is available on a global scale, providing a localized experience enhances user satisfaction and expands your app's reach. React, by default, doesn't include built-in internationalization support, but there are powerful libraries available that simplify this process. One of the most widely used libraries for this purpose is i18next, along with its React bindings react-i18next. In this guide, we'll walk through how to set up i18next in a React app, manage translations, enable dynamic language switching, and follow best practices for internationalization. Setting Up Localization in a React App 1. Installing dependencies First, install the necessary libraries: npm install i18next react-i18next This installs the core i18next library and its integration with React. 2. Project structure for translations Organize the translations in JSON files within a folder structure like this: src/ config/ locales/ en/ translation.json es/ translation.json hi/ translation.json Each translation.json file contains key-value pairs for translated text. Example: en/translation.json { "greeting_message": "Hi, how are you?" } es/translation.json { "greeting_message": "¡Hola, ¿cómo estás?" } hi/translation.json { "greeting_message": "नमस्ते | आप कैसे हैं?" } 3. Initializing i18next Create a configuration file to initialize i18next: src/config/i18n.js import i18n from 'i18next'; import { initReactI18next } from 'react-i18next'; import enTranslations from './locales/en/translation.json'; import esTranslations from './locales/es/translation.json'; import hiTranslations from './locales/hi/translation.json'; i18n.use(initReactI18next).init({ resources: { en: { translation: enTranslations }, es: { translation: esTranslations }, hi: { translation: hiTranslations }, }, lng: 'en', fallbackLng: 'en', interpolation: { escapeValue: false, }, }); export default i18n; 4. Loading i18n in Your App Import the i18n configuration in your app root file. The following is an example that uses vite to bootstrap a react app. src/main.jsx import { StrictMode } from 'react'; import { createRoot } from 'react-dom/client'; import App from './App.jsx'; import './index.css'; import './config/i18n'; createRoot(document.getElementById('root')).render( ); Translating Text in Components Use the useTranslation hook to translate text in any component. Let's create a Greeting.jsx component to greet the user. import { useTranslation } from 'react-i18next'; export default function Greeting() { const { t } = useTranslation(); return {t('greeting_message')}; } You can also interpolate dynamic values using placeholders: en/translation.json { "welcome_user": "Welcome, {{name}}!" } Component: {t('welcome_user', { name: 'Baburao' })} Dynamic Language Switching Enable users to switch languages at runtime using i18n.changeLanguage . Let's create a LanguageSwitcher.jsx component for this purpose. import { useTranslation } from 'react-i18next'; export default function LanguageSwitcher() { const { i18n } = useTranslation(); const handleLanguageChange = (e) => { i18n.changeLanguage(e.target.value); }; return ( English ¡Español! हिंदी ); } Results Best Practices Plan early: Incorporate i18n from the start to avoid retrofitting later. Meaningful keys: Use descriptive keys like "nav.home" rather than full sentences. Avoid concatenation: Use complete sentences in translation files and placeholders for dynamic content. Pluralization and formatting: Utilize i18next's support for pluralization and date/number formatting. Test thoroughly: Check your app in multiple languages for layout issues and missing translations. RTL language support: Ensure your app supports right-to-left languages by adjusting layouts and direction attributes. Conclusion Internationalizing a React app is straightforward with tools like i18next. With this approach, you can create a user-friendly multilingual application. Following best practices ensures your app remains scalable and accessible to a global audience.
Introduction
Internationalization (i18n) and localization (l10n) are essential for building web applications that cater to users across different languages and regions across the world. Internationalization is the process of enabling an application to be easily adaptable in various languages and locales, while localization involves translating and formatting content for a specific language or region. As the internet is available on a global scale, providing a localized experience enhances user satisfaction and expands your app's reach.
React, by default, doesn't include built-in internationalization support, but there are powerful libraries available that simplify this process. One of the most widely used libraries for this purpose is i18next, along with its React bindings react-i18next. In this guide, we'll walk through how to set up i18next in a React app, manage translations, enable dynamic language switching, and follow best practices for internationalization.
Setting Up Localization in a React App
1. Installing dependencies
First, install the necessary libraries:
npm install i18next react-i18next
This installs the core i18next library and its integration with React.
2. Project structure for translations
Organize the translations in JSON files within a folder structure like this:
src/
  config/
    locales/
      en/
        translation.json
      es/
        translation.json
      hi/
        translation.json
Each translation.json file contains key-value pairs for translated text.
Example:
en/translation.json
{
  "greeting_message": "Hi, how are you?"
}
es/translation.json
{
  "greeting_message": "¡Hola, ¿cómo estás?"
}
hi/translation.json
{
  "greeting_message": "नमस्ते | आप कैसे हैं?"
}
3. Initializing i18next
Create a configuration file to initialize i18next:
src/config/i18n.js
import i18n from 'i18next';
import { initReactI18next } from 'react-i18next';
import enTranslations from './locales/en/translation.json';
import esTranslations from './locales/es/translation.json';
import hiTranslations from './locales/hi/translation.json';

i18n.use(initReactI18next).init({
  resources: {
    en: { translation: enTranslations },
    es: { translation: esTranslations },
    hi: { translation: hiTranslations },
  },
  lng: 'en',
  fallbackLng: 'en',
  interpolation: {
    escapeValue: false,
  },
});

export default i18n;
4. Loading i18n in Your App
Import the i18n configuration in your app root file. The following is an example that uses vite to bootstrap a react app.
src/main.jsx
import { StrictMode } from 'react';
import { createRoot } from 'react-dom/client';
import App from './App.jsx';
import './index.css';
import './config/i18n';

createRoot(document.getElementById('root')).render(


);
Translating Text in Components
Use the useTranslation hook to translate text in any component. Let's create a Greeting.jsx component to greet the user.
import { useTranslation } from 'react-i18next';
export default function Greeting() {
const { t } = useTranslation();
return {t('greeting_message')}
;
}
You can also interpolate dynamic values using placeholders:
en/translation.json
{
  "welcome_user": "Welcome, {{name}}!"
}
Component:
{t('welcome_user', { name: 'Baburao' })}
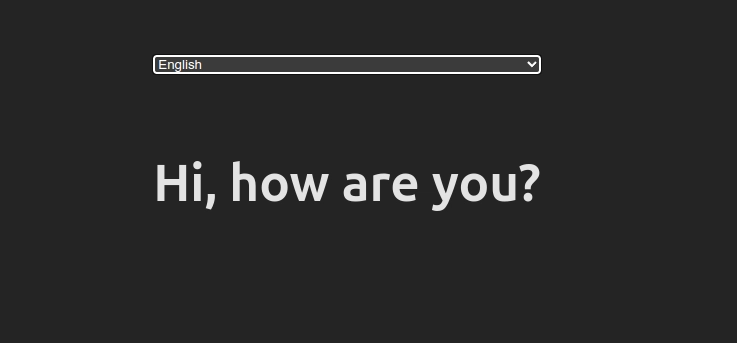
Dynamic Language Switching
Enable users to switch languages at runtime using i18n.changeLanguage . Let's create a LanguageSwitcher.jsx component for this purpose.
import { useTranslation } from 'react-i18next';
export default function LanguageSwitcher() {
const { i18n } = useTranslation();
const handleLanguageChange = (e) => {
i18n.changeLanguage(e.target.value);
};
return (
);
}
Results

Best Practices
- Plan early: Incorporate i18n from the start to avoid retrofitting later.
- Meaningful keys: Use descriptive keys like "nav.home" rather than full sentences.
- Avoid concatenation: Use complete sentences in translation files and placeholders for dynamic content.
- Pluralization and formatting: Utilize i18next's support for pluralization and date/number formatting.
- Test thoroughly: Check your app in multiple languages for layout issues and missing translations.
- RTL language support: Ensure your app supports right-to-left languages by adjusting layouts and direction attributes.
Conclusion
Internationalizing a React app is straightforward with tools like i18next. With this approach, you can create a user-friendly multilingual application. Following best practices ensures your app remains scalable and accessible to a global audience.