


![Apple Developing Battery Case for iPhone 17 Air Amid Battery Life Concerns [Report]](https://www.iclarified.com/images/news/97208/97208/97208-640.jpg)
![Apple to Split iPhone Launches Across Fall and Spring in Major Shakeup [Report]](https://www.iclarified.com/images/news/97211/97211/97211-640.jpg)
![Apple to Move Camera to Top Left, Hide Face ID Under Display in iPhone 18 Pro Redesign [Report]](https://www.iclarified.com/images/news/97212/97212/97212-640.jpg)
![AirPods 4 On Sale for $99 [Lowest Price Ever]](https://www.iclarified.com/images/news/97206/97206/97206-640.jpg)


_Inge_Johnsson-Alamy.jpg?width=1280&auto=webp&quality=80&disable=upscale#)


![[The AI Show Episode 145]: OpenAI Releases o3 and o4-mini, AI Is Causing “Quiet Layoffs,” Executive Order on Youth AI Education & GPT-4o’s Controversial Update](https://www.marketingaiinstitute.com/hubfs/ep%20145%20cover.png)


![From Art School Drop-out to Microsoft Engineer with Shashi Lo [Podcast #170]](https://cdn.hashnode.com/res/hashnode/image/upload/v1746203291209/439bf16b-c820-4fe8-b69e-94d80533b2df.png?#)


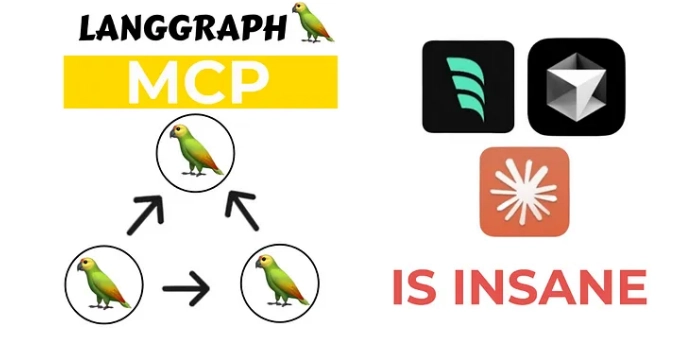
LangGraph + MCP + Ollama: The Key To Powerful Agentic AI
In this story, I have a super quick tutorial showing you how to create a multi-agent chatbot using LangGraph, MCP, and Ollama to build a powerful agent chatbot for your business or personal use. Not Long Ago, I made a video about the Model Context Protocol. Some developers compare it to “Zapier built for AI”, believing it simply adds extra steps to API usage. “ Before MCP, developers had to write code and connect AI tools to external systems through APIs, meaning each integration needed to be coded up front. ” Said John Rush Although MCP was released last year, it has suddenly become popular recently, which has also sparked discussions about how long its “flowering period” can last. LangChain also launched a vote on x: The results showed that 40.8% of people believed that MCP was the future standard, 25.8% believed that MCP was just a flash in the pan, and the remaining 33.4% chose to wait and see. MCP is still new (released in November 2024), but it already supports many services such as GitHub, Slack, and PostgreSQL. Since it is an open standard, it is surprising that it can be used with any LLM (Claude, OpenAI, Gemini, etc.). So, let me give you a quick demo of a live chatbot to show you what I mean. Check the video YouTube I will ask the chatbot two different questions: the first one is, ‘Can you write a report about the latest LLM?’ Feel free to ask any questions you want. If you look at how the chatbot generates the output, you will see that the agent uses its structured flow, powered by the create_chatbot function, to process input. This function integrates system instructions, user messages, and tool execution into a smooth interaction process. It then decides which tool to use based on the query. It will invoke the Google search tool to search for the latest information and generate the report. For the second question, 'Write a Python script that uses Seaborn to create a scatter plot with regression lines,' the chatbot processes the request and routes it to the appropriate tool, such as the python_repl or data_visualization, depending on how the query is structured. The async_tool_executor dynamically handles tool calls, ensuring that both synchronous and asynchronous functions, like generating code or visualizations, are executed properly. Throughout this process, the chatbot StateGraph manages conversation states, so it can provide accurate and contextually aware responses to follow-up questions. The get_tools function ensures that only functional tools are available, maintaining system stability. The main function keeps everything running smoothly, processing user inputs, invoking the correct tools, and handling outputs in real-time. So, by the end of this Story, you will understand the difference between MCP and Function Call, when to use Function Call and MCP, and how we going to use LangGraph, MCP and OpenSource to create a powerful Agentic chatbot. What is the difference between the MCP and the Function Call? In Function Calling, the AI is like a skilled worker operating under a strict script — it can fill out forms and call predefined tools, but only those it has obtained, and call them one by one. In MCP, the AI is more like an agent with a toolkit: it can rummage around in the toolbox (discover new tools), combine them, handle more tasks and have greater autonomy. Function Calling is tightly coupled to the prompts of the model and requires developers to manage the order, which makes it very controllable but inflexible to some extent. MCP achieves loose coupling through open protocols, which makes it highly flexible and extensible, but requires strong design to manage complexity (and ensure safety). The next section will dive into how to build an agent with MCP and how to deal with the challenges that come with this flexibility. When to use Function Call and MCP Choosing Function Calling vs. MCP depends on the use case: Use Function Calling when you have a small set of well-defined actions or queries, especially if they are single-step operations and you want highly structured outputs. It’s a good fit for predictable tasks and lightweight integrations where the added overhead of MCP might be overkill, so choose Function Calling when structured, narrow tasks and ease of integration with your app are critical. Use MCP when you need greater flexibility, a versatile tool, or context that evolves across interactions. MCP is better suited for complex, multi-step workflows, or when the AI must maintain long-term context and interact with a variety of systems, if your AI agent is a general assistant across internal systems that can draw on multiple data sources. It’s important to note that these two approaches are not mutually exclusive—they can complement each other. For example, Function Calling can be used inside an MCP client to process a model's structured output. Conceptually, function calling is designed to translate natural language into fu
In this story, I have a super quick tutorial showing you how to create a multi-agent chatbot using LangGraph, MCP, and Ollama to build a powerful agent chatbot for your business or personal use.
Not Long Ago, I made a video about the Model Context Protocol. Some developers compare it to “Zapier built for AI”, believing it simply adds extra steps to API usage.
“ Before MCP, developers had to write code and connect AI tools to external systems through APIs, meaning each integration needed to be coded up front. ” Said John Rush
Although MCP was released last year, it has suddenly become popular recently, which has also sparked discussions about how long its “flowering period” can last. LangChain also launched a vote on x:
The results showed that 40.8% of people believed that MCP was the future standard, 25.8% believed that MCP was just a flash in the pan, and the remaining 33.4% chose to wait and see.
MCP is still new (released in November 2024), but it already supports many services such as GitHub, Slack, and PostgreSQL. Since it is an open standard, it is surprising that it can be used with any LLM (Claude, OpenAI, Gemini, etc.).
So, let me give you a quick demo of a live chatbot to show you what I mean.
Check the video YouTube
I will ask the chatbot two different questions: the first one is, ‘Can you write a report about the latest LLM?’ Feel free to ask any questions you want.
If you look at how the chatbot generates the output, you will see that the agent uses its structured flow, powered by the create_chatbot function, to process input. This function integrates system instructions, user messages, and tool execution into a smooth interaction process. It then decides which tool to use based on the query.
It will invoke the Google search tool to search for the latest information and generate the report. For the second question, 'Write a Python script that uses Seaborn to create a scatter plot with regression lines,' the chatbot processes the request and routes it to the appropriate tool, such as the python_repl or data_visualization, depending on how the query is structured. The async_tool_executor dynamically handles tool calls, ensuring that both synchronous and asynchronous functions, like generating code or visualizations, are executed properly.
Throughout this process, the chatbot StateGraph manages conversation states, so it can provide accurate and contextually aware responses to follow-up questions. The get_tools function ensures that only functional tools are available, maintaining system stability. The main function keeps everything running smoothly, processing user inputs, invoking the correct tools, and handling outputs in real-time.
So, by the end of this Story, you will understand the difference between MCP and Function Call, when to use Function Call and MCP, and how we going to use LangGraph, MCP and OpenSource to create a powerful Agentic chatbot.
What is the difference between the MCP and the Function Call?
In Function Calling, the AI is like a skilled worker operating under a strict script — it can fill out forms and call predefined tools, but only those it has obtained, and call them one by one. In MCP, the AI is more like an agent with a toolkit: it can rummage around in the toolbox (discover new tools), combine them, handle more tasks and have greater autonomy.
Function Calling is tightly coupled to the prompts of the model and requires developers to manage the order, which makes it very controllable but inflexible to some extent.
MCP achieves loose coupling through open protocols, which makes it highly flexible and extensible, but requires strong design to manage complexity (and ensure safety). The next section will dive into how to build an agent with MCP and how to deal with the challenges that come with this flexibility.
When to use Function Call and MCP
Choosing Function Calling vs. MCP depends on the use case:
Use Function Calling when you have a small set of well-defined actions or queries, especially if they are single-step operations and you want highly structured outputs.
It’s a good fit for predictable tasks and lightweight integrations where the added overhead of MCP might be overkill, so choose Function Calling when structured, narrow tasks and ease of integration with your app are critical.
Use MCP when you need greater flexibility, a versatile tool, or context that evolves across interactions. MCP is better suited for complex, multi-step workflows, or when the AI must maintain long-term context and interact with a variety of systems, if your AI agent is a general assistant across internal systems that can draw on multiple data sources.
It’s important to note that these two approaches are not mutually exclusive—they can complement each other. For example, Function Calling can be used inside an MCP client to process a model's structured output.
Conceptually, function calling is designed to translate natural language into function execution in a controlled way, while MCP is designed to provide a broader interface for AI to explore and operate in an environment.
Let’s start coding
Let us now explore step by step and unravel the answer to how to create the MCP APP. We will install the libraries that support the model. For this, we will do a pip install requirements
pip install -r requirements.txt
The next step is the usual one where we will import the relevant libraries, the significance of which will become evident as we proceed.
langchain_mcp_adapters: Convert MCP tools to LangChain tools
for use with the LangGraph agent and provide a client implementation
Allows users to connect to and load tools from multiple MCP servers
MCP: MCP is an open protocol that standardizes how applications provide context to LLMs.
Googlesearch-python: A package to facilitate Google searches.
# agent.py
from langchain_core.messages import AIMessage, ToolMessage, HumanMessage
from langgraph.graph import StateGraph, START, END, MessagesState
from nodes import create_chatbot
import asyncio
import os
import dotenv
from langchain_mcp_adapters.client import MultiServerMCPClient
# main.py
import streamlit as st
import asyncio
from agent import create_agent
from langchain_core.messages import HumanMessage
# nodes.py
from server import get_tools
from langgraph.graph import MessagesState
from langchain_openai import ChatOpenAI
from langchain_ollama import ChatOllama
from langchain_core.prompts import ChatPromptTemplate, SystemMessagePromptTemplate, HumanMessagePromptTemplate
from datetime import datetime
import os

# server.py - unchanged except for removing search_google if it's not working
from mcp.server.fastmcp import FastMCP
from langchain_experimental.utilities import PythonREPL
import io
import base64
import matplotlib.pyplot as plt
from openai import OpenAI
from pydantic import BaseModel, Field
import os
from dotenv import load_dotenv
import asyncio
from googlesearch import search
Agent.py
I designed the create_agent function as an asynchronous process to build an AI agent. I set up a async function that takes docs_info an optional parameter to provide relevant data to the chatbot.
I integrated MultiServerMCPClient into an async with context manager, ensuring seamless communication with an MCP server http://localhost:8000/sse using Server-Sent Events (SSE) with a 30-second timeout.
I implemented a call to client.get_tools() retrieve the necessary MCP tools, enabling advanced functionalities. To manage conversational states, I built a StateGraph using MessagesState.
I then created a chatbot node withcreate_chatbot(docs_info), allowing it to process and interact with the provided documentation.
async def create_agent(docs_info=None):
    async with MultiServerMCPClient(
        {
            "server":{
                "url":"http://localhost:8000/sse",
                "transport":"sse",
                "timeout": 30
            }
        }
    ) as client:
        # Get MCP tools
        tools = client.get_tools()

        # Create the graph builder
        graph_builder = StateGraph(MessagesState)

        # Create nodes
        chatbot_node = create_chatbot(docs_info)
        graph_builder.add_node("chatbot", chatbot_node)
I designed async_tool_executor to dynamically process tool calls by taking state as input, which contains a list of messages exchanged in the conversation. I extract the last message (messages[-1]) to check for tool calls, retrieving them from tool_calls directly or within additional_kwargs.
If no tool calls are found, I return the messages unchanged. To process tool calls, I copy the messages into new_messages and iterate through each tool call, extracting tool_name, tool_args, and tool_id, supporting both dictionary and object formats for flexibility. I search for the corresponding tool by matching its tool_name with available tools; if not found, I generate an error message listing valid tools.
If the tool exists, I determine whether it’s an async function using asyncio.iscoroutinefunction()—if async, I execute it using the await tool.coroutine(tool_args) otherwise, I call tool.func(tool_args) or tool(**tool_args). I handle errors by catching exceptions and appending detailed error messages to new_messages.
# Custom async tool node to handle async MCP tools
        async def async_tool_executor(state):
            messages = state["messages"]
            last_message = messages[-1]

            # Check if there are tool calls
            tool_calls = None
            if hasattr(last_message, "tool_calls"):
                tool_calls = last_message.tool_calls
            elif hasattr(last_message, "additional_kwargs") and "tool_calls" in last_message.additional_kwargs:
                tool_calls = last_message.additional_kwargs["tool_calls"]

            if not tool_calls:
                return {"messages": messages}

            # Process each tool call
            new_messages = messages.copy()

            for tool_call in tool_calls:
                # Handle different formats of tool_call
                if isinstance(tool_call, dict):
                    tool_name = tool_call.get("name")
                    tool_args = tool_call.get("args", {})
                    tool_id = tool_call.get("id", "tool-call-id")
                else:
                    tool_name = tool_call.name
                    tool_args = tool_call.args if hasattr(tool_call, "args") else {}
                    tool_id = getattr(tool_call, "id", "tool-call-id")

                # Print debug info
                print(f"Executing tool: {tool_name}")
                print(f"Tool args: {tool_args}")

                # Find the matching tool
                tool = next((t for t in tools if t.name == tool_name), None)

                if not tool:
                    # Tool not found
                    tool_error = f"Error: {tool_name} is not a valid tool, try one of {[t.name for t in tools]}."
                    new_messages.append(AIMessage(content=tool_error))
                else:
                    try:
                        # Execute the async tool
                        if asyncio.iscoroutinefunction(tool.coroutine):
                            result = await tool.coroutine(**tool_args)
                        else:
                            # Fall back to sync execution if needed
                            result = tool.func(**tool_args) if hasattr(tool, 'func') else tool(**tool_args)

                        print(f"Tool result: {result}")

                        # Add tool result
                        new_messages.append(ToolMessage(
                            content=str(result),
                            tool_call_id=tool_id,
                            name=tool_name
                        ))
                    except Exception as e:
                        # Handle errors
                        error_msg = f"Error: {str(e)}\n Please fix your mistakes."
                        print(f"Tool error: {error_msg}")
                        new_messages.append(AIMessage(content=error_msg))

            return {"messages": new_messages}
I designed a structured conversational flow by integrating an async tool executor node and a routing function into the chatbot’s graph. First, I added the async_tool_executor as a node named "tools", allowing the system to process tool calls dynamically.
Then, I created a router function to determine the next step based on the last message in the conversation. The router inspects whether the last message sent by the AI contains tool calls—if found, it directs the flow to "tools" Otherwise, it ends the conversation.
To establish the flow, I added edges to the graph: starting from "chatbot", conditionally routing to either "tools" or "end", and looping "tools" back to "chatbot" to enable multiple tool interactions.
 # Add the async tool executor node
        graph_builder.add_node("tools", async_tool_executor)

        # Define router function to handle tool calls
        def router(state):
            messages = state["messages"]
            last_message = messages[-1]

            has_tool_calls = False
            if isinstance(last_message, AIMessage):
                if hasattr(last_message, "tool_calls") and last_message.tool_calls:
                    has_tool_calls = True
                elif hasattr(last_message, "additional_kwargs") and last_message.additional_kwargs.get("tool_calls"):
                    has_tool_calls = True

            return "tools" if has_tool_calls else "end"

        # Add edges
        graph_builder.add_edge(START, "chatbot")
        graph_builder.add_conditional_edges(
            "chatbot",
            router,
            {
                "tools": "tools",
                "end": END
            }
        )
        graph_builder.add_edge("tools", "chatbot")

        # Compile the graph
        graph = graph_builder.compile()
        return graph, client  # Return client to keep it alive
Node.py
I designed a function, get_system_prompt dynamically generate a system prompt for the AI assistant, ensuring it operates with clear guidelines and contextual awareness. First, I formatted the current date using datetime.now().strftime("%Y-%m-%d") and embedded it in the prompt for real-time reference.
Then, I defined the assistant’s role and capabilities, listing three primary tools: generate_image (DALL-E for image creation), data_visualization (matplotlib for chart generation), and python_repl (a Python execution environment).
def get_system_prompt(docs_info=None):
    system_prompt = f"""
    Today is {datetime.now().strftime("%Y-%m-%d")}
    You are a helpful AI Assistant that can use these tools:
    - generate_image: Generate an image using DALL-E based on a prompt
    - data_visualization: Create charts with Python and matplotlib
    - python_repl: Execute Python code

    When you call image generation or data visualization tool, only answer the fact that you generated, not base64 code or url.
    Once you generated image by a tool, then do not call it again in one answer.
    """
    if docs_info:
        docs_context = "\n\nYou have access to these documents:\n"
        for doc in docs_info:
            docs_context += f"- {doc['name']}: {doc['type']}\n"
        system_prompt += docs_context

    system_prompt += "\nYou should always answer in same language as user's ask."
    return system_prompt
I developed the create_chatbot function to handle user inputs and generate AI responses. It uses a technique, ChatPromptTemplate, to combine system instructions with user messages. The system instructions come from get_system_prompt(docs_info).
I piped (|) the prompt into an LLM to create a seamless processing chain. The function ensures message format consistency by converting strings into HumanMessage objects. The chatbot invokes the LLM with user messages and appends the response.
This maintains a structured conversation history. The assistant follows predefined rules while adapting to queries. It remains tool-agnostic, allowing flexibility in responses. This setup ensures an interactive and dynamic chatbot experience.