Kubernetes Dashboard: Headlamp on Kind
Headlamp is a Kubernetes UI that helps you visualize your containerized workloads through a user-friendly graphical interface. It’s especially useful for beginners who might feel overwhelmed when using Kubernetes only through the CLI. With the growing popularity of Kind (Kubernetes IN Docker) for local Kubernetes testing and development, it's helpful to pair Headlamp with it for better visualization. Installing Kind You can follow the official guide to install Kind. For this tutorial, we used Kind v0.26.0. Installing Headlamp in Kind Step 1: Create a Kind Cluster kind create cluster --name kind-cluster Step 2: Switch Context to Kind If you're using Minikube or another cluster, make sure to switch to your new Kind context: kubectl config use-context kind-kind-cluster Step 3: Deploy Headlamp Using the Manifest Apply the official Headlamp deployment manifest: kubectl apply -f https://raw.githubusercontent.com/kinvolk/headlamp/main/kubernetes-headlamp.yaml This uses the kube-system namespace by default. Step 4: Verify the Deployment Check if the Headlamp pod and service are running: kubectl get pods,svc -n kube-system Accessing the Dashboard Port Forward the Service kubectl port-forward -n kube-system service/headlamp 8080:80 Now open http://localhost:8080 in your browser. Logging in with a Service Account Token To access the dashboard, you’ll need to authenticate with a service account token. Create a Service Account kubectl -n kube-system create serviceaccount headlamp-admin Bind Admin Role kubectl create clusterrolebinding headlamp-admin --serviceaccount=kube-system:headlamp-admin --clusterrole=cluster-admin Generate the Token kubectl create token headlamp-admin -n kube-system Copy the token and paste it into the Headlamp login screen You’ll be redirected to the full dashboard: Conclusion In this blog, we walked through setting up Headlamp in a Kind cluster from scratch. After creating a Kind cluster, switching context, deploying Headlamp using the official manifest, and accessing it via port-forwarding, you now have a clean and functional Kubernetes UI. Why Headlamp? It provides a beginner-friendly GUI to visualize resources, inspect logs, and monitor workloads which makes it easier for newcomers to explore Kubernetes. For production environments, avoid giving full admin access. Instead, follow the principle of least privilege by configuring RBAC carefully. You can also integrate OIDC for secure authentication
Headlamp is a Kubernetes UI that helps you visualize your containerized workloads through a user-friendly graphical interface.
It’s especially useful for beginners who might feel overwhelmed when using Kubernetes only through the CLI.
With the growing popularity of Kind (Kubernetes IN Docker) for local Kubernetes testing and development, it's helpful to pair Headlamp with it for better visualization.
Installing Kind
You can follow the official guide to install Kind.
For this tutorial, we used Kind v0.26.0.
Installing Headlamp in Kind
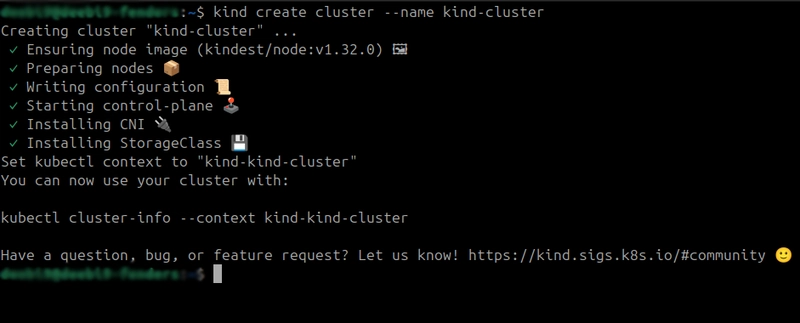
Step 1: Create a Kind Cluster
kind create cluster --name kind-cluster
Step 2: Switch Context to Kind
If you're using Minikube or another cluster, make sure to switch to your new Kind context:
kubectl config use-context kind-kind-cluster
Step 3: Deploy Headlamp Using the Manifest
Apply the official Headlamp deployment manifest:
kubectl apply -f https://raw.githubusercontent.com/kinvolk/headlamp/main/kubernetes-headlamp.yaml

This uses the kube-system namespace by default.
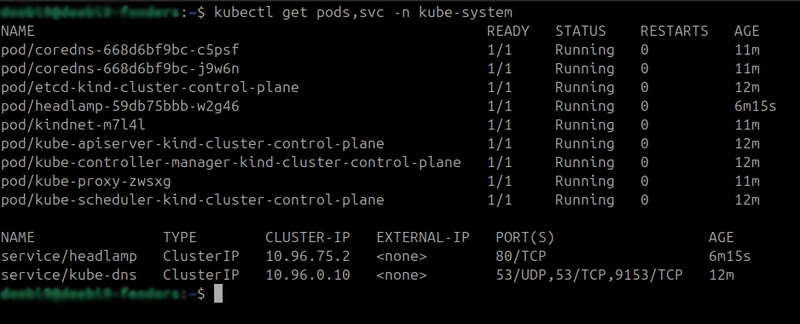
Step 4: Verify the Deployment
Check if the Headlamp pod and service are running:
kubectl get pods,svc -n kube-system
Accessing the Dashboard
Port Forward the Service
kubectl port-forward -n kube-system service/headlamp 8080:80
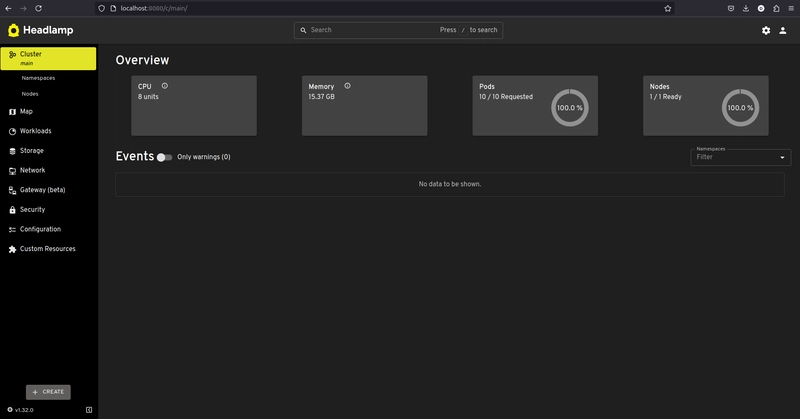
Now open http://localhost:8080 in your browser.
Logging in with a Service Account Token
To access the dashboard, you’ll need to authenticate with a service account token.
Create a Service Account
kubectl -n kube-system create serviceaccount headlamp-admin
Bind Admin Role
kubectl create clusterrolebinding headlamp-admin --serviceaccount=kube-system:headlamp-admin --clusterrole=cluster-admin
Generate the Token
kubectl create token headlamp-admin -n kube-system
Copy the token and paste it into the Headlamp login screen
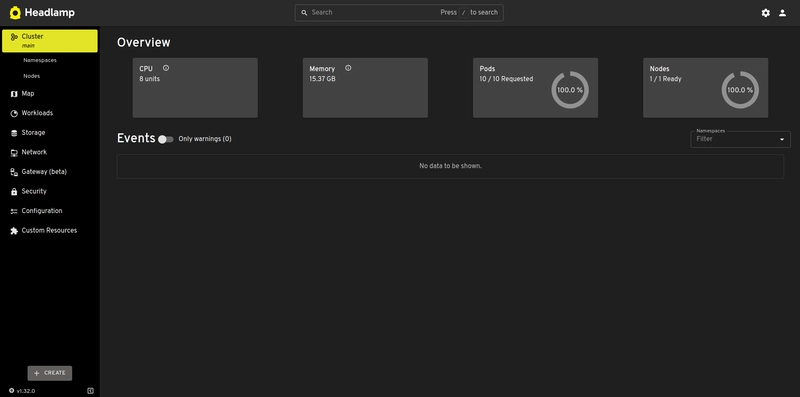
You’ll be redirected to the full dashboard:
Conclusion
In this blog, we walked through setting up Headlamp in a Kind cluster from scratch. After creating a Kind cluster, switching context, deploying Headlamp using the official manifest, and accessing it via port-forwarding, you now have a clean and functional Kubernetes UI.
Why Headlamp?
It provides a beginner-friendly GUI to visualize resources, inspect logs, and monitor workloads which makes it easier for newcomers to explore Kubernetes.
For production environments, avoid giving full admin access. Instead, follow the principle of least privilege by configuring RBAC carefully. You can also integrate OIDC for secure authentication






![New Apple iPad mini 7 On Sale for $399! [Lowest Price Ever]](https://www.iclarified.com/images/news/96096/96096/96096-640.jpg)

![Rapidus in Talks With Apple as It Accelerates Toward 2nm Chip Production [Report]](https://www.iclarified.com/images/news/96937/96937/96937-640.jpg)










 (1).webp?#)


_Christophe_Coat_Alamy.jpg?#)


![[The AI Show Episode 142]: ChatGPT’s New Image Generator, Studio Ghibli Craze and Backlash, Gemini 2.5, OpenAI Academy, 4o Updates, Vibe Marketing & xAI Acquires X](https://www.marketingaiinstitute.com/hubfs/ep%20142%20cover.png)




![[DEALS] The Premium Learn to Code Certification Bundle (97% off) & Other Deals Up To 98% Off – Offers End Soon!](https://www.javacodegeeks.com/wp-content/uploads/2012/12/jcg-logo.jpg)



![From drop-out to software architect with Jason Lengstorf [Podcast #167]](https://cdn.hashnode.com/res/hashnode/image/upload/v1743796461357/f3d19cd7-e6f5-4d7c-8bfc-eb974bc8da68.png?#)


.jpg?#)


.png?#)


