Step-by-step guide on how to create a Windows 11 VM that is highly available on the Azure portal.
Table of contents Introduction Create a Windows 11 VM that's highly available. Conclusion. Introduction Creating a highly available Windows 11 virtual machine (VM) on the Azure portal is essential for ensuring reliability and continuous access to your applications. Creating a highly available Windows 11 virtual machine (VM) implies that the setup is designed to minimize downtime and ensure reliability, even in the event of hardware or software failures. This typically involves leveraging features like availability zones (placing VMs in different physical locations/zones within a region to prevent a single point of failure), load balancing, and redundant resources. It ensures that the VM can continuously provide its intended services or applications, making it ideal for critical workloads where uninterrupted accessibility is essential. This step-by-step guide walks you through setting up and configuring a Windows 11 VM with features that enhance availability and fault tolerance. Whether for development, testing, or operational use, this guide equips you with the tools to build a resilient cloud environment tailored to your needs. 2.0. Create a Windows 11 VM that's highly available. 2.1. Login to the Azure portal, navigate to the Virtual machine, and select Create. 2.2 Fill in the project details and create a new resource group. 2.3. Fill in the instance details. 2.4. Navigate to the administrator section, and create a preferred username, and password. Also, choose the RDP(3389) inbound port. Ensure Licensing is checked. 2.5. Go to the Networking section and create a load balancer. 2.6. Navigate to the monitoring section and disable diagnostics. 2.7. Go to the Tag section, and add the name and value. Review and Create 2.8. Click on Create 2.9. Click on Go to Resource 2.10. Click on public IP address to extend Idle time out and save 2.11. Click on Connect. Click on Select to Configure RDP file Download the RDP file. 2.12. Install Microsoft remote desktop if not already installed and then open the downloaded Windows 11 RDP file. Conclusion By completing this guide, you've successfully created a highly available Windows 11 virtual machine on the Azure portal. This setup ensures reliability, scalability, and continuous access to your applications, even in unexpected disruptions. Regular maintenance and monitoring will help you optimize performance and keep your cloud environment resilient to evolving challenges.
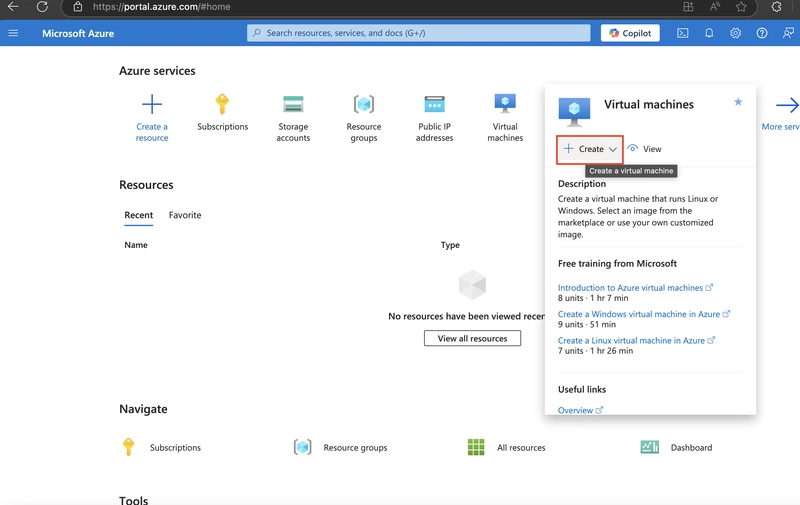
Table of contents
- Introduction
- Create a Windows 11 VM that's highly available.
- Conclusion.
Introduction
Creating a highly available Windows 11 virtual machine (VM) on the Azure portal is essential for ensuring reliability and continuous access to your applications. Creating a highly available Windows 11 virtual machine (VM) implies that the setup is designed to minimize downtime and ensure reliability, even in the event of hardware or software failures. This typically involves leveraging features like availability zones (placing VMs in different physical locations/zones within a region to prevent a single point of failure), load balancing, and redundant resources. It ensures that the VM can continuously provide its intended services or applications, making it ideal for critical workloads where uninterrupted accessibility is essential.
This step-by-step guide walks you through setting up and configuring a Windows 11 VM with features that enhance availability and fault tolerance. Whether for development, testing, or operational use, this guide equips you with the tools to build a resilient cloud environment tailored to your needs.
2.0. Create a Windows 11 VM that's highly available.
2.1. Login to the Azure portal, navigate to the Virtual machine, and select Create.

2.2 Fill in the project details and create a new resource group.
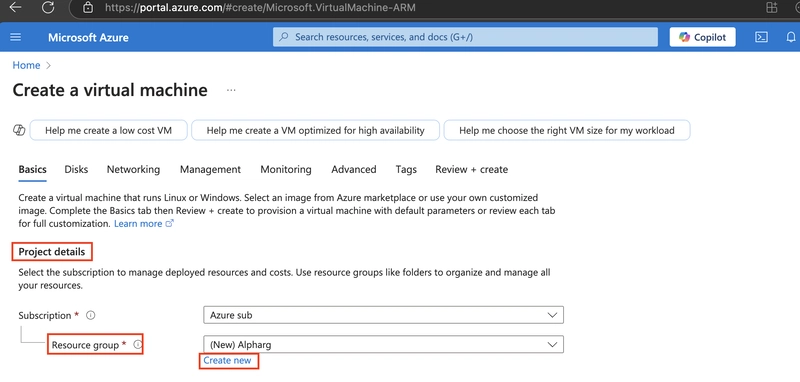
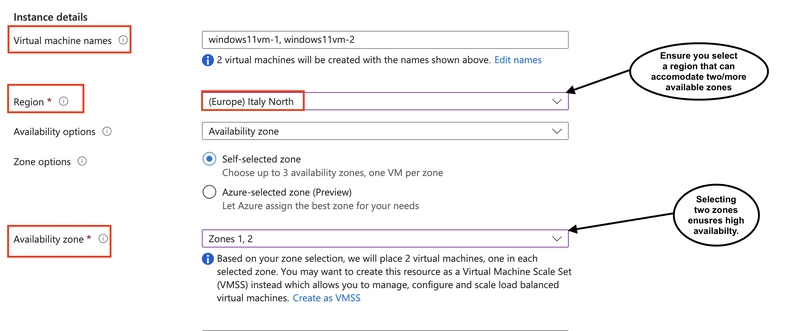
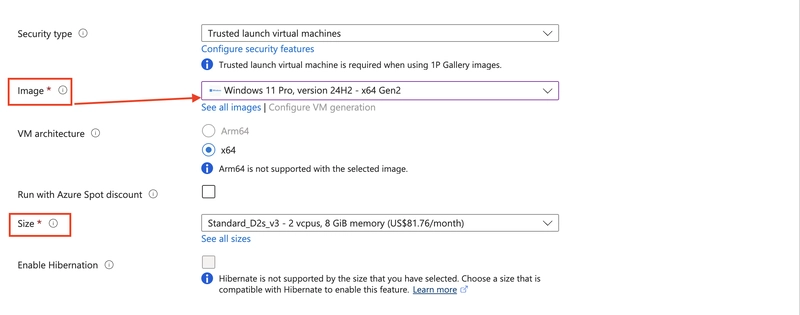
2.3. Fill in the instance details.
2.4. Navigate to the administrator section, and create a preferred username, and password. Also, choose the RDP(3389) inbound port.
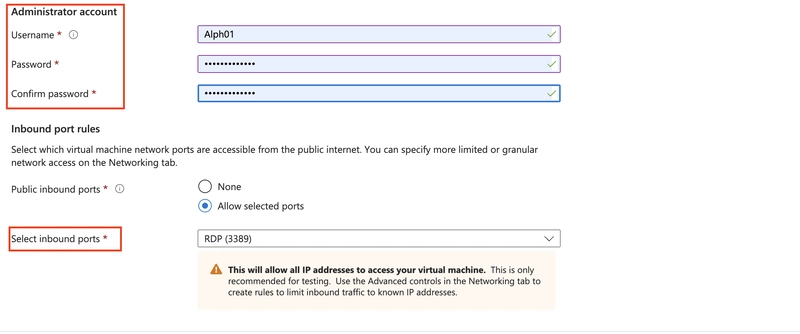
Ensure Licensing is checked.

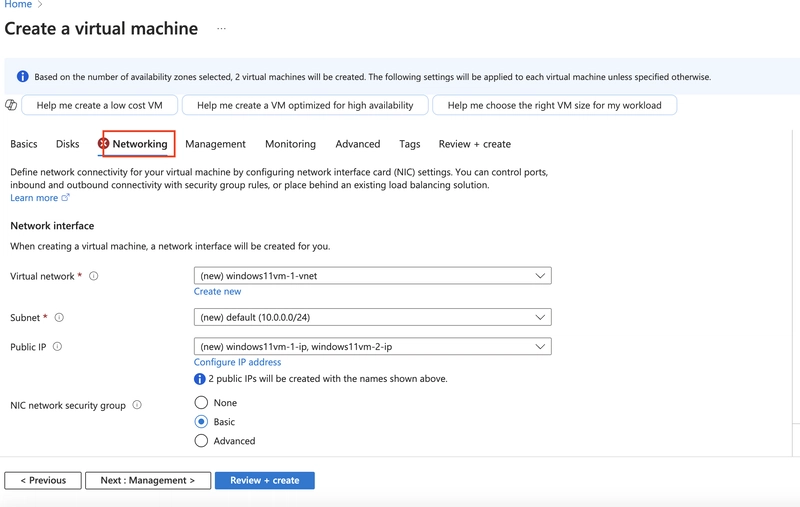
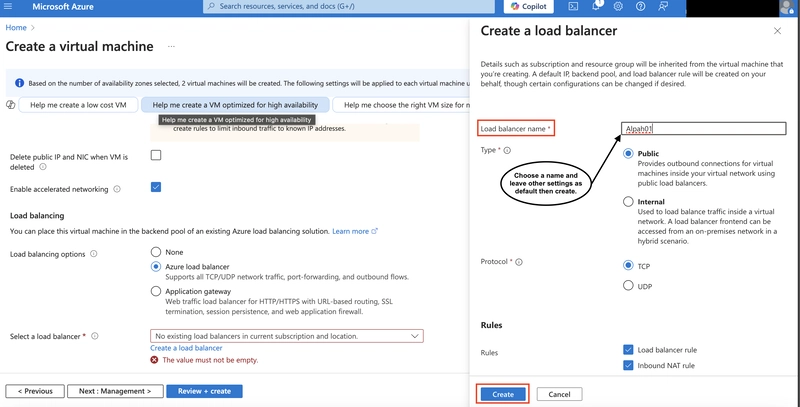
2.5. Go to the Networking section and create a load balancer.


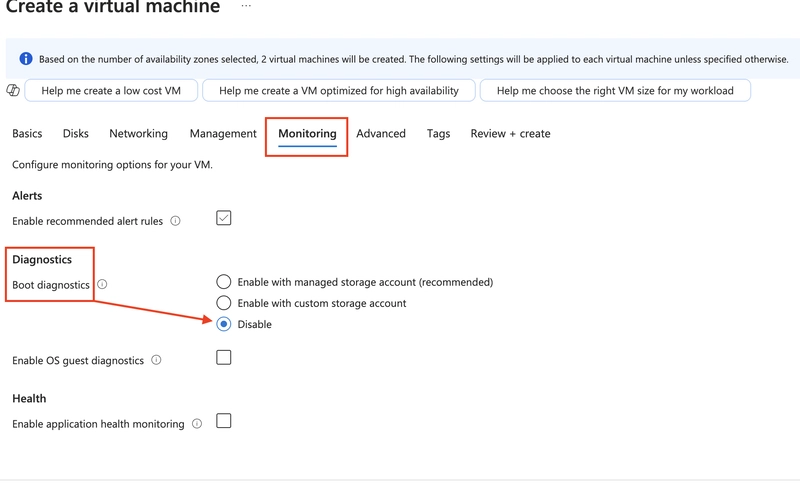
2.6. Navigate to the monitoring section and disable diagnostics.
2.7. Go to the Tag section, and add the name and value.
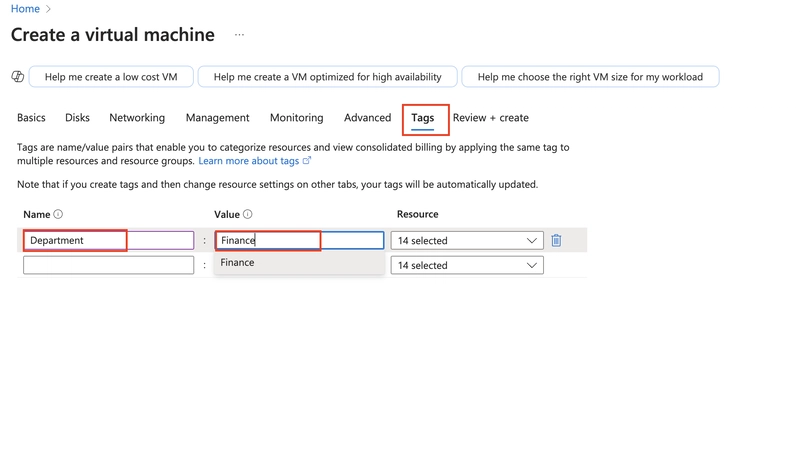
Review and Create
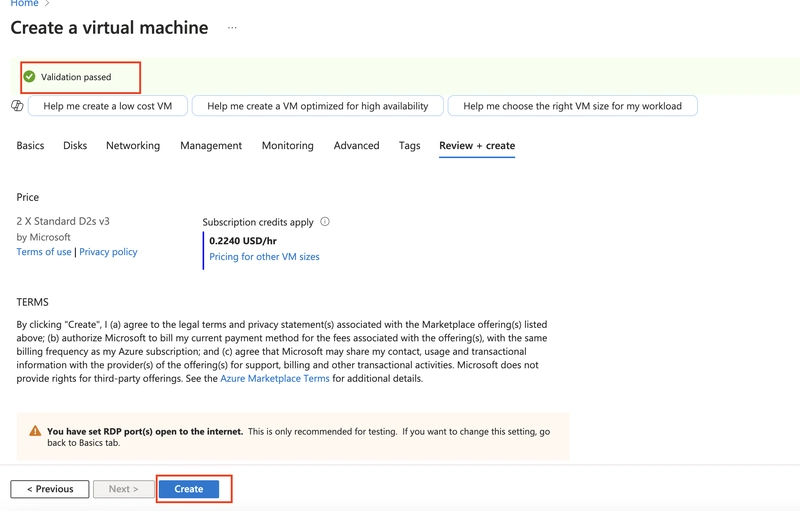
2.8. Click on Create
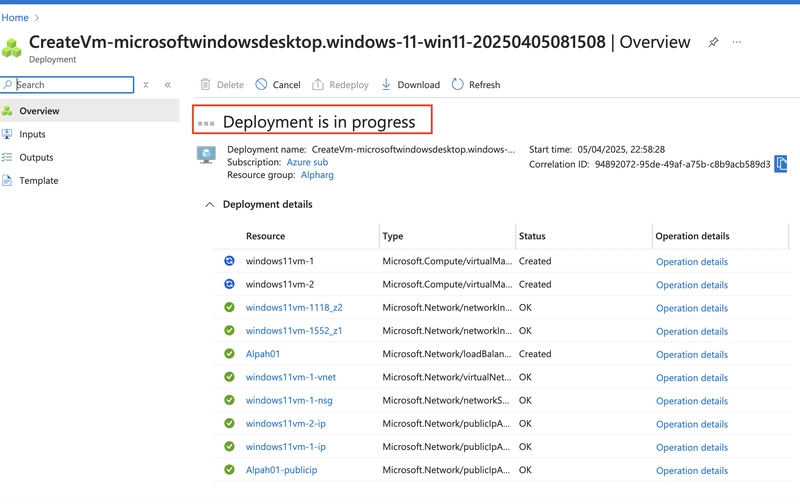
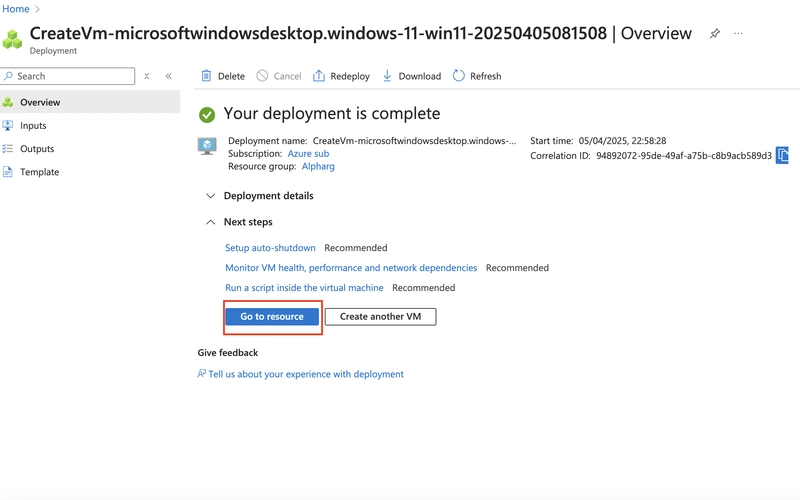
2.9. Click on Go to Resource
2.10. Click on public IP address to extend Idle time out and save
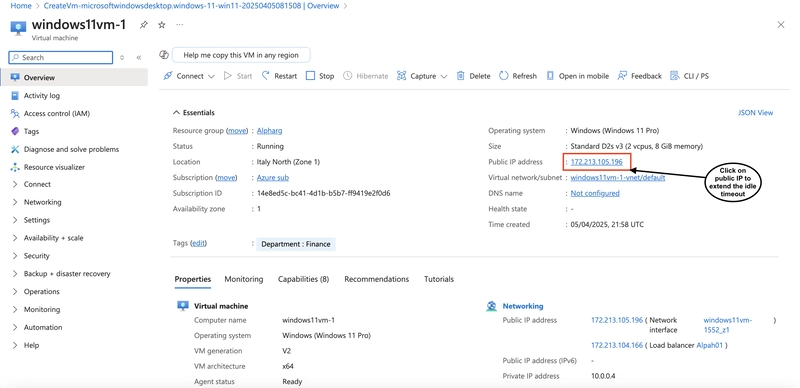
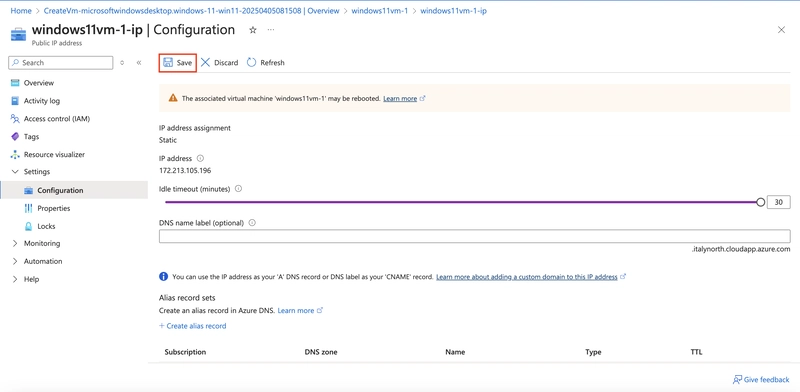
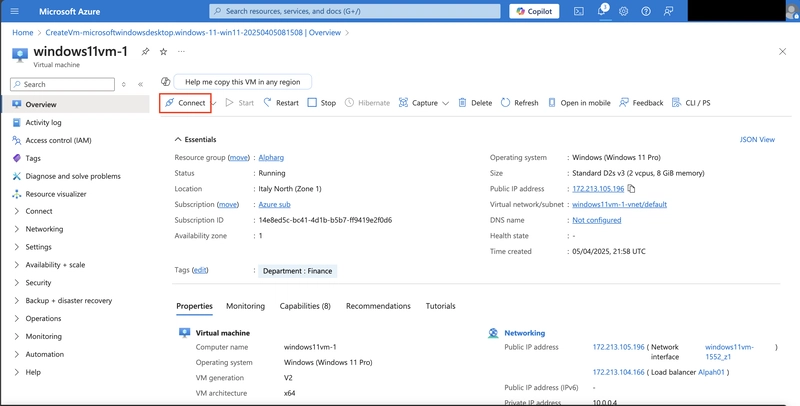
2.11. Click on Connect.
Click on Select to Configure RDP file
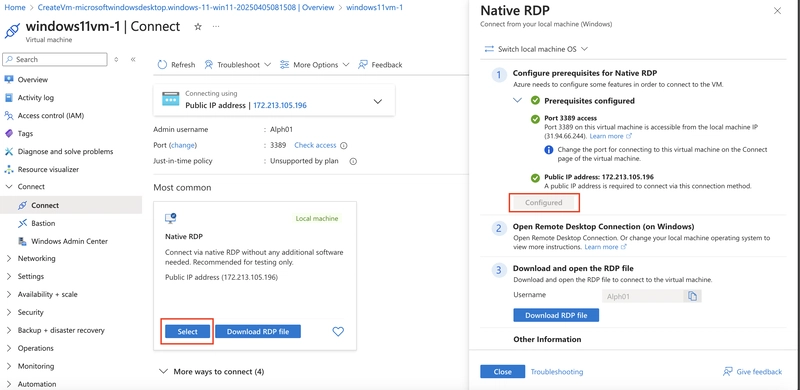
Download the RDP file.
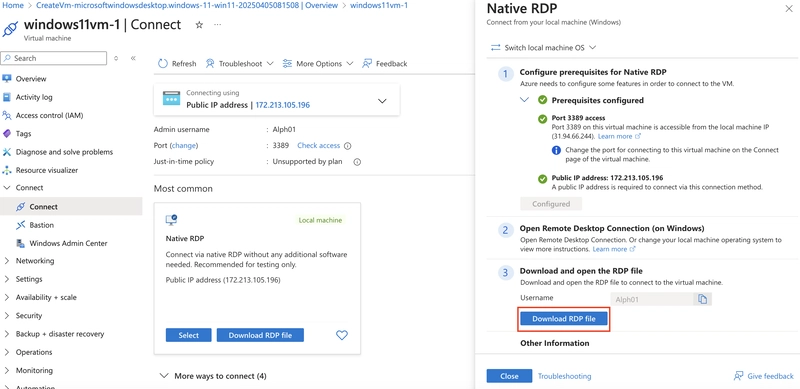
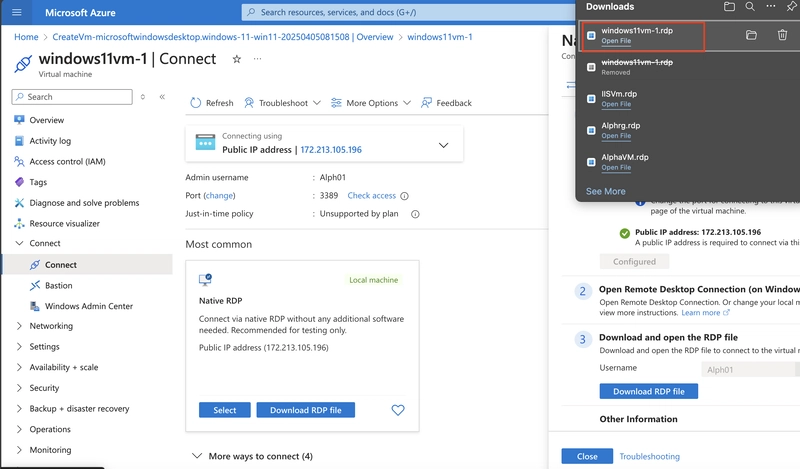
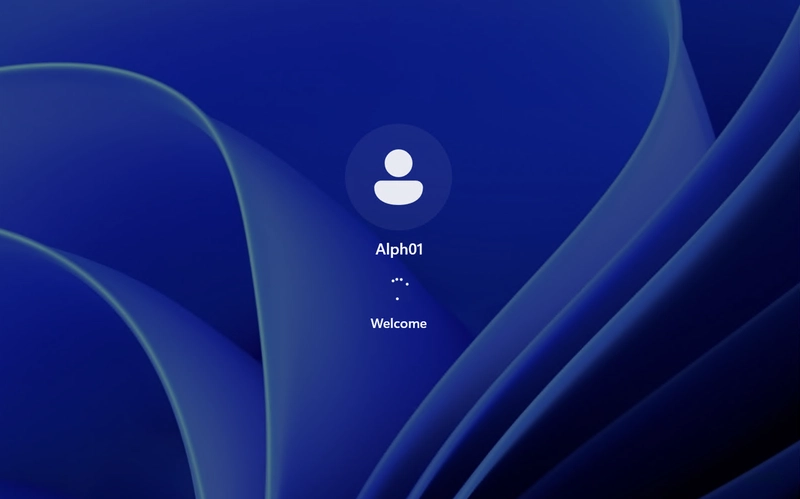
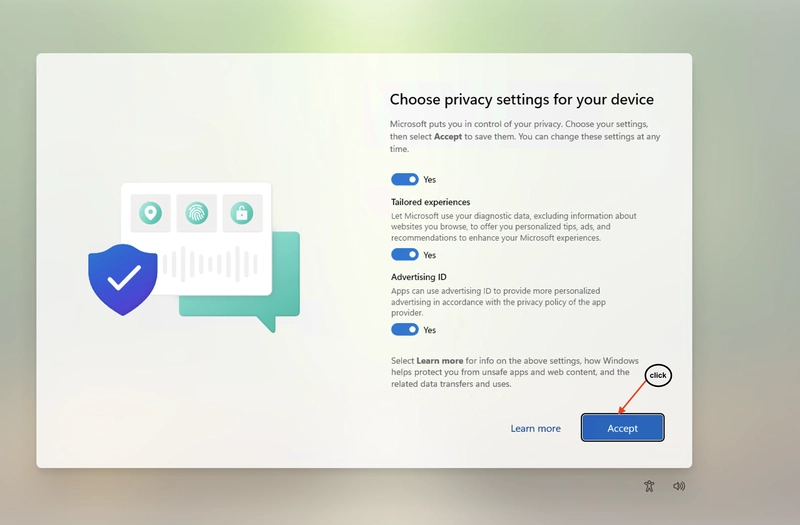
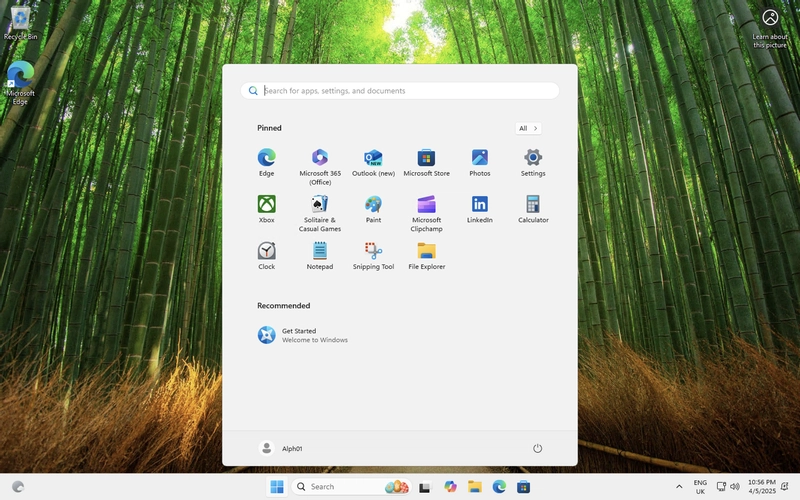
2.12. Install Microsoft remote desktop if not already installed and then open the downloaded Windows 11 RDP file.
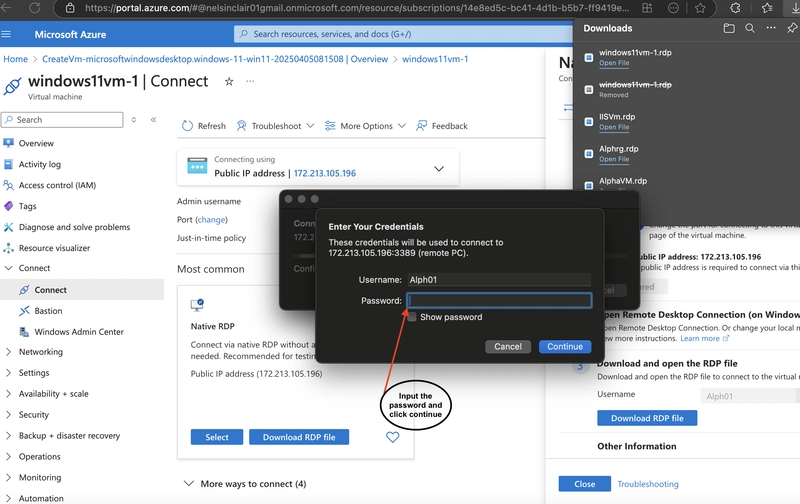
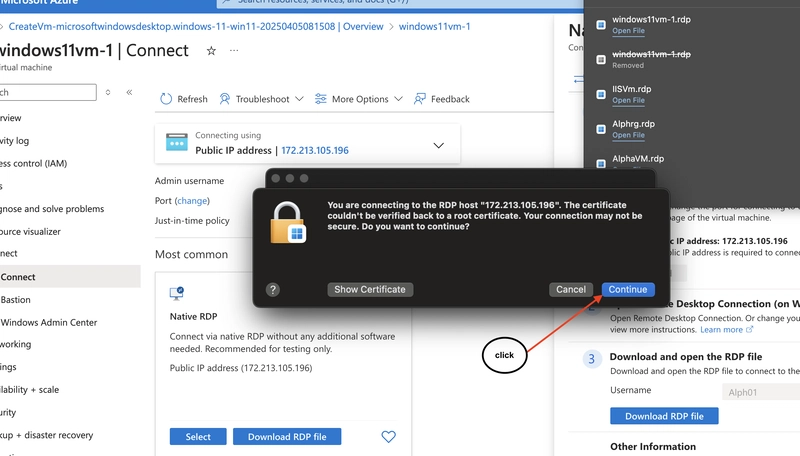
Conclusion
By completing this guide, you've successfully created a highly available Windows 11 virtual machine on the Azure portal. This setup ensures reliability, scalability, and continuous access to your applications, even in unexpected disruptions. Regular maintenance and monitoring will help you optimize performance and keep your cloud environment resilient to evolving challenges.




![Tariffs Threaten Apple's $999 iPhone Price Point in the U.S. [Gurman]](https://www.iclarified.com/images/news/96943/96943/96943-640.jpg)
![iPhone 17 Pro Won't Feature Two-Toned Back [Gurman]](https://www.iclarified.com/images/news/96944/96944/96944-640.jpg)

![New Apple iPad mini 7 On Sale for $399! [Lowest Price Ever]](https://www.iclarified.com/images/news/96096/96096/96096-640.jpg)




 (1).webp?#)


_Christophe_Coat_Alamy.jpg?#)


![[The AI Show Episode 142]: ChatGPT’s New Image Generator, Studio Ghibli Craze and Backlash, Gemini 2.5, OpenAI Academy, 4o Updates, Vibe Marketing & xAI Acquires X](https://www.marketingaiinstitute.com/hubfs/ep%20142%20cover.png)


![From drop-out to software architect with Jason Lengstorf [Podcast #167]](https://cdn.hashnode.com/res/hashnode/image/upload/v1743796461357/f3d19cd7-e6f5-4d7c-8bfc-eb974bc8da68.png?#)


![[DEALS] The Premium Learn to Code Certification Bundle (97% off) & Other Deals Up To 98% Off – Offers End Soon!](https://www.javacodegeeks.com/wp-content/uploads/2012/12/jcg-logo.jpg)


.png?#)


