Getting started with Amazon Q Developer CLI
If you are reading this then there is a good chance your curiosity has been piqued by the excitement that Amazon Q Developer CLI has been generating online. Developers have been sharing how they have been using Amazon Q Developer CLI to create amazing automations, create new applications from scratch, vibe code fun games, and much more (check out the end of this post for a small selection of those). You don't need to have an AWS Account to be able to use Amazon Q Developer CLI, so everyone can join in the fun...yes everyone! In this post I am going to talk more about what Amazon Q Developer CLI is, and then help you get started. Lets dive right in. What is Amazon Q Developer CLI How often to you use your terminal or shell? As a developer, I spend probably most of my time in the terminal when I am not writing code in my IDE. If you are not a developer, maybe you work as a sysadmin, or perhaps a devops engineer, you might spend all of your time in the terminal - writing scripts to automate stuff, running various tools to help with your job, and helping to fix things when they go wrong. The terminal is an essential part of our job, and so we need to make sure we are 'command line confident' as I like to say. It's tough though, with so many tools we use to help with our activities, it is easy to sometimes forget command line parameters and options - especially when these are being updated to support newer versions. With generative AI increasingly being integrated and enabled in developer tooling, wouldn't it be great if we could have some of those capabilities to use in the command line. Well the good news is that you can! All the goodness you have in the IDE with things like the Amazon Q Developer IDE plugin, you can now have at your fingertips in your terminal and on the command line. Amazon Q Developer CLI is an open source (dual licensed, Apache 2.0 and MIT) that you can download and install, and provides these capabilities: command auto complete - if you are a fan of how auto completion works in the IDE, Amazon Q Developer CLI supports hundreds of popular CLI tools (for example git, docker, aws) and brings that to the command line natural language to command translation - helps you convert your intent to the appropriate tools and arguments that you can then run in the command line - perfect for those situations where you might forget all the various command line parameters and options, but you know what you want to do natural language chat with agentic execution - lets you interact with your terminal using natural language (ask questions, debug issues, explore the codebase, etc) and then take action (generate code, edit files, automate Git workflows, resolve merge conflicts, and more) with your permission Whats more, if English is not your first language then don't worry as you can interact with Amazon Q Developer CLI in lots of languages. My colleague Jeff Barr was even able to use it with Quechua, the indigenous language dating back to pre-Columbian times (read more here). I have tried it in Spanish, and my colleagues from across the world have tried it in their local languages and we all give it the thumbs up! Ok so I hope this sounds good to you. Lets get started, by walking you through the installation steps and then showing you how to get started. Installing To use Amazon Q Developer CLI all you need is a supported operating system (MacOS, Linux, and Windows using the Windows Subsystem for Linux, wsl), a supported terminal (don't worry, unless you are using something very different it is likely you are using a supported terminal), and a supported shell (zsh, bash, and fish). Minimal and Full installations - There are two types of installation: a minimal installation that installs the Amazon Q Developer CLI chat and autocomplete features, and then a full installation that additional installs the GUI configuration tool. Don't worry too much though, the key thing is that both installation types will help you get Amazon Q Developer CLI up and running in your environment. The installation process installs the binaries for your platform, configures integration with the terminal (or shell), and then help you log in. I have put together a couple of guides to help with installation. First up is the Essential guide to installing Amazon Q Developer CLI on Linux for those of you who are using Linux, and then for Windows users I put together The essential guide to installing Amazon Q Developer CLI on Windows. For MacOS users, they have the simplest installation which you can find here, with a direct download or using brew to install it. AWS Community Builder Ravindra Singh has also put together a Mac installation guide, Install and Use Amazon Q AI Assistant on Mac Once installed, you will need to login. There are two types of account you can login with: Builder ID and Identity Centre accounts. To get started for free, we can use the Builder ID login. If you have not
If you are reading this then there is a good chance your curiosity has been piqued by the excitement that Amazon Q Developer CLI has been generating online. Developers have been sharing how they have been using Amazon Q Developer CLI to create amazing automations, create new applications from scratch, vibe code fun games, and much more (check out the end of this post for a small selection of those). You don't need to have an AWS Account to be able to use Amazon Q Developer CLI, so everyone can join in the fun...yes everyone!
In this post I am going to talk more about what Amazon Q Developer CLI is, and then help you get started. Lets dive right in.
What is Amazon Q Developer CLI
How often to you use your terminal or shell? As a developer, I spend probably most of my time in the terminal when I am not writing code in my IDE. If you are not a developer, maybe you work as a sysadmin, or perhaps a devops engineer, you might spend all of your time in the terminal - writing scripts to automate stuff, running various tools to help with your job, and helping to fix things when they go wrong. The terminal is an essential part of our job, and so we need to make sure we are 'command line confident' as I like to say.
It's tough though, with so many tools we use to help with our activities, it is easy to sometimes forget command line parameters and options - especially when these are being updated to support newer versions. With generative AI increasingly being integrated and enabled in developer tooling, wouldn't it be great if we could have some of those capabilities to use in the command line.
Well the good news is that you can! All the goodness you have in the IDE with things like the Amazon Q Developer IDE plugin, you can now have at your fingertips in your terminal and on the command line. Amazon Q Developer CLI is an open source (dual licensed, Apache 2.0 and MIT) that you can download and install, and provides these capabilities:
- command auto complete - if you are a fan of how auto completion works in the IDE, Amazon Q Developer CLI supports hundreds of popular CLI tools (for example git, docker, aws) and brings that to the command line
- natural language to command translation - helps you convert your intent to the appropriate tools and arguments that you can then run in the command line - perfect for those situations where you might forget all the various command line parameters and options, but you know what you want to do
- natural language chat with agentic execution - lets you interact with your terminal using natural language (ask questions, debug issues, explore the codebase, etc) and then take action (generate code, edit files, automate Git workflows, resolve merge conflicts, and more) with your permission
Whats more, if English is not your first language then don't worry as you can interact with Amazon Q Developer CLI in lots of languages. My colleague Jeff Barr was even able to use it with Quechua, the indigenous language dating back to pre-Columbian times (read more here). I have tried it in Spanish, and my colleagues from across the world have tried it in their local languages and we all give it the thumbs up!
Ok so I hope this sounds good to you. Lets get started, by walking you through the installation steps and then showing you how to get started.
Installing
To use Amazon Q Developer CLI all you need is a supported operating system (MacOS, Linux, and Windows using the Windows Subsystem for Linux, wsl), a supported terminal (don't worry, unless you are using something very different it is likely you are using a supported terminal), and a supported shell (zsh, bash, and fish).
Minimal and Full installations - There are two types of installation: a minimal installation that installs the Amazon Q Developer CLI chat and autocomplete features, and then a full installation that additional installs the GUI configuration tool. Don't worry too much though, the key thing is that both installation types will help you get Amazon Q Developer CLI up and running in your environment.
The installation process installs the binaries for your platform, configures integration with the terminal (or shell), and then help you log in. I have put together a couple of guides to help with installation. First up is the Essential guide to installing Amazon Q Developer CLI on Linux for those of you who are using Linux, and then for Windows users I put together The essential guide to installing Amazon Q Developer CLI on Windows. For MacOS users, they have the simplest installation which you can find here, with a direct download or using brew to install it.
AWS Community Builder Ravindra Singh has also put together a Mac installation guide, Install and Use Amazon Q AI Assistant on Mac
Once installed, you will need to login. There are two types of account you can login with: Builder ID and Identity Centre accounts. To get started for free, we can use the Builder ID login. If you have not already used this, then it is super simple. Access the Builder ID page, and you can register for your free Builder ID alias using your email address. You don't need to have an AWS Account.
Here is a short video of what this looks like:
Once you have installed it, you are good to go and will now have a number of new commands available from within your terminal. Lets take a look at these and how you can get started.
Getting started
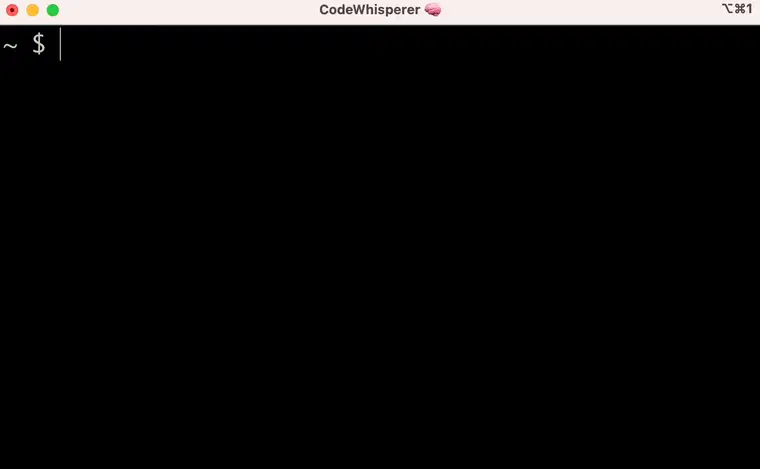
Now that you have Amazon Q Developer CLI installed, all we need to do to access it is open up a terminal. Your terminal will open up a shell, and as part of the installation, that shell will start qterm automatically. Lets walk through some things to get you up and running.
Command completions
The first thing we are going to look at is how command completion works. When you type in a command from the terminal, you will notice that there is now a helper that will provide suggestions as to what command options you want to use.
You can navigate using the up and down arrow keys for the various options, or you can keep typing and the options will change as you type. If you want those options to stop or go away, you can press ESC and it will cancel.
Check out this short video of this in action.
Translating commands
The next thing we are going to do is use Amazon Q Developer CLI to translate your intent to a specific command. Lets say for example we wanted to run a command but we could not remember all the parameters and command line options we needed. This happens to me all the time. So for example, lets say I wanted to find all the files in my local directory that contained the world "amazon-q".
From a terminal I can type:
q translate "find all the files in my current directory and all subdirectories that contain the word amazon-q but exclude hidden files and directories"
and after a short moment, this is what I will get
q translate "find all the files in my current directory and all subdirectories that contain the word amazon-q but exclude hidden files and directories"

  Shell · find . -type f -name "*amazon-q*" -not -path "*/.*" -not -path "./.*"

❯ ⚡ Execute command










![Apple Releases macOS Sequoia 15.5 Beta to Developers [Download]](https://www.iclarified.com/images/news/96915/96915/96915-640.jpg)
![Amazon Makes Last-Minute Bid for TikTok [Report]](https://www.iclarified.com/images/news/96917/96917/96917-640.jpg)
![Apple Releases iOS 18.5 Beta and iPadOS 18.5 Beta [Download]](https://www.iclarified.com/images/news/96907/96907/96907-640.jpg)













.jpg?#)






![[The AI Show Episode 142]: ChatGPT’s New Image Generator, Studio Ghibli Craze and Backlash, Gemini 2.5, OpenAI Academy, 4o Updates, Vibe Marketing & xAI Acquires X](https://www.marketingaiinstitute.com/hubfs/ep%20142%20cover.png)














![Is this a suitable approach to architect a flutter app? [closed]](https://i.sstatic.net/4hMHGb1L.png)


