


![Lowest Prices Ever: Apple Pencil Pro Just $79.99, USB-C Pencil Only $49.99 [Deal]](https://www.iclarified.com/images/news/96863/96863/96863-640.jpg)
![Apple Releases iOS 18.4 RC 2 and iPadOS 18.4 RC 2 to Developers [Download]](https://www.iclarified.com/images/news/96860/96860/96860-640.jpg)


![What Google Messages features are rolling out [March 2025]](https://i0.wp.com/9to5google.com/wp-content/uploads/sites/4/2023/12/google-messages-name-cover.png?resize=1200%2C628&quality=82&strip=all&ssl=1)


![Chip Glitching 101 with [Hash]](https://hackaday.com/wp-content/uploads/2025/03/glitching.jpeg?#)


![[The AI Show Episode 141]: Road to AGI (and Beyond) #1 — The AI Timeline is Accelerating](https://www.marketingaiinstitute.com/hubfs/ep%20141.1.png)
![[The AI Show Episode 140]: New AGI Warnings, OpenAI Suggests Government Policy, Sam Altman Teases Creative Writing Model, Claude Web Search & Apple’s AI Woes](https://www.marketingaiinstitute.com/hubfs/ep%20140%20cover.png)
![[The AI Show Episode 139]: The Government Knows AGI Is Coming, Superintelligence Strategy, OpenAI’s $20,000 Per Month Agents & Top 100 Gen AI Apps](https://www.marketingaiinstitute.com/hubfs/ep%20139%20cover-2.png)


![From broke musician to working dev. How college drop-out Ryan Furrer taught himself to code [Podcast #166]](https://cdn.hashnode.com/res/hashnode/image/upload/v1743189826063/2080cde4-6fc0-46fb-b98d-b3d59841e8c4.png?#)


.png?#)


![Mini Review: Rendering Ranger: R2 [Rewind] (Switch) - A Novel Run 'N' Gun/Shooter Hybrid That's Finally Affordable](https://images.nintendolife.com/0e9d68643dde0/large.jpg?#)


A BLOG THAT SHOWS DETAILED STEPS ON CREATING AND CONNECTING TO A LINUX VM USING A PUBLIC KEY
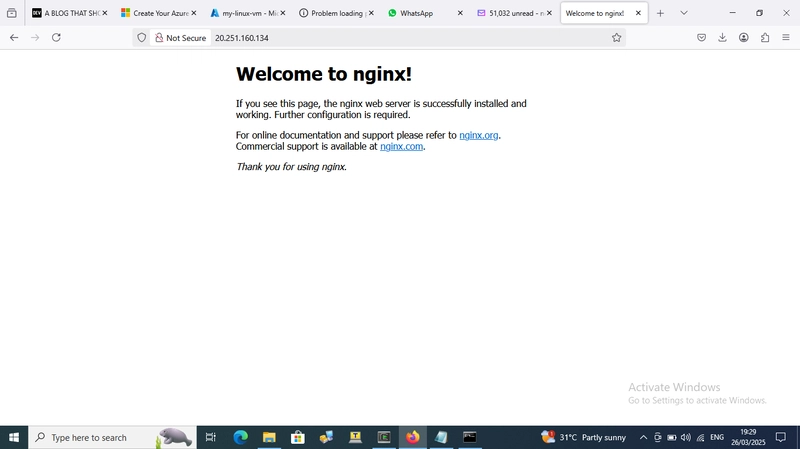
1 Navigate to the Azure portal: GO to portal.azure.com and sign in 2 click on the virtual machine and select azure virtual machine 3 create the virtual machine 4 select the OS disks: 5 Go to the networking interface: 6 the next step is the validation stage: 7 creation of the key file: 8 click on create resource: 9 click on the drop down and select "connect": 10 Go to your download on your PC to located the .PEM and select properties: 11 Go to your PC field and type 'CMD' then run the downloaded root-path 12 you are now update and upgrade your linux by typing the following commands: sudo apt update and sudo apt upgrade 13 put the public address on your web browser
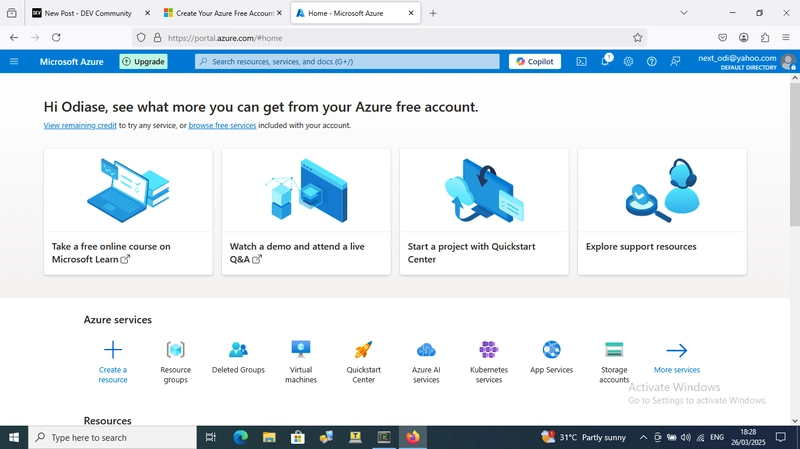
1 Navigate to the Azure portal:
- GO to portal.azure.com and sign in
2 click on the virtual machine and select azure virtual machine
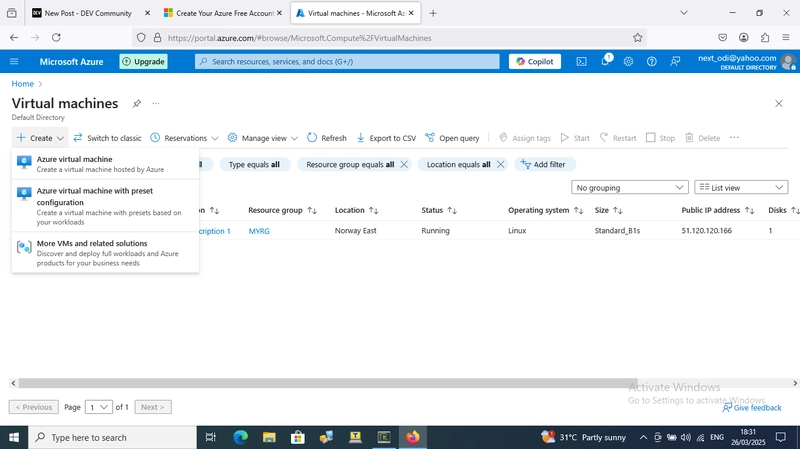
3 create the virtual machine
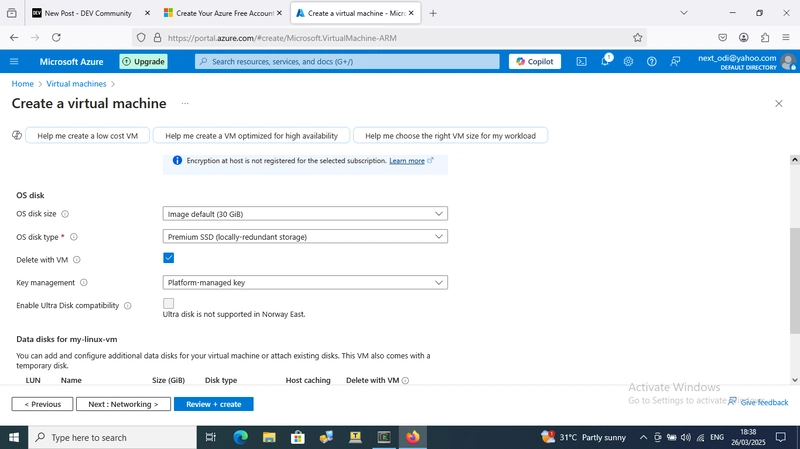
4 select the OS disks:
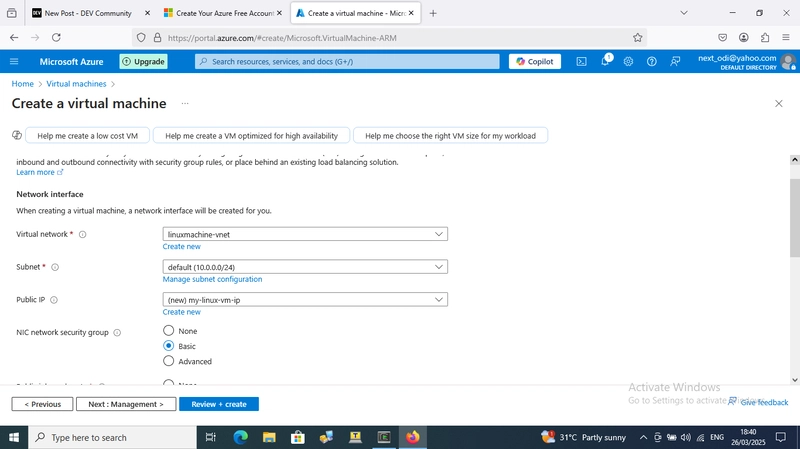
5 Go to the networking interface:
6 the next step is the validation stage:

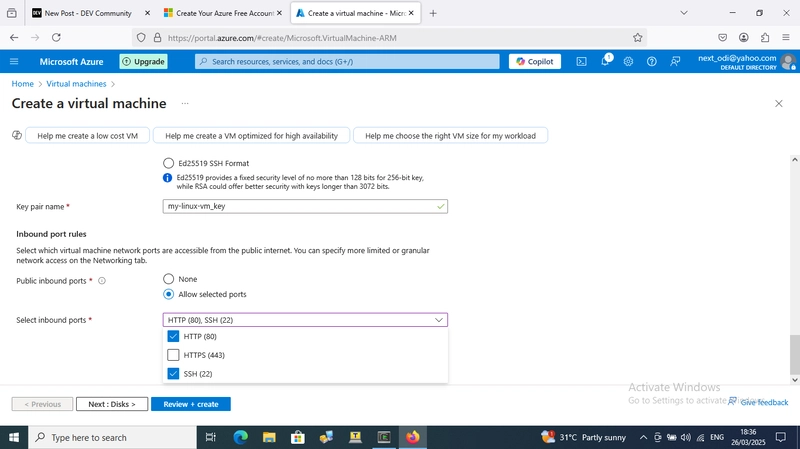
7 creation of the key file:
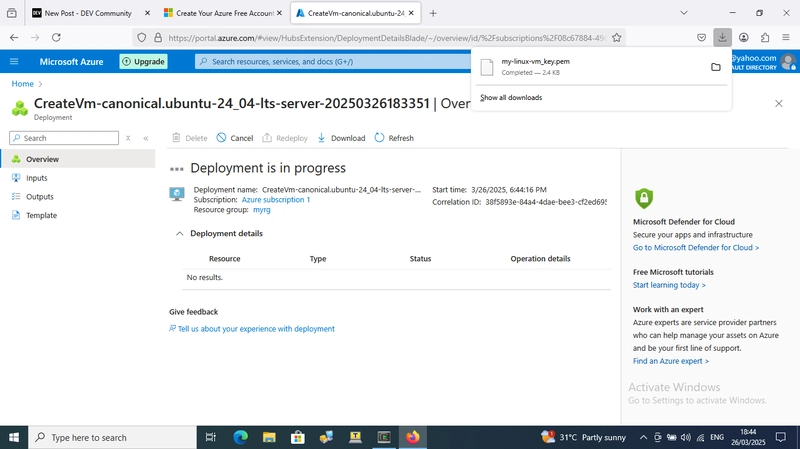
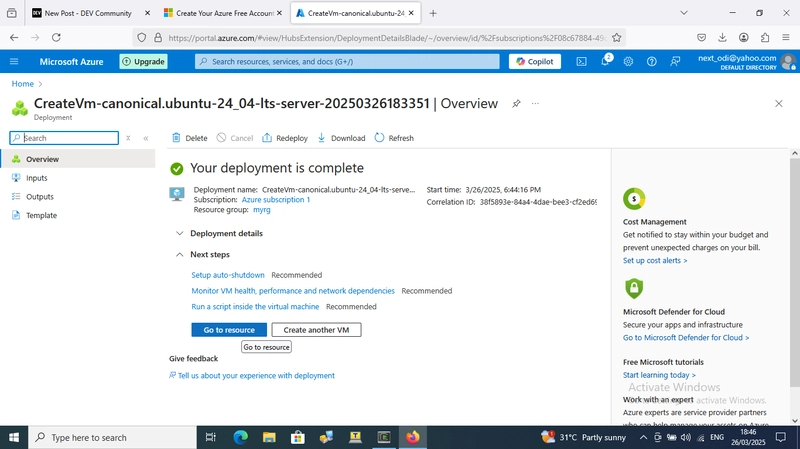
8 click on create resource:
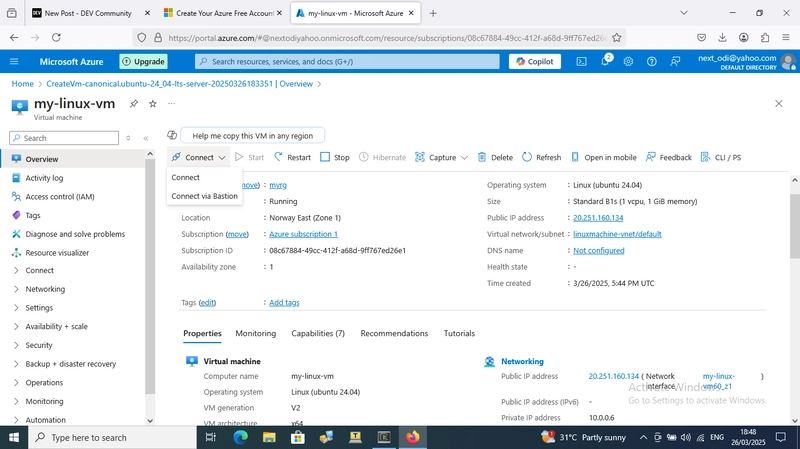
9 click on the drop down and select "connect":
10 Go to your download on your PC to located the .PEM and select properties:

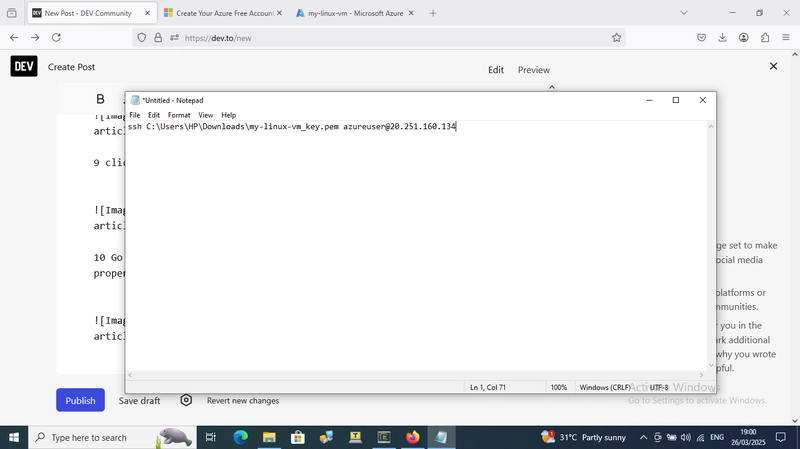

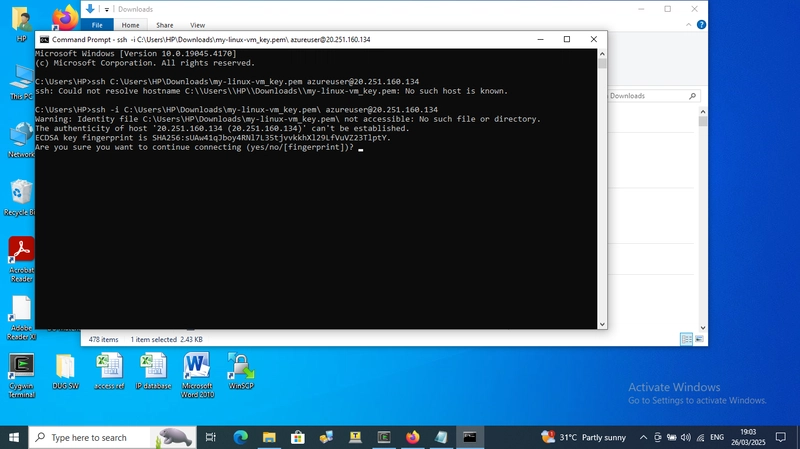
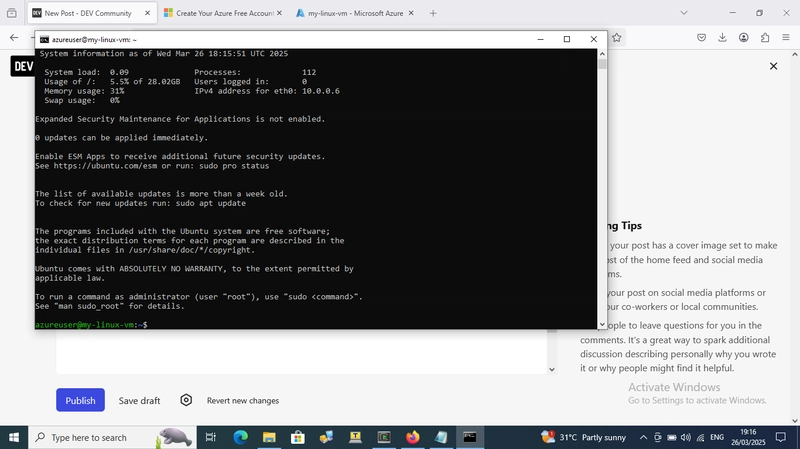
11 Go to your PC field and type 'CMD' then run the downloaded root-path
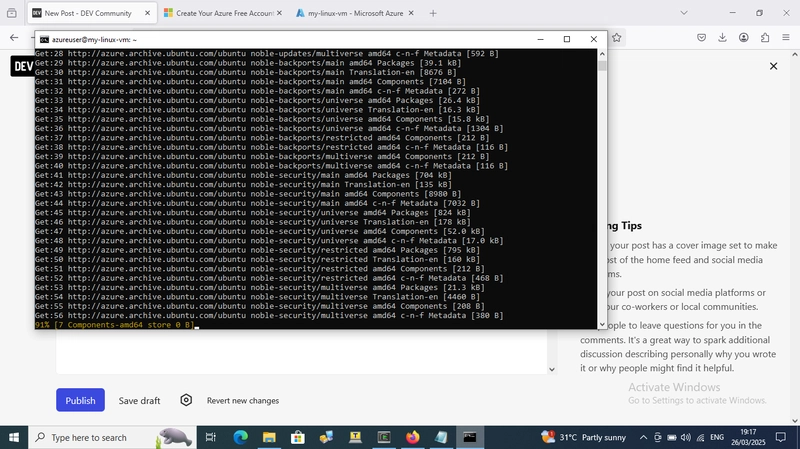
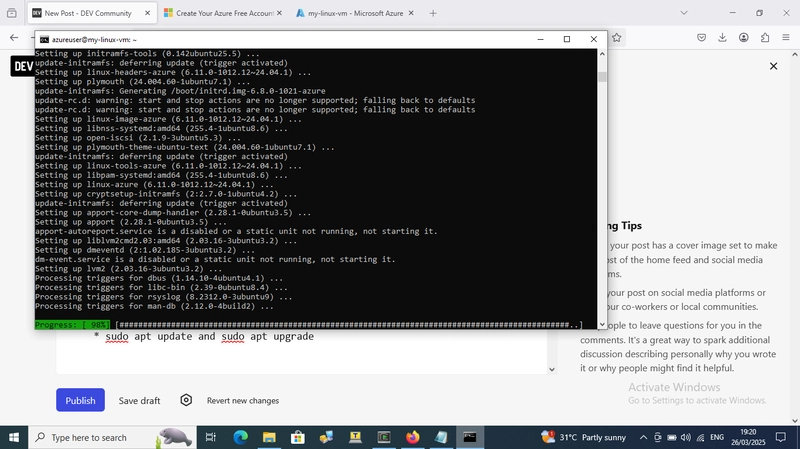
12 you are now update and upgrade your linux by typing the following commands:
- sudo apt update and sudo apt upgrade
13 put the public address on your web browser