


![Apple Watch Series 10 Prototype with Mystery Sensor Surfaces [Images]](https://www.iclarified.com/images/news/96892/96892/96892-640.jpg)


_Andrew_Angelov_Alamy.jpg?#)


![[The AI Show Episode 142]: ChatGPT’s New Image Generator, Studio Ghibli Craze and Backlash, Gemini 2.5, OpenAI Academy, 4o Updates, Vibe Marketing & xAI Acquires X](https://www.marketingaiinstitute.com/hubfs/ep%20142%20cover.png)


![Is this a suitable approach to architect a flutter app? [closed]](https://i.sstatic.net/4hMHGb1L.png)


![From broke musician to working dev. How college drop-out Ryan Furrer taught himself to code [Podcast #166]](https://cdn.hashnode.com/res/hashnode/image/upload/v1743189826063/2080cde4-6fc0-46fb-b98d-b3d59841e8c4.png?#)


-1280x720.jpg?width=1920&height=1920&fit=bounds&quality=80&format=jpg&auto=webp#)


AWS THREE-TIER ARCHITECTURE
AWS 3-Tier Architecture The 3-tier architecture is a fundamental design pattern that divides an application into three layers: presentation, application, and database. This separation enhances scalability, security, and flexibility, making it a popular choice for modern cloud solutions. In this blog, I’m excited to share the results of my implementation of the AWS 3-tier architecture through detailed screenshots. Each image reflects the output at key steps of the project—from design to deployment. ARCHITECTURE DIAGRAM: Part 1 1. Setting up the codebase To implement the AWS 3-tier architecture effectively, I started by leveraging a pre-existing codebase from GitHub. Clone the GitHub repository. 2. Create an S3 Bucket Navigate to the S3 service and create a new S3 bucket. 3. IAM EC2 Instance Role Creation Create a Role. The Role is use to connect EC2 and S3. Part 2 - Networking and Security 1. Create VPC Go to VPC Dashboard and create VPC. The VPC is created to provide an isolated network environment for hosting resources securely. 2. Create Subnet Create 6 subnets (3 in each availability zone) to ensure high availability, with at least 2 public subnets for the web layer and 4 private subnets for the application and database layers. A subnet is public when connected to an Internet Gateway; otherwise, it is private. 3. Internet Gateway Create an Internet Gateway and attach it to VPC. Internet gateway attached to VPC 4. NAT Gateway A NAT Gateway is created to allow resources in private subnets to access the internet without exposing them to incoming internet traffic. 5. Routing Configuration Create three route tables one route table for the web layer public subnets and 2 more route tables, one for each app layer private subnet in each availability zone. 6. Security Groups Security Groups define inbound (ingress) and outbound (egress) rules for EC2 instances, Load Balancers, and other AWS services, ensuring controlled access to resources. Part 3 - Database Deployment 1. Subnet Groups Create RDS Subnet groups. 2. Database Deployment Create RDS Database(MySQL-Compatible Amazon Aurora). Part - 4 1. App Instance Deployment Create an EC2 instance for App Tier. 2. Connect to Instance 3. Configure Database 4. Configure App Instance Upload the app-tier folder to the S3 bucket that you created in part 1. Connect to the instance and install necessary components. 5. Test App Tier Part 5 - Internal Load Balancing and Auto Scaling 1. App Tier AMI Create AMI for App Tier instance. 2. Target Group Create a Target Group for App Tier instance. 3. Internal Load Balancer Create an Application Load Balancer for App Tier instance. 4. Launch Template Create a Launch template with the AMI. 5. Auto Scaling Create an Auto Scaling Group for the app instances. Part 6 - Web Instance Deployment 1. Update Config File Update the Internal Load Balancer's DNS name in the 'nginx.conf' file and upload it to S3. 2. Web Instance Deployment Create an EC2 instance for Web Tier. 3. Connect and Configure Web Instance Part 7 - External Load Balancer and Auto Scaling 1. Web Tier AMI Create AMI for Web Tier instance. 2. Target Group Create a Target Group for Web Tier instance. 3. Internet Facing Load Balancer Create an Internet facing Application Load Balancer for Web Tier instance. 4. Launch Template 5. Auto Scaling Output The AWS 3-tier architecture has been successfully implemented, enhancing scalability, security, and performance for an efficient cloud-based infrastructure.
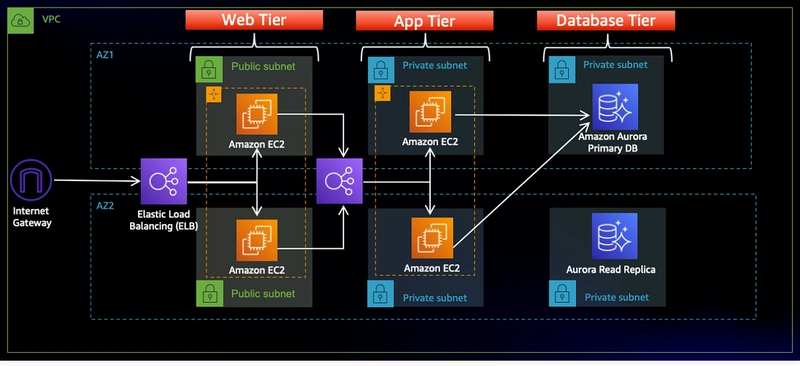
AWS 3-Tier Architecture The 3-tier architecture is a fundamental design pattern that divides an application into three layers: presentation, application, and database. This separation enhances scalability, security, and flexibility, making it a popular choice for modern cloud solutions.
In this blog, I’m excited to share the results of my implementation of the AWS 3-tier architecture through detailed screenshots. Each image reflects the output at key steps of the project—from design to deployment.
ARCHITECTURE DIAGRAM:
Part 1
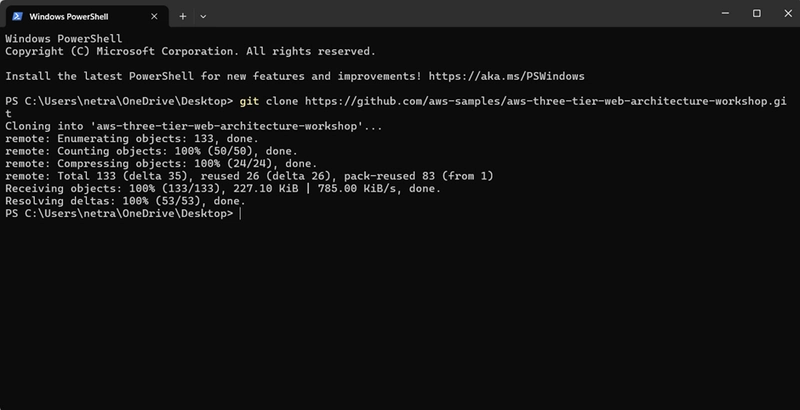
1. Setting up the codebase
- To implement the AWS 3-tier architecture effectively, I started by leveraging a pre-existing codebase from GitHub.
- Clone the GitHub repository.
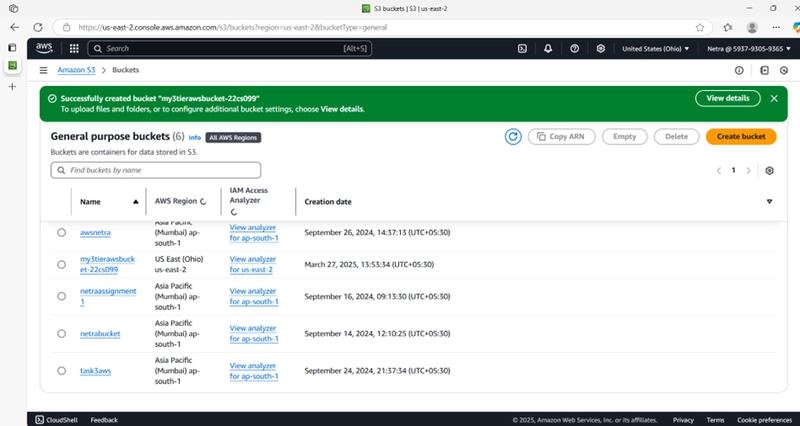
2. Create an S3 Bucket
Navigate to the S3 service and create a new S3 bucket.
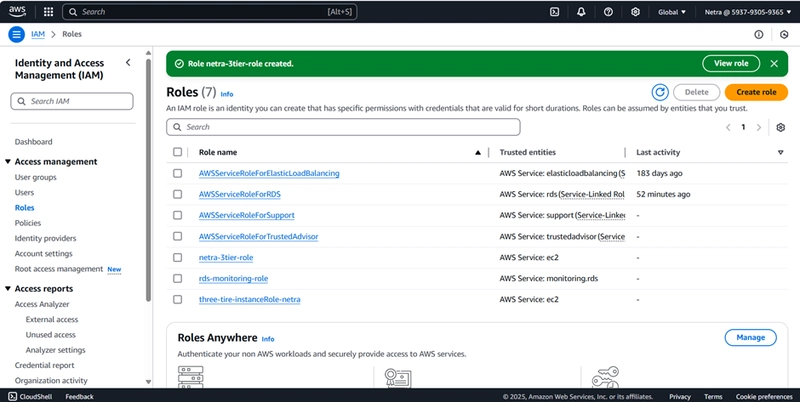
3. IAM EC2 Instance Role Creation
- Create a Role.
- The Role is use to connect EC2 and S3.
Part 2 - Networking and Security
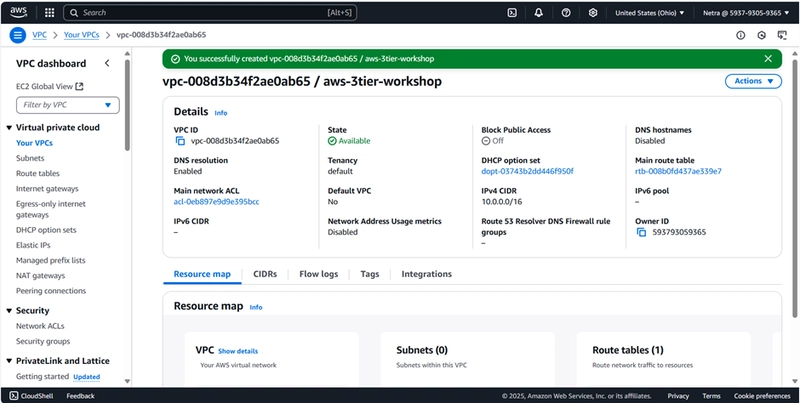
1. Create VPC
- Go to VPC Dashboard and create VPC.
- The VPC is created to provide an isolated network environment for hosting resources securely.
2. Create Subnet
- Create 6 subnets (3 in each availability zone) to ensure high availability, with at least 2 public subnets for the web layer and 4 private subnets for the application and database layers.
- A subnet is public when connected to an Internet Gateway; otherwise, it is private.

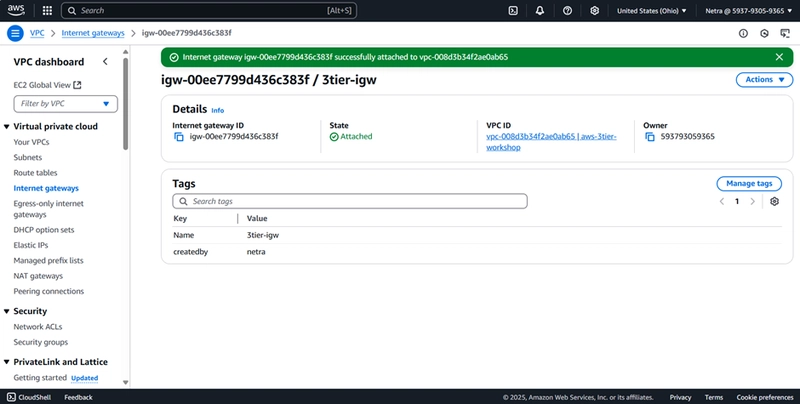
3. Internet Gateway
Create an Internet Gateway and attach it to VPC.
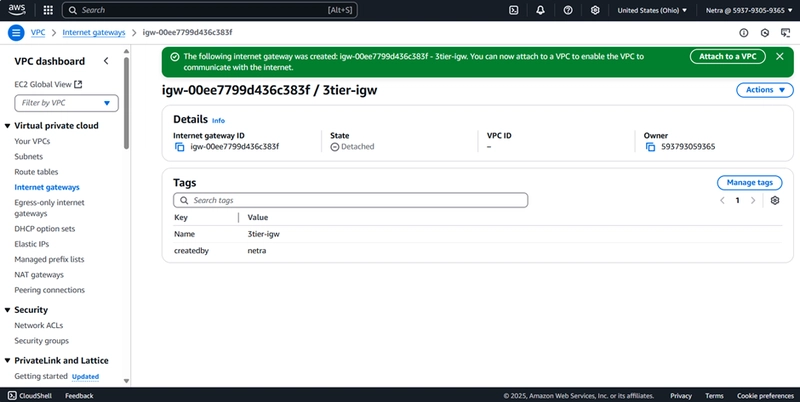
Internet gateway attached to VPC
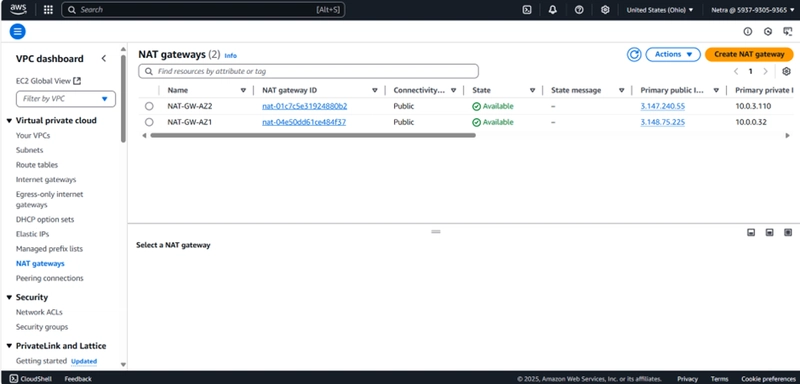
4. NAT Gateway
A NAT Gateway is created to allow resources in private subnets to access the internet without exposing them to incoming internet traffic.
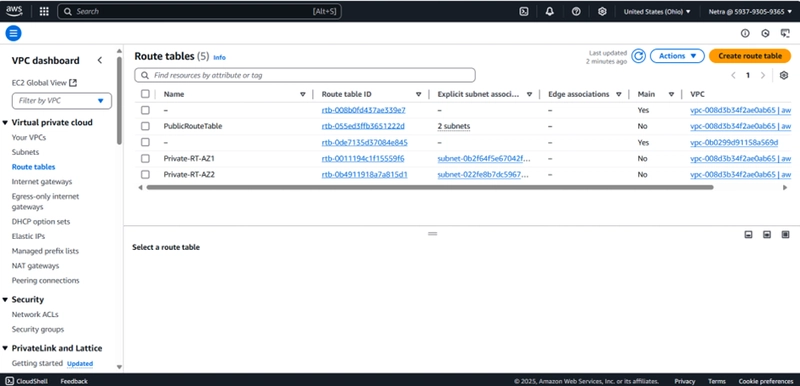
5. Routing Configuration
- Create three route tables
- one route table for the web layer public subnets and 2 more route tables, one for each app layer private subnet in each availability zone.
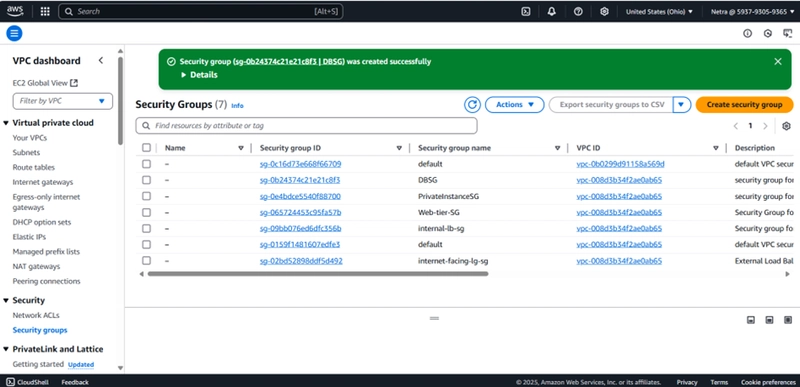
6. Security Groups
Security Groups define inbound (ingress) and outbound (egress) rules for EC2 instances, Load Balancers, and other AWS services, ensuring controlled access to resources.
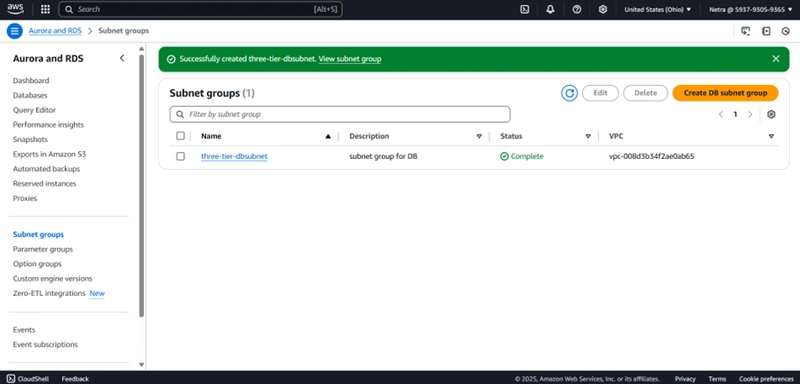
Part 3 - Database Deployment
1. Subnet Groups
Create RDS Subnet groups.
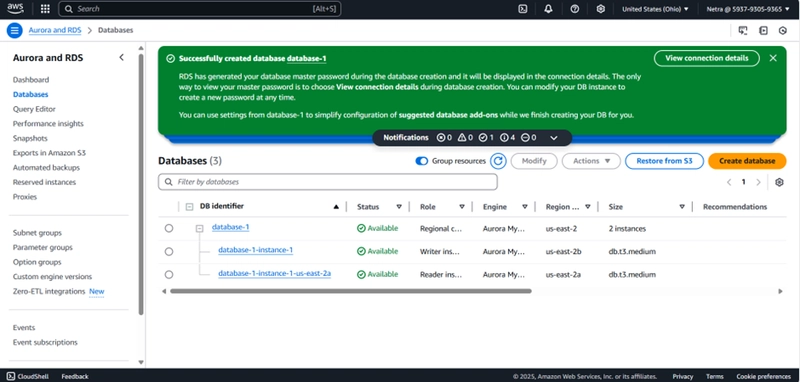
2. Database Deployment
Create RDS Database(MySQL-Compatible Amazon Aurora).
Part - 4
1. App Instance Deployment
Create an EC2 instance for App Tier.
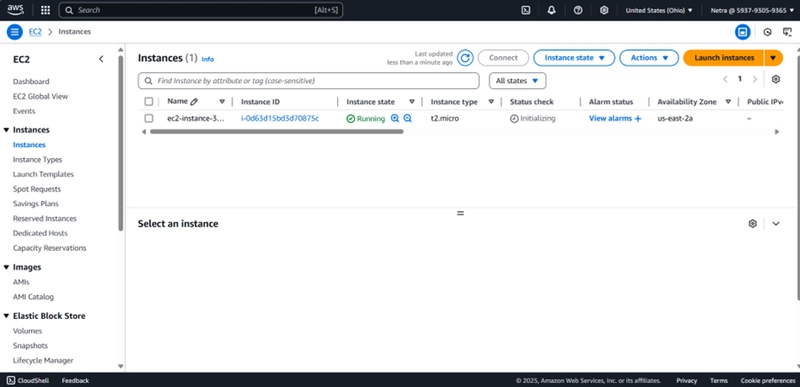
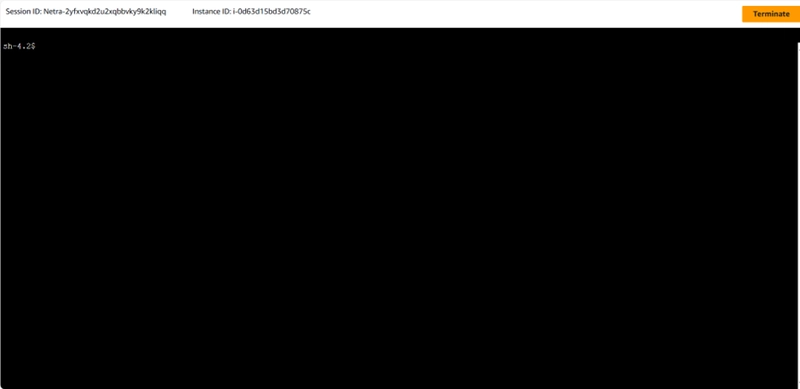
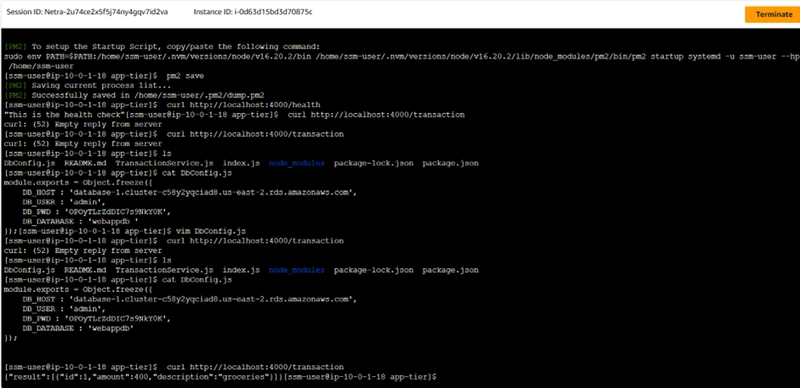
2. Connect to Instance
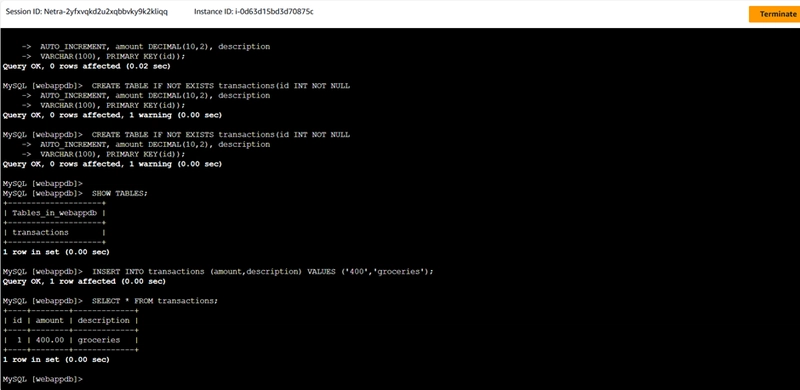
3. Configure Database
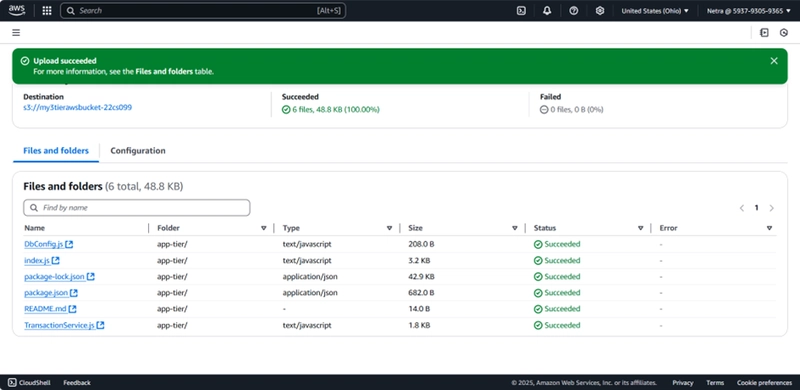
4. Configure App Instance
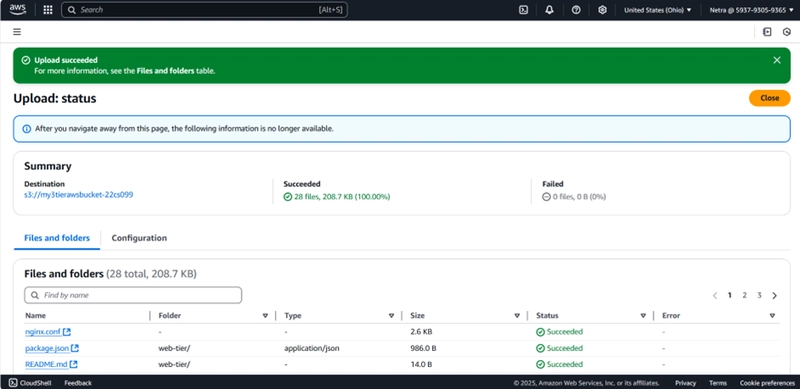
- Upload the app-tier folder to the S3 bucket that you created in part 1.
- Connect to the instance and install necessary components.
5. Test App Tier
Part 5 - Internal Load Balancing and Auto Scaling
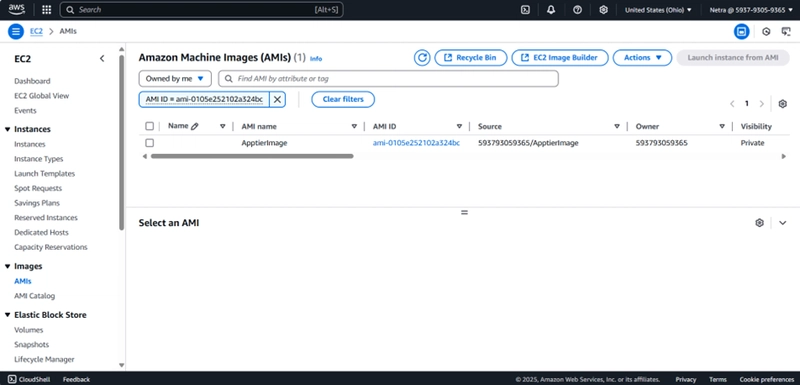
1. App Tier AMI
Create AMI for App Tier instance.
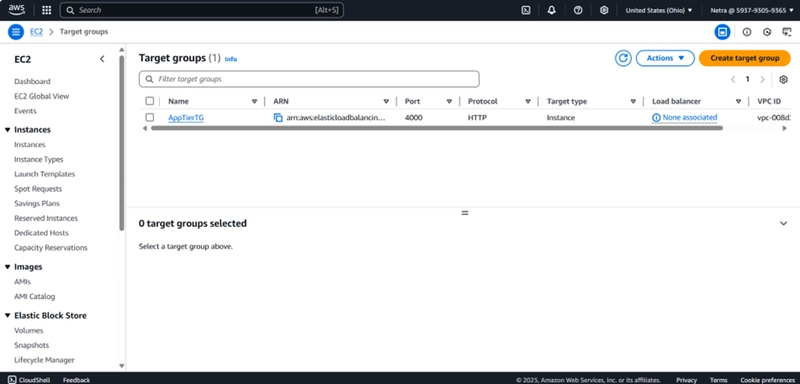
2. Target Group
Create a Target Group for App Tier instance.
3. Internal Load Balancer
Create an Application Load Balancer for App Tier instance.

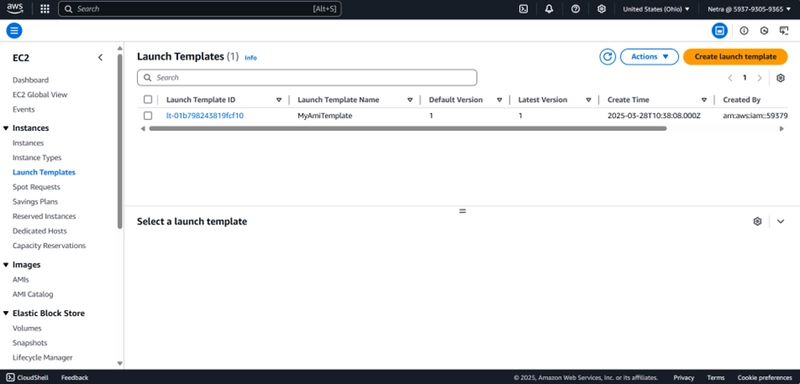
4. Launch Template
Create a Launch template with the AMI.
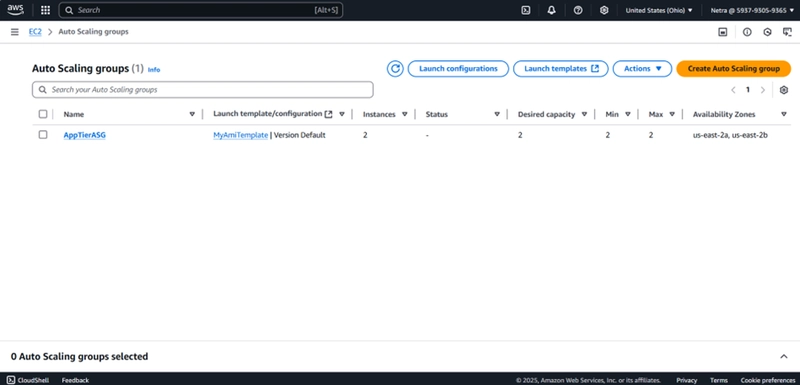
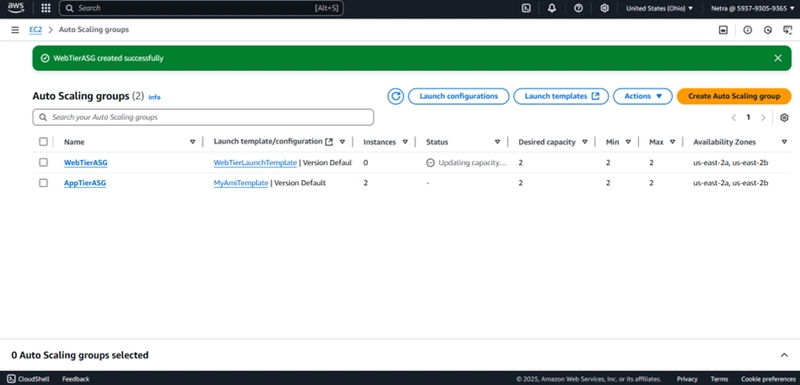
5. Auto Scaling
Create an Auto Scaling Group for the app instances.
Part 6 - Web Instance Deployment
1. Update Config File
Update the Internal Load Balancer's DNS name in the 'nginx.conf' file and upload it to S3.
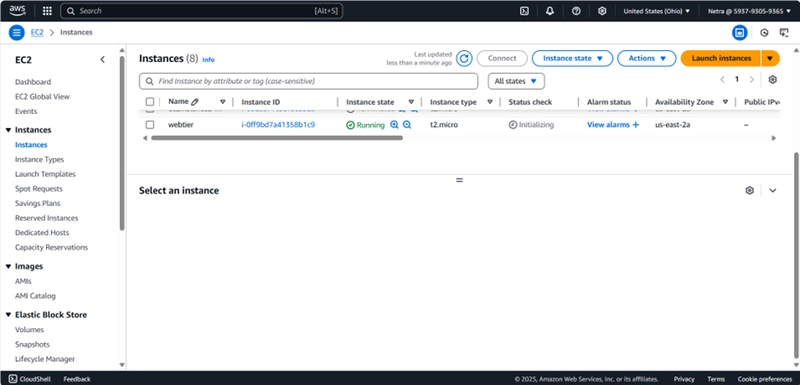
2. Web Instance Deployment
Create an EC2 instance for Web Tier.
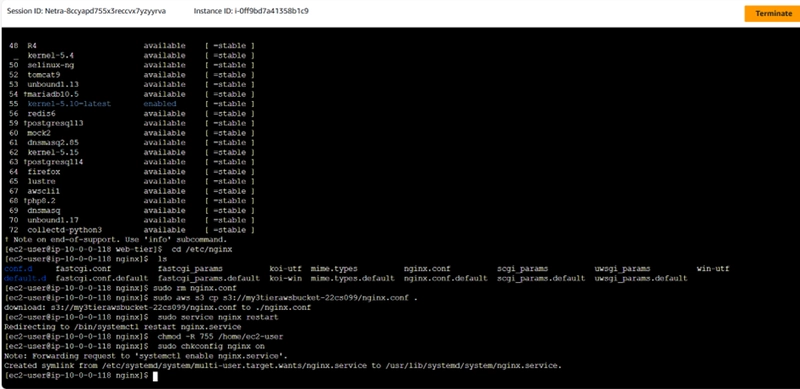
3. Connect and Configure Web Instance
Part 7 - External Load Balancer and Auto Scaling
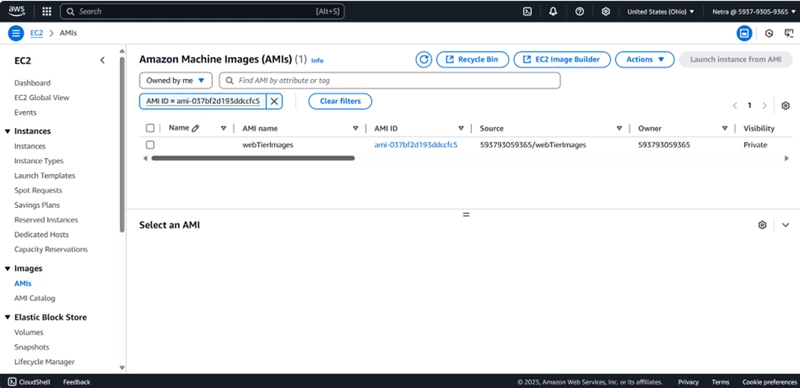
1. Web Tier AMI
Create AMI for Web Tier instance.
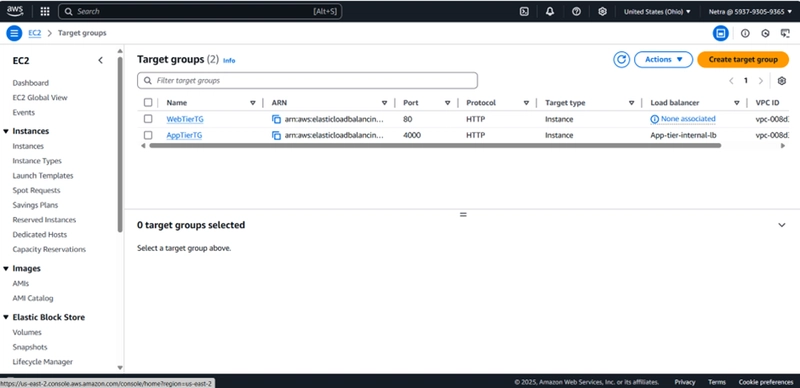
2. Target Group
Create a Target Group for Web Tier instance.
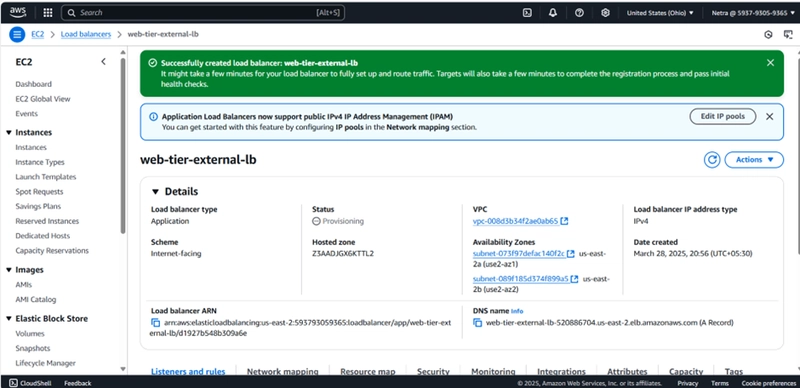
3. Internet Facing Load Balancer
Create an Internet facing Application Load Balancer for Web Tier instance.
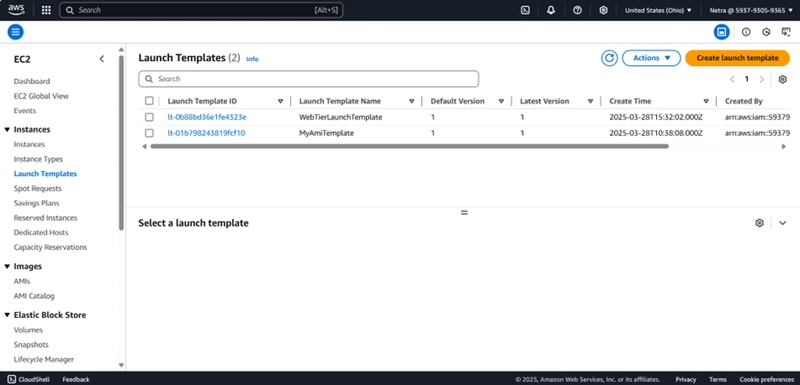
4. Launch Template
5. Auto Scaling
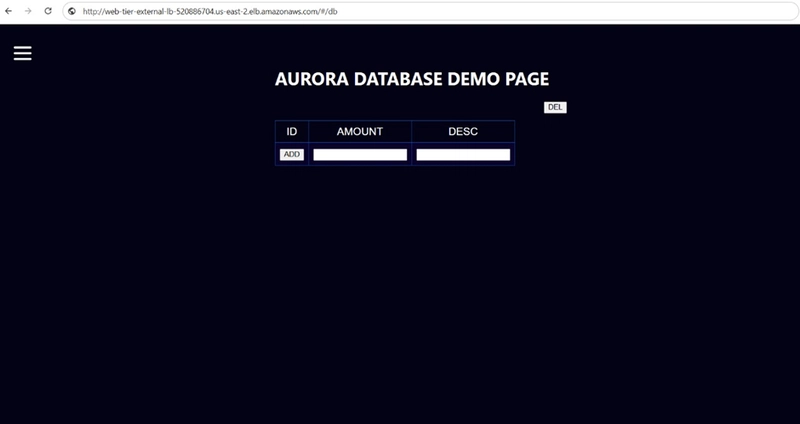
Output
The AWS 3-tier architecture has been successfully implemented, enhancing scalability, security, and performance for an efficient cloud-based infrastructure.